Start here
Quick paths by what you want to do
I want to become a member
Pick a category, create an account and apply in about 12 minutes.
I want to renew
Check readiness, choose the term and pay in two minutes.
I need CPD hours
See your gap, log an external activity or book an accredited event.
I want to verify a certificate
Enter the number or scan the QR — no account.
I'm a reviewer
Start from the inbox by SLA, review documents, request a correction or refer to committee.
I'm on the CPD committee
Approve external activities within annual caps and award event hours.
I'm in finance
Resolve differences, close the day and approve refunds.
I administer the platform
Configure categories, forms, workflows and permissions — no code.
19 screens
Visitor
Public website: learn about the association, memberships and events, and verify certificates — no account needed.
/Home
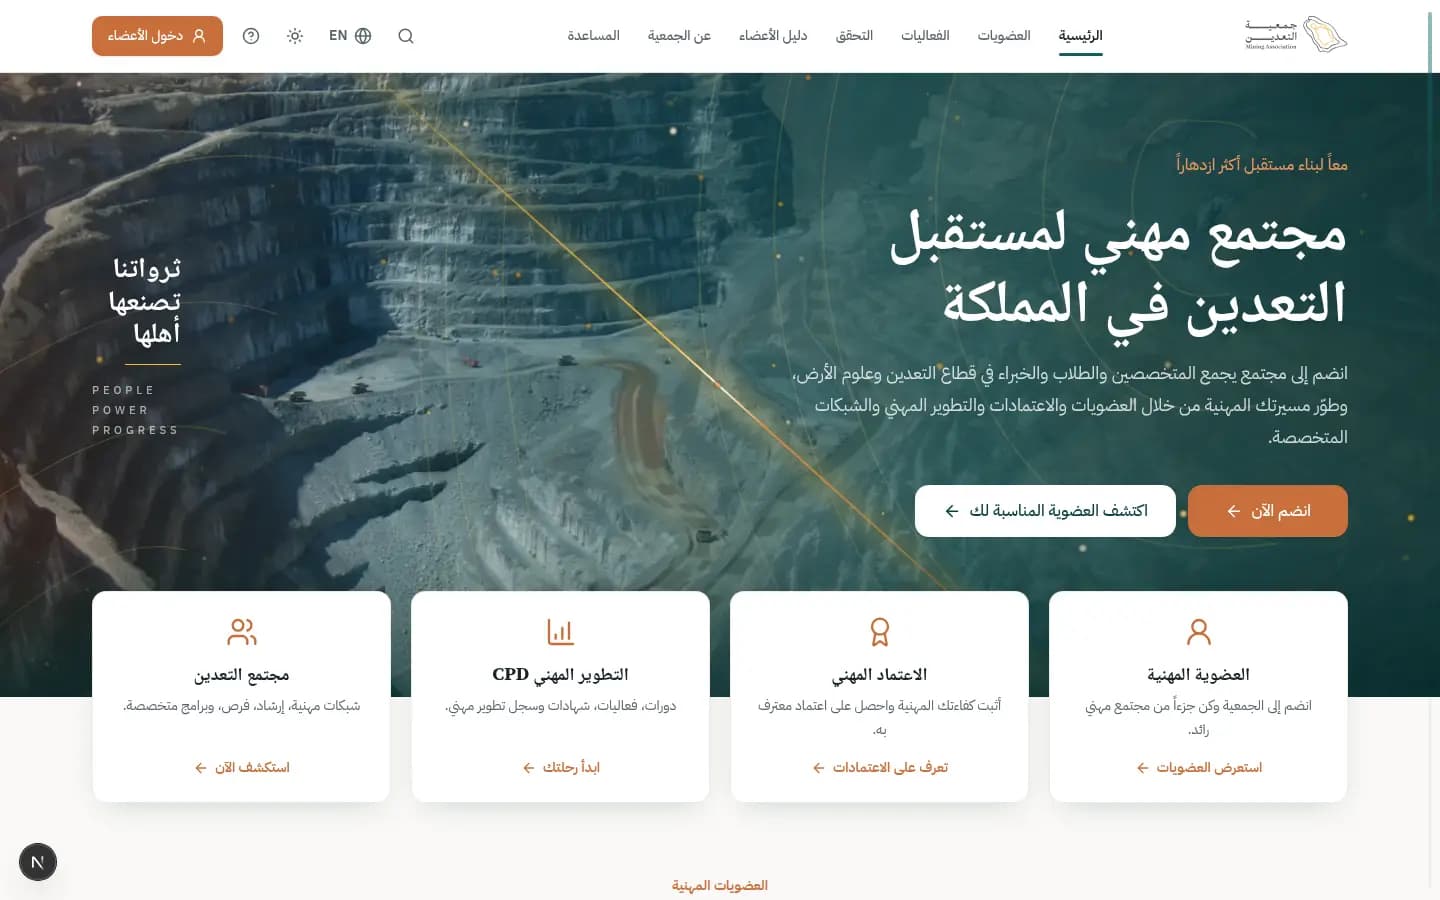
The association's front door: introduces memberships, professional credentials and CPD, and shortcuts you to joining or verifying a certificate.
Who uses it?
Every visitor — professionals considering joining, employers and partners.
Features covered
Related journeys
How to
Start joining from the home page
- 1Press “Join now” at the top of the page.
- 2If unsure about your category press “Find the right membership for you” and answer the five questions.
- 3Review the “Membership categories” section and press “Compare categories” to see them side by side.
- 4Press “Create account” in the “Member portal” section to begin your application.
Quickly verify a membership or certificate
- 1Scroll to “Verify any membership or certificate”.
- 2Press “Verify now” to open the public verification page.
- 3Enter the number or scan the QR code — no account needed.
What's on the screen
- “Join now / Find the right membership”
- The two hero calls to action: apply directly, or use the recommendation tool.
- “Membership categories”
- Cards for the five categories with “Annual fee”, “Details” and “Compare”.
- “Member portal”
- A preview of the personal portal with “Member sign-in” and “Create account”.
- “Upcoming events”
- Nearest CPD-accredited conferences and courses; “All events” opens the full catalog.
- “Our impact in numbers”
- Association indicators: registered members, events delivered, training hours, partners.
- “Verify now”
- Opens public verification for a membership or certificate.
Tips
- Applying takes about 12 minutes and autosaves, so it's fine to stop halfway.
- Switch language and theme (light/dark) from the header at any time.
/membershipsMemberships
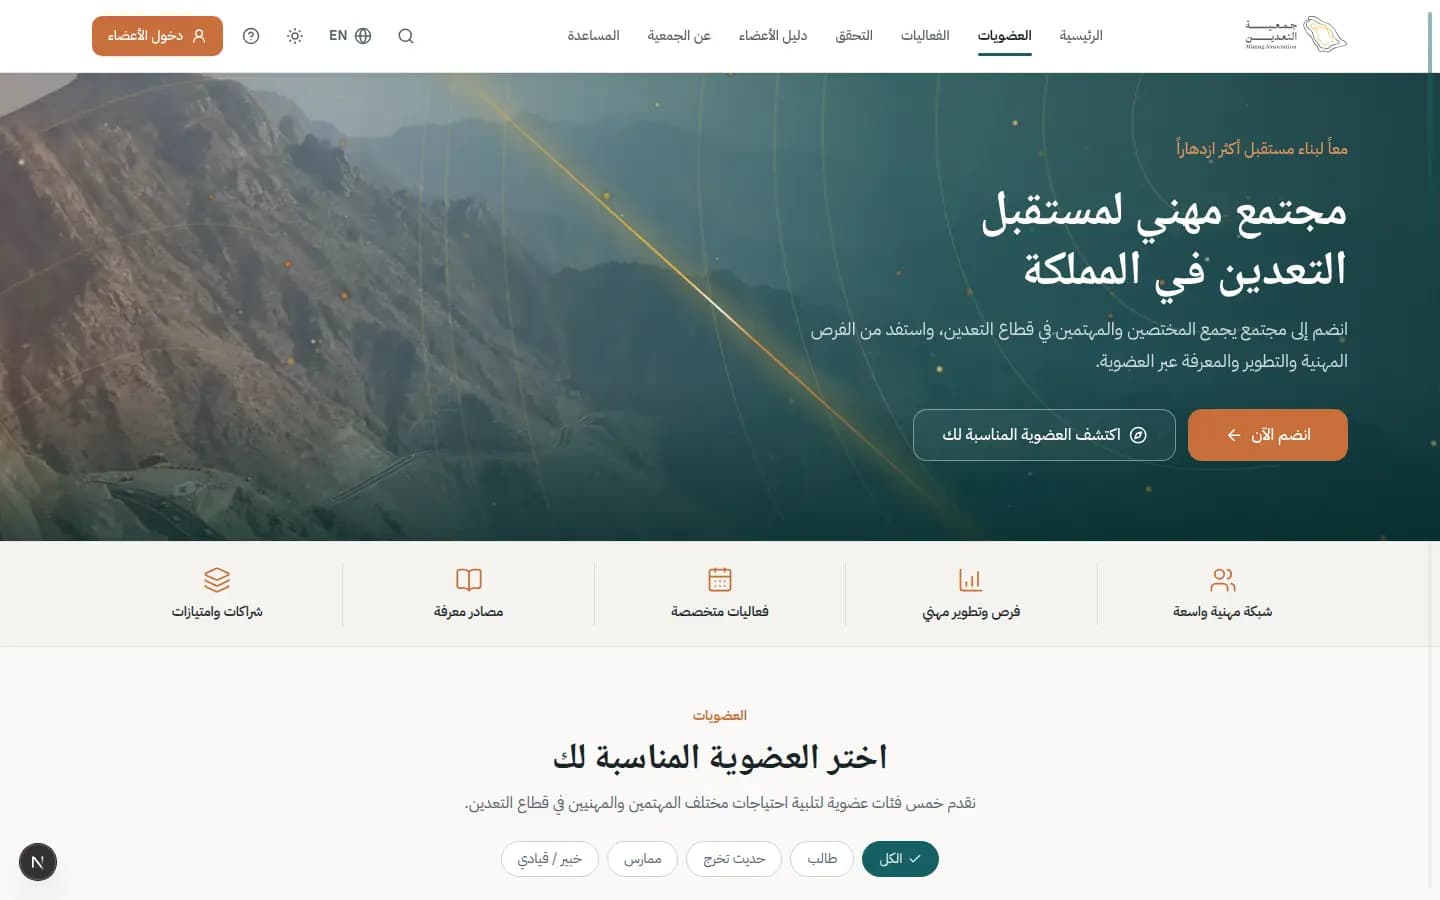
Catalog of the five membership categories with fees, eligibility and benefits, filterable by career stage.
Who uses it?
Anyone choosing a membership category before applying.
Features covered
Related journeys
Related screens
How to
Choose and compare categories
- 1Use “Filter by stage”: “All”, “Student”, “Graduate”, “Practitioner” or “Expert / leader”.
- 2Press “Compare” on two or more cards to show the comparison tray.
- 3Press “Details” to read the category's requirements and documents.
- 4Press “Join now” on the right category to start applying.
What's on the screen
- “Filter by stage”
- Narrows the cards to your career stage.
- “Most popular”
- Badge marking the most chosen category.
- “Compare”
- Adds the category to the comparison (up to four); “Remove” takes it out.
- “Not sure which category fits?”
- A card leading to “Start the finder”.
- “FAQ”
- Quick answers about fees, renewal and eligibility.
Tips
- Fees shown are before 15% VAT.
/memberships/finderMembership finder
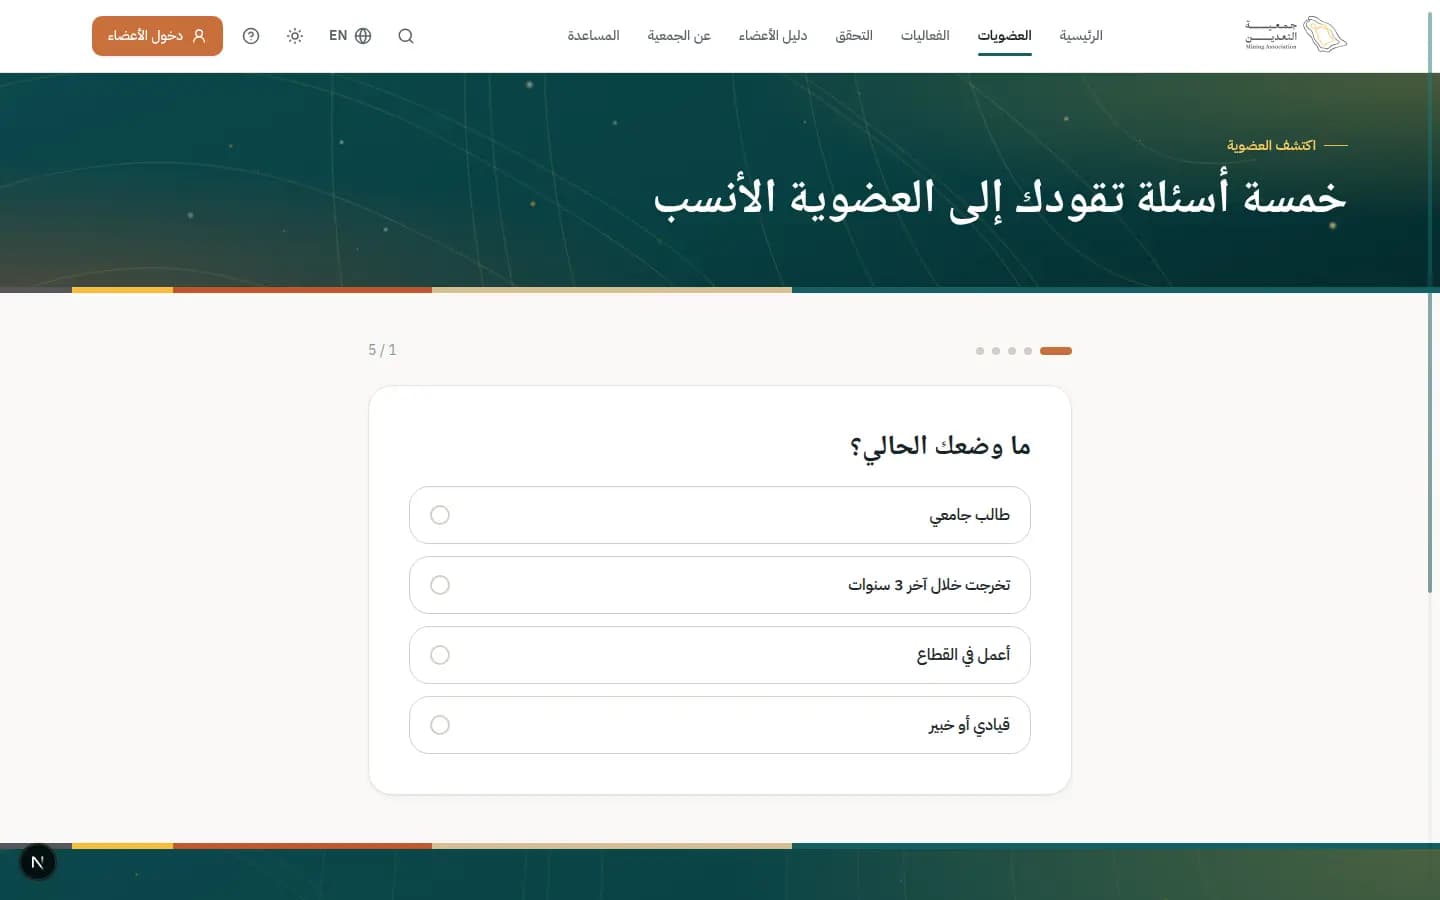
A five-question tool that recommends the best-fit membership with reasons and what you'll need.
Who uses it?
Visitors who don't know which category fits them.
Features covered
Related journeys
Related screens
How to
Get a recommendation
- 1Answer “What's your current situation?” then “Highest qualification?”.
- 2Complete years of experience, specialty and main goal.
- 3Read “Our recommendations”; the top one is marked “Best fit” with “Why it fits” and “What you'll need”.
- 4Press “Start registration” or “View details”, or “Retake” to try other answers.
What's on the screen
- “The five questions”
- One question per step with “Previous” to go back.
- “Our recommendations”
- Categories ranked from best to least fit based on your answers.
- “This result is guidance only”
- Reminder that acceptance is decided after document review.
Tips
- The recommendation isn't an eligibility decision; you can apply to another category if you meet its terms.
/memberships/compareCompare memberships
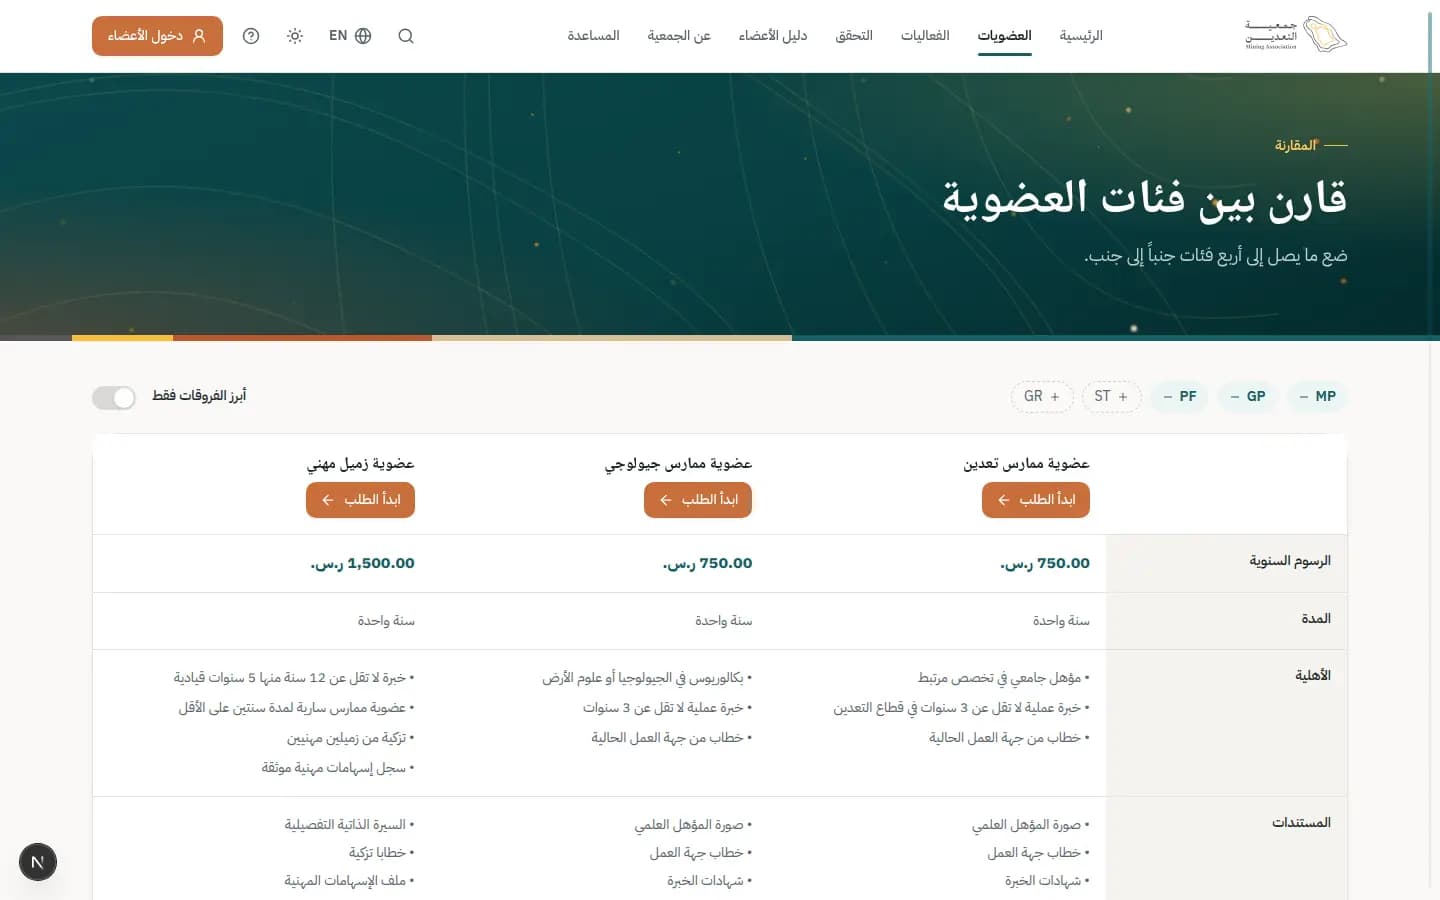
A table placing up to four categories side by side: fee, term, eligibility, documents, CPD, renewal and review time.
Who uses it?
Anyone down to two or three options who wants to decide.
Features covered
Related journeys
Related screens
How to
Compare just the differences
- 1Add or remove categories with “Remove” above each column.
- 2Turn on “Highlight differences only” to hide identical rows.
- 3Press “Start application” under the category you choose.
What's on the screen
- “Annual fee / Term / Eligibility”
- Core comparison rows.
- “CPD requirement”
- Required annual hours or “None”.
- “Renewal / Review time”
- Renewal window opens 60 days ahead; review time in working days.
Tips
- On mobile, swipe the table horizontally to see the other columns.
/memberships/MPMembership category
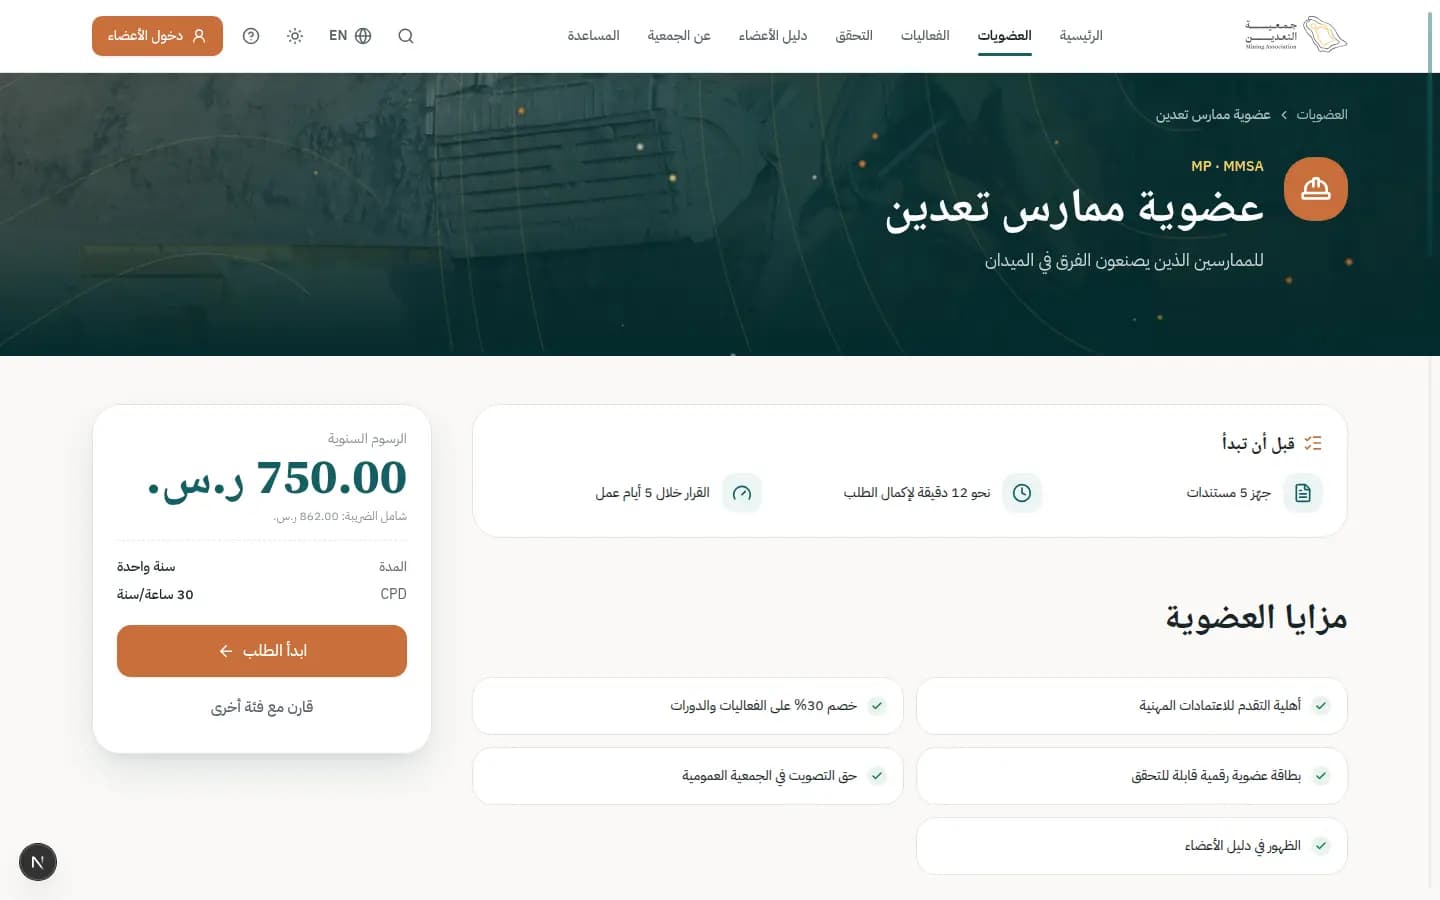
One category page (e.g. Mining Practitioner MP) with everything before applying: benefits, eligibility, documents, steps and fees.
Who uses it?
Anyone who has picked a category and is preparing to apply.
Features covered
Related journeys
Related screens
How to
Prepare before you apply
- 1Read “Before you start”: number of documents, fill time and decision time.
- 2Check “Eligibility” and “Required documents” (PDF or image up to 5 MB).
- 3See “How to apply”: create account → fill the form → upload documents → pay → decision.
- 4Press “Start application”, or “Compare with another category” if unsure.
What's on the screen
- “Membership benefits”
- What this category gives you.
- “Annual fee”
- Fee before VAT and “incl. VAT”, plus term and CPD requirement.
- “How to apply”
- The five stages from account to decision.
- “Related categories”
- Close alternatives to this category.
Tips
- Have documents ready; uploads are kept in your vault and reused for renewals and credentials.
/eventsEvents & training
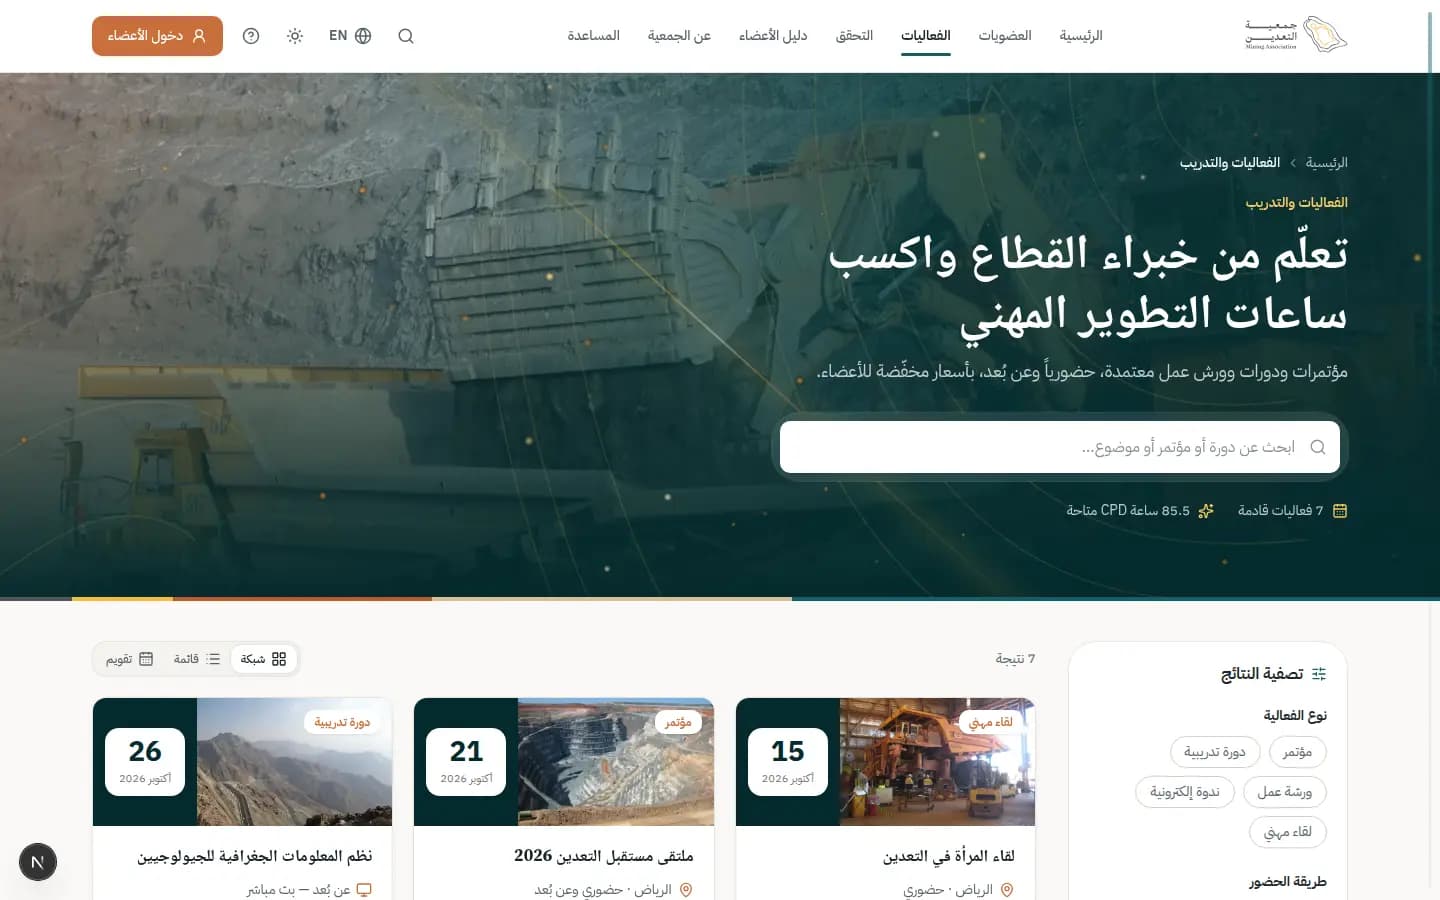
Catalog of CPD-accredited conferences, courses and workshops, in person and online, with search, filters and calendar.
Who uses it?
Members and visitors looking for training or an event.
Features covered
Related journeys
Related screens
How to
Find a suitable event
- 1Type in “Search for a course, conference or topic…”.
- 2Filter by type, attendance mode, city, CPD hours and member price.
- 3Switch the view between “Grid”, “List” and “Calendar”.
- 4Open an event card for details and registration.
What's on the screen
- “Filter results”
- Side filter panel (“Filter” on mobile); “Clear all” resets.
- “Members-only events”
- Shows events restricted to members.
- “Show past events”
- Includes finished events in the results.
- “Calendar”
- Monthly view with previous/next month.
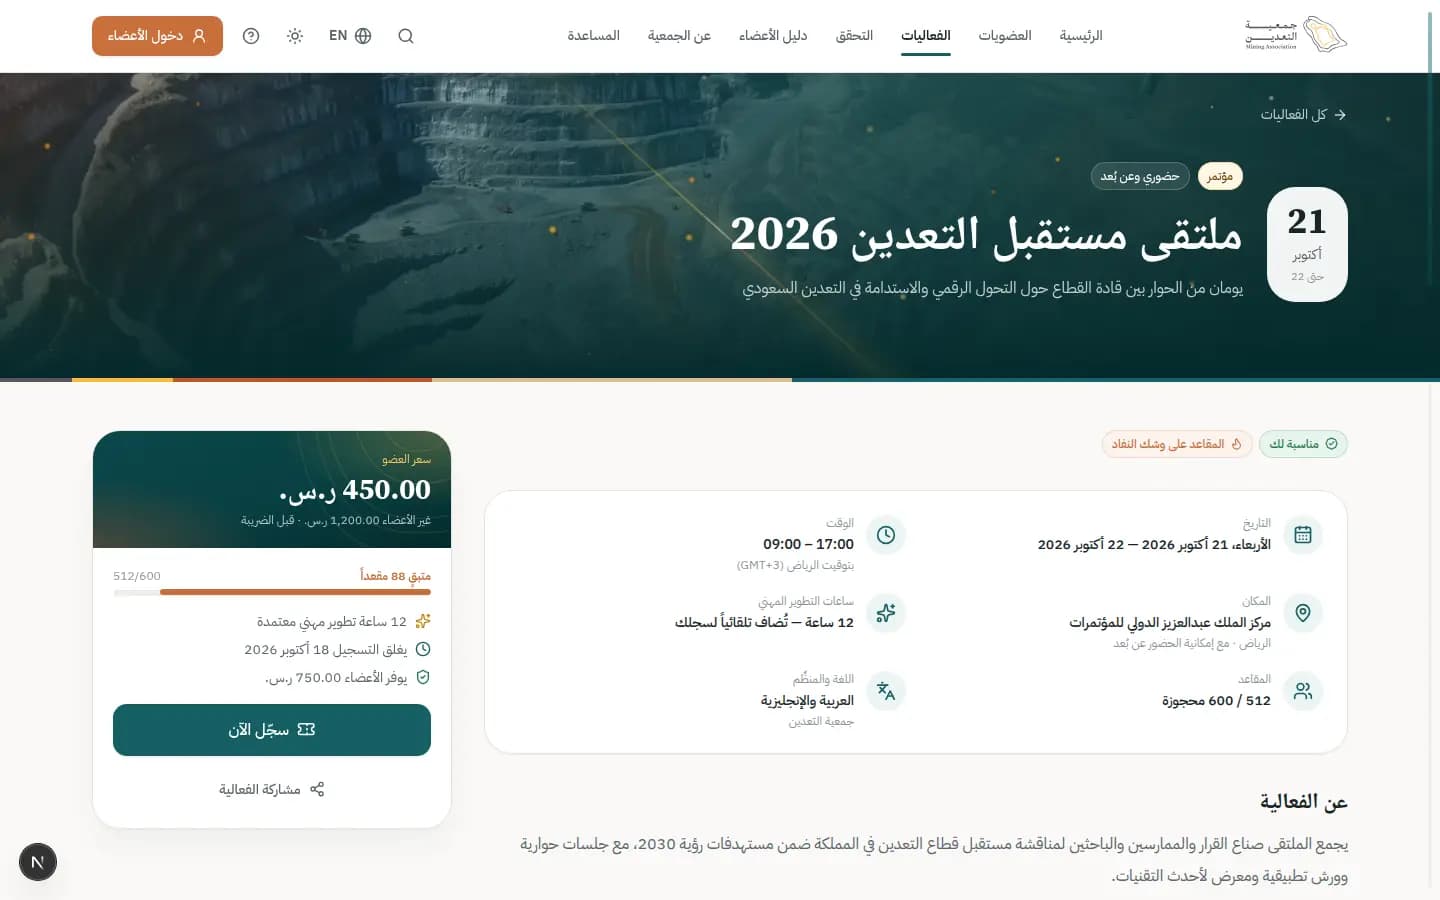
- “Almost full”
- Badge on events with few seats left.
Tips
- Members pay a reduced price and CPD hours are credited automatically after attending.
/events/future-mining-forumEvent detail
Full event page — date, venue, agenda, speakers, prices and CPD hours — with registration in a side sheet.
Who uses it?
Anyone registering for a specific event.
Features covered
Related journeys
Related screens
How to
Register for the event
- 1Press “Register now” on the price card.
- 2In “Choose ticket type” pick “Association member”, “Student” or “Non-member”.
- 3Complete “Your details”: job title, dietary needs and notes, then “Continue”.
- 4Choose the payment method and press “Pay” — or “Confirm registration” for free events.
- 5From “Confirmation” keep the ticket: “Add to calendar”, “Download ticket PDF” or “View in my events”.
Join the waitlist
- 1When “Sold out”, press “Notify me when a seat opens”.
- 2Enter your email and confirm; your expected position appears.
- 3When a seat frees up it's held for you for 24 hours.
What's on the screen
- “Member price / Non-members”
- Prices before VAT and how much members save.
- “CPD hours”
- Added to your record automatically after attending.
- “Agenda / Speakers”
- Each day's programme and who's speaking.
- “Attendance / Location”
- Venue with “Directions”, or the stream link one hour before.
- “Cancellation & refund policy”
- When you can cancel or transfer and how much is refunded.
- “Share event”
- Copies the event link.
Status meanings
- RegisteredYour seat is confirmed.
- WaitlistedYou're on the waitlist until a seat opens.
Tips
- Non-member tickets include an attendance certificate but no CPD credit.
- An e-invoice is issued immediately after payment.
/verifyVerify a membership or certificate
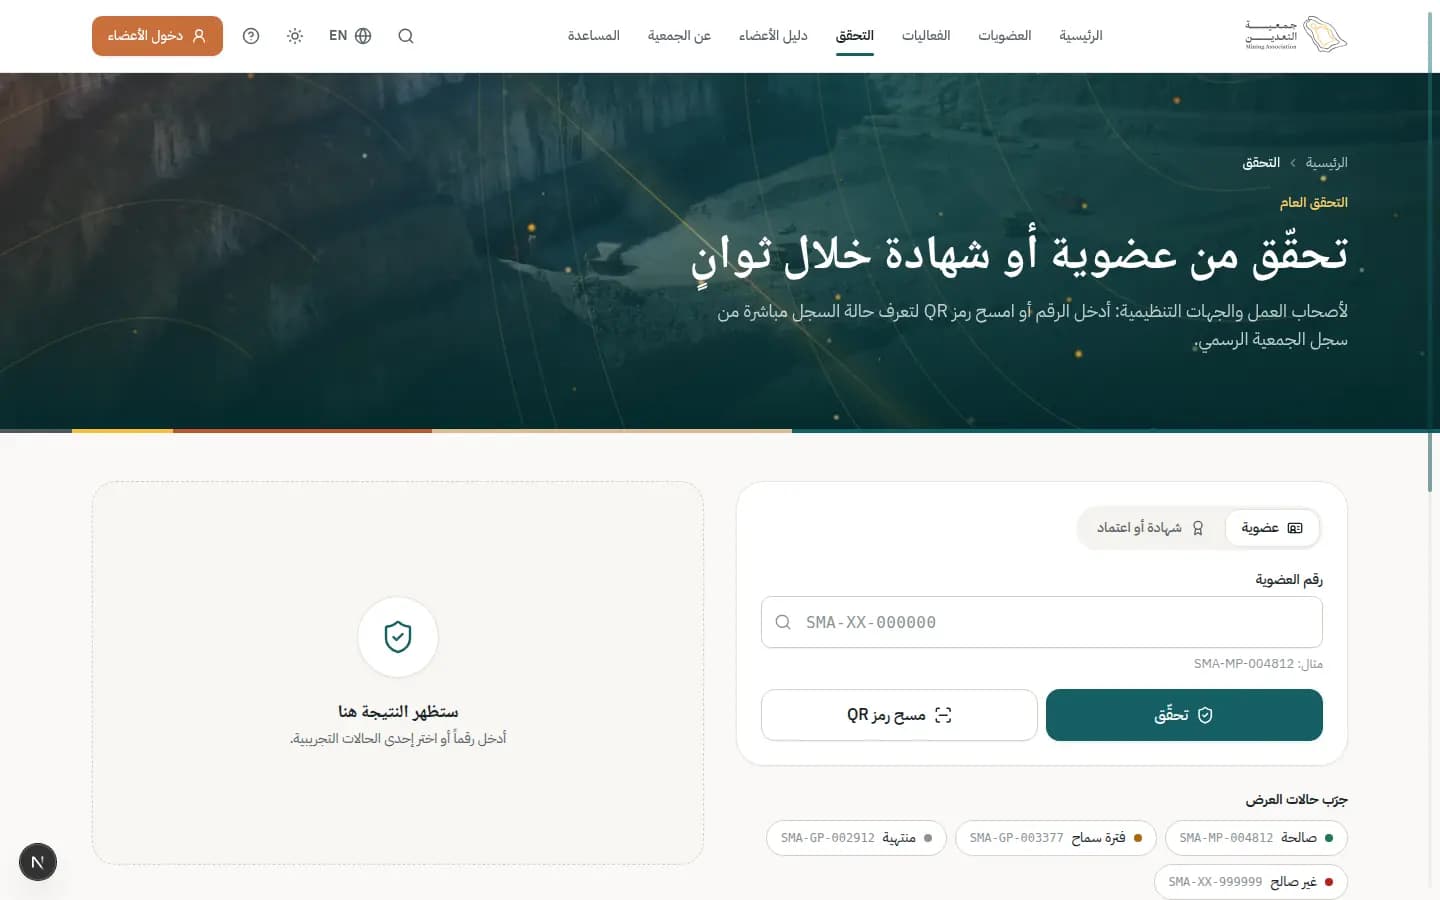
Public page where anyone — employers, regulators — checks a membership or certificate status straight from the association's register.
Who uses it?
Employers, regulators and members themselves.
Features covered
Related journeys
Related screens
How to
Verify by number
- 1Choose “Membership” or “Certificate or credential”.
- 2Enter the membership number (e.g. SMA-MP-004812) or the certificate number / code.
- 3Press “Verify” and read the result, status and dates.
Verify by scanning a QR code
- 1Press “Scan QR code”.
- 2Press “Allow camera” and point it at the code.
- 3If the camera can't be accessed, enter the number manually.
What's on the screen
- “Try demo cases”
- Ready examples for each possible result.
- “Minimal public data”
- Only name, status and dates — no contact or ID data.
- “Every check is logged”
- Checks are logged to protect members.
Status meanings
- ActiveValid — the record matches and can be relied on.
- In graceGrace — expired, holder within 30 days to renew.
- ExpiredExpired — the record isn't currently valid.
- RevokedRevoked — cancelled by the association; do not rely on it.
- RejectedInvalid — unknown code; the document may be forged.
Tips
- Members: share your digital card from “My membership” instead of sending photos.
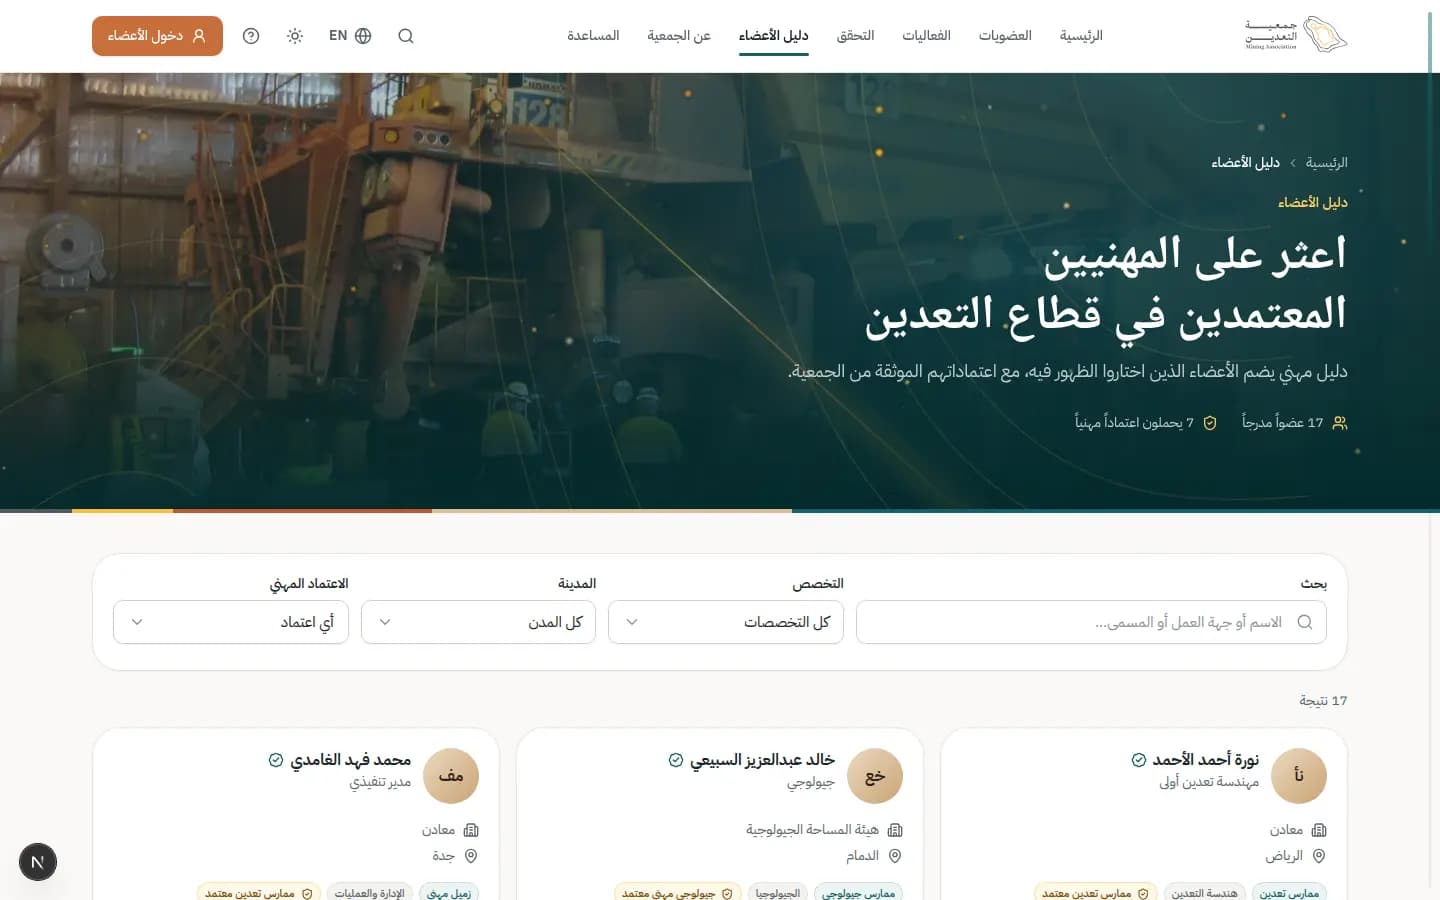
/directoryMember directory
Professional directory of members who opted in, with credentials verified by the association.
Who uses it?
Employers and peers looking for an accredited professional.
Features covered
Related journeys
Related screens
How to
Find a professional
- 1Type in “Name, employer or title…”.
- 2Filter by specialty, city and professional credential.
- 3Press “Verify membership” on a card to confirm it's valid.
What's on the screen
- “Filter”
- Specialty, city and credential filters; “Clear filters” resets.
- “Verified member”
- Badge on each verified member with “Member since”.
- “Listing is optional”
- No member is listed without consent; contact details aren't shown.
Tips
- Members control what's shown from “My profile” → “Directory visibility”.
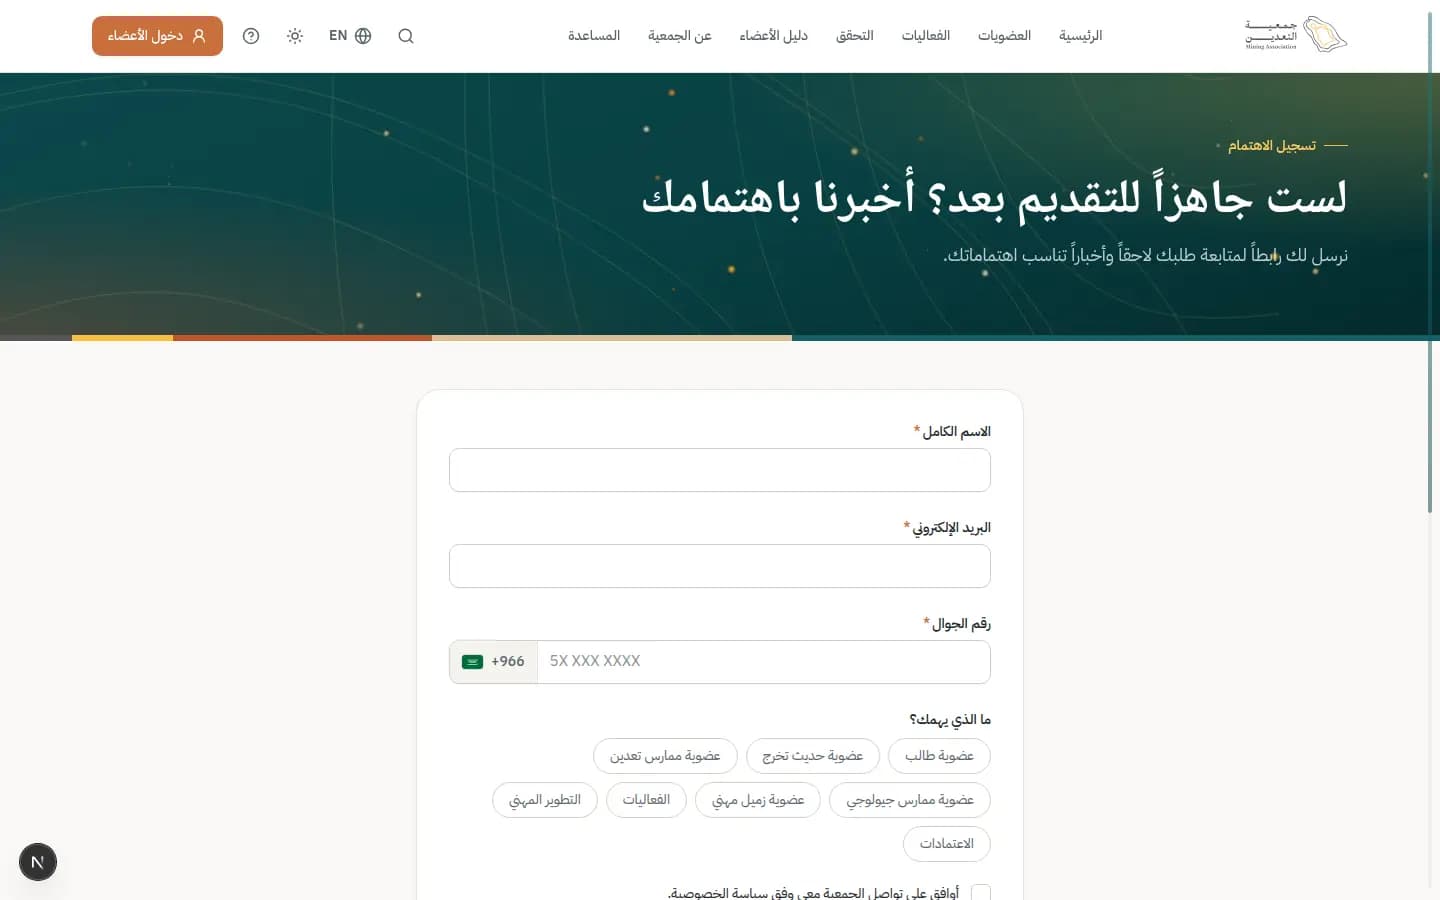
/interestRegister interest
Short form for those not ready to apply: we send a “Continue your application” link and relevant news.
Who uses it?
Interested visitors who want to apply later.
Features covered
Related journeys
Related screens
How to
Register your interest
- 1Enter full name, email and mobile number.
- 2Select “What interests you?”.
- 3Consent to contact and press “Register my interest”.
- 4Use the “Continue your application” link in your email any time.
What's on the screen
- “What interests you?”
- Decides which news and opportunities you receive.
- “Browse memberships”
- After sending, takes you to the catalog.
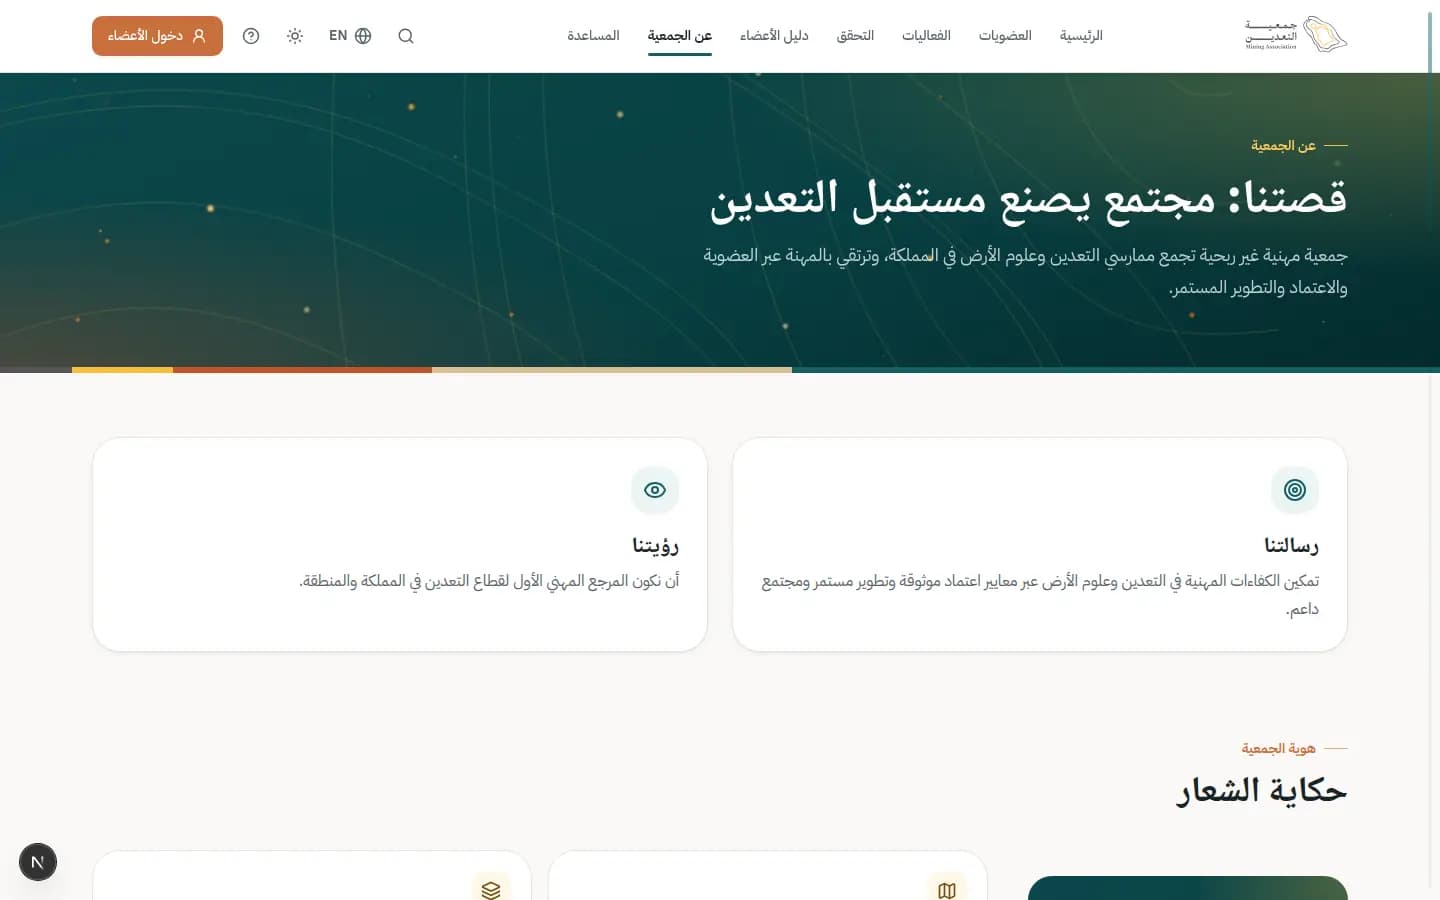
/aboutAbout
The association's story, mission, vision, values, logo story, leadership, milestones and partners.
Who uses it?
Anyone getting to know the association.
Features covered
Related screens
How to
Get to know the association
- 1Read “Our mission”, “Our vision” and “Our values”: integrity, excellence, partnership, sustainability.
- 2Browse “The logo story” and “Milestones”.
- 3Press “Join now” or “Contact us” in “Be part of the story”.
What's on the screen
- “Identity / Logo story”
- Logo meanings: map, earth strata, golden lamp, human face.
- “Leadership”
- Board and executive team.
- “Our partners”
- Partner organisations.
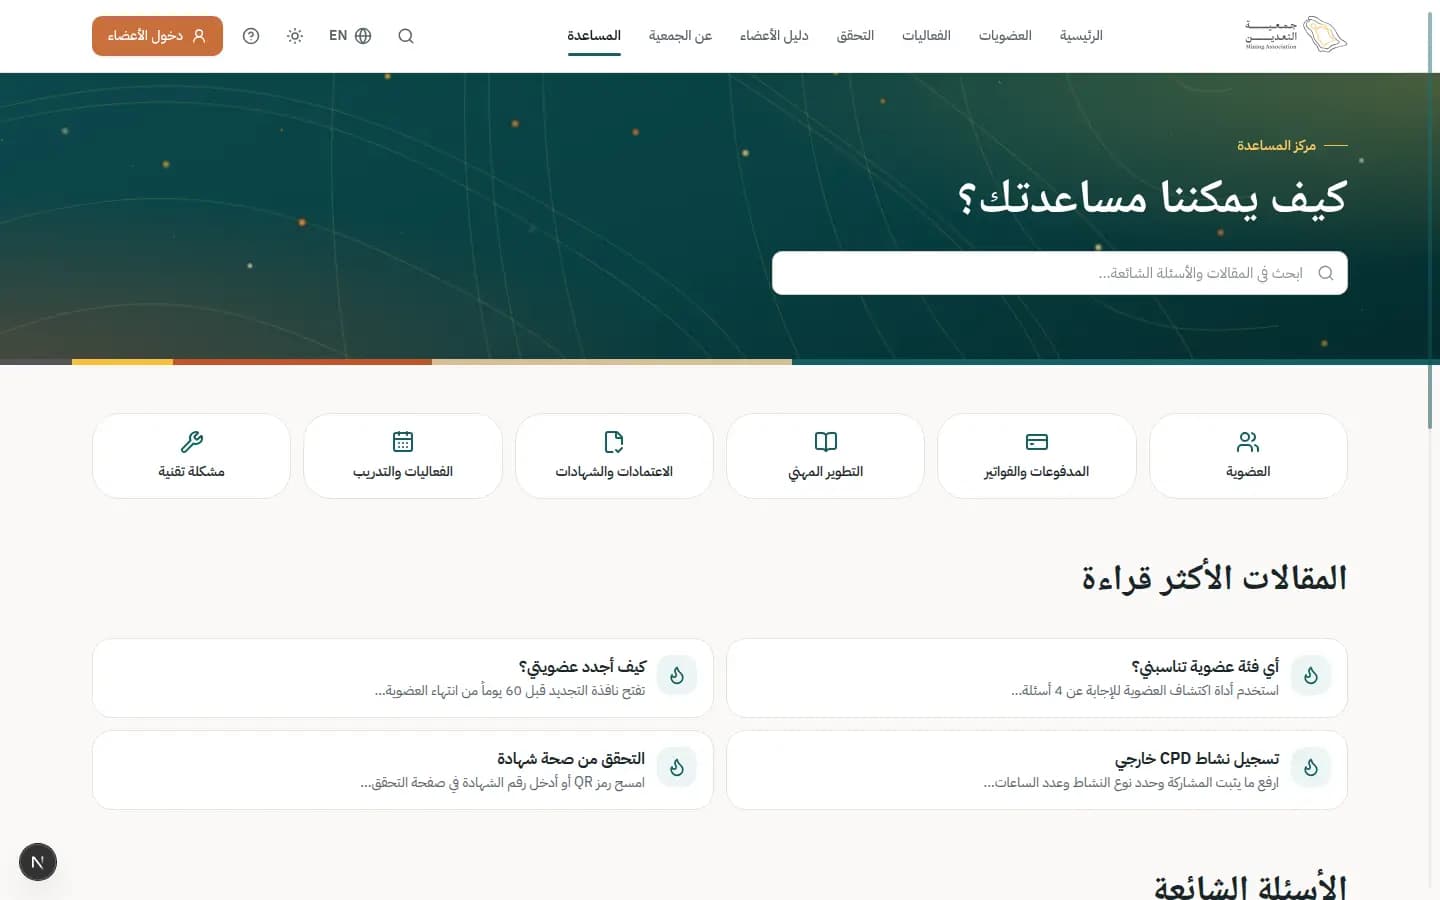
/helpHelp center
Help articles and FAQs with instant search and “Was this helpful?” feedback.
Who uses it?
Visitors and members before opening a support ticket.
Features covered
Related journeys
How to
Find an answer
- 1Type your question in “Search articles and FAQs…”.
- 2Open an article from results or “Most read articles”.
- 3Rate the article with “Yes” or “No”.
- 4If you didn't find your answer press “Contact us”.
What's on the screen
- “Most read articles”
- The most requested topics.
- “FAQ”
- Short questions that expand on click.
- “Didn't find your answer?”
- Support replies within one working day.
/contactContact
Contact channels, working hours and an enquiry form that creates a ticket number.
Who uses it?
Visitors, non-members and partners.
Features covered
Related journeys
Related screens
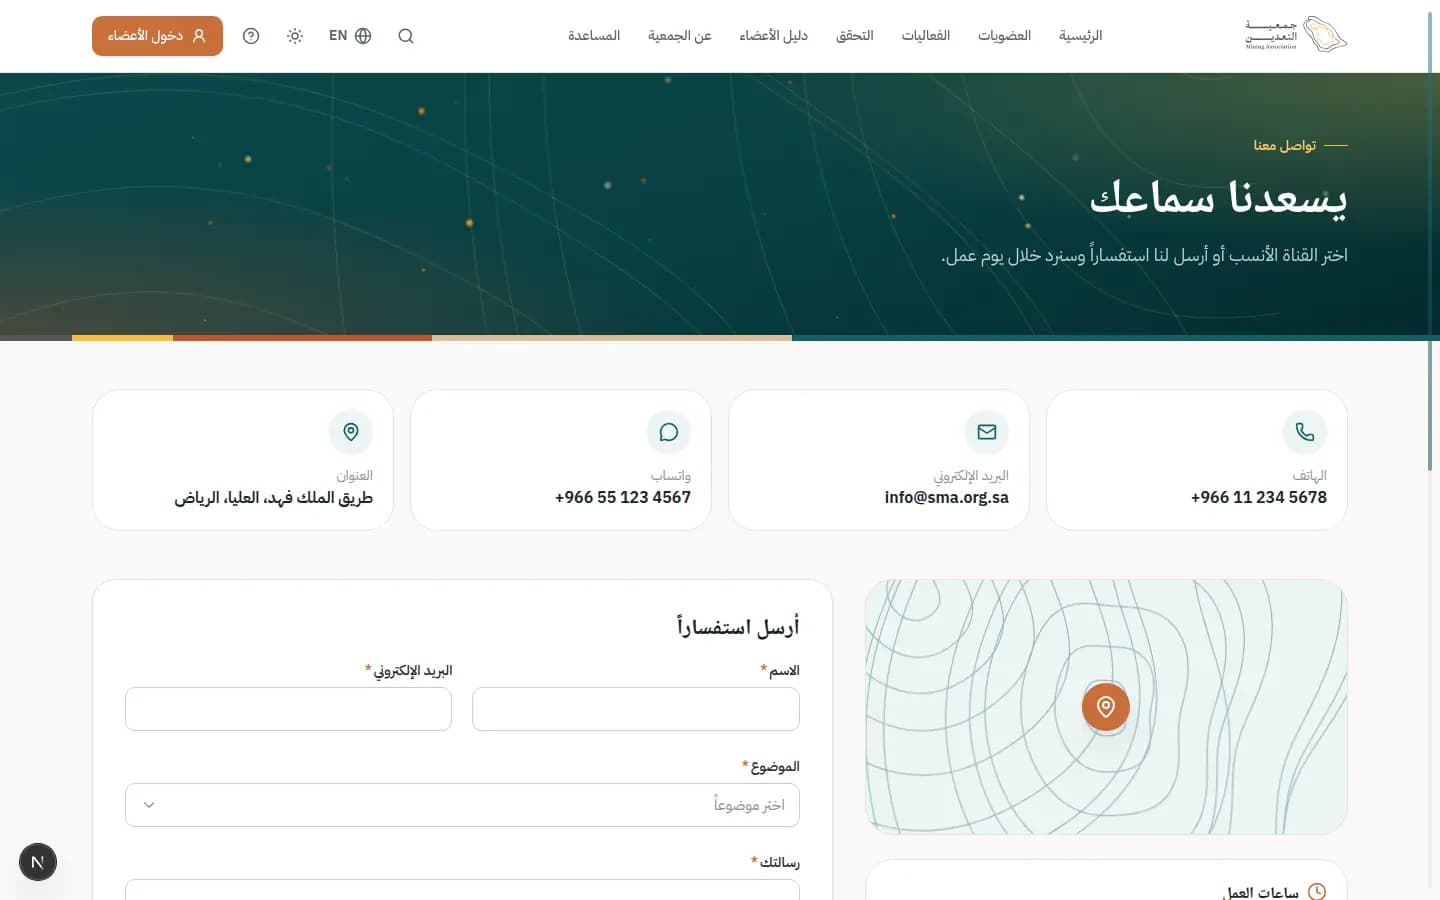
How to
Send an enquiry
- 1Fill name and email, then choose a subject.
- 2Write your message (10+ characters) and press “Send”.
- 3Keep the ticket number; the reply arrives by email within a working day.
What's on the screen
- “Phone / WhatsApp / Address”
- Direct contact channels.
- “Working hours”
- Sunday–Thursday; closed Friday–Saturday.
Tips
- Members: open a ticket from the portal so it's linked to your membership.
/appMobile app
A page introducing the association's mobile app: offline card, document capture and CPD logging, with download links.
Who uses it?
Any visitor or member who wants their membership in their pocket. No account is needed to browse the page.
Features covered
Related journeys
Related screens
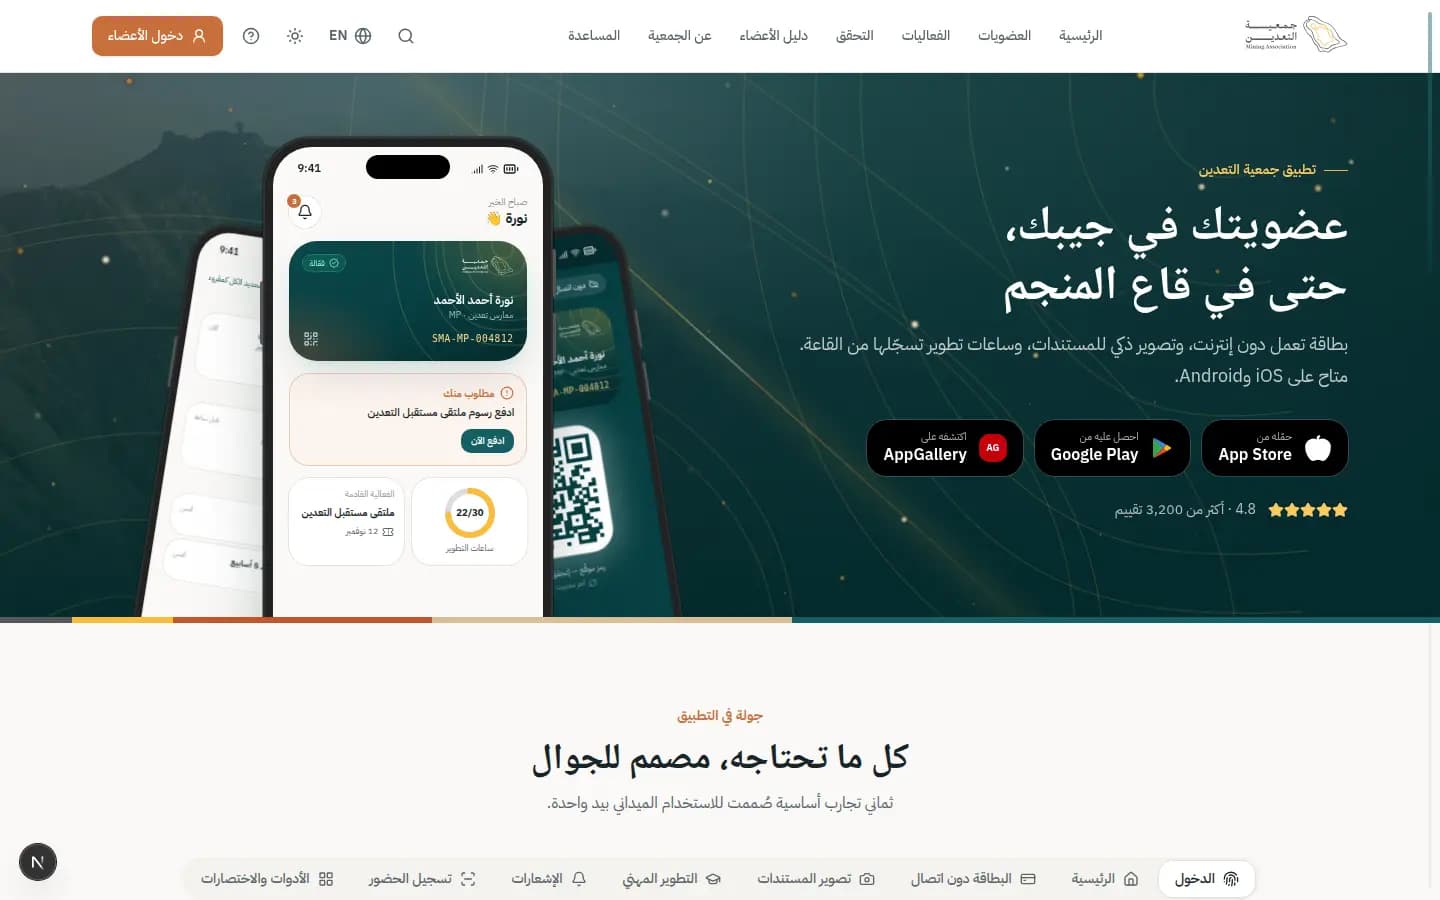
How to
Get the app
- 1Open the page on your phone, or scan the code under “Scan with your phone camera” if you're on a computer.
- 2Press the button for your device: “Download on the” App Store or “Get it on” Google Play.
- 3Open the app and sign in with your website account — your card and requests are waiting.
Explore the features before installing
- 1Scroll to “Everything you need, built for mobile”.
- 2Press a tab such as “Offline card”, “Document capture” or “CPD” to see how the screen looks on a phone.
- 3Read the points beside the picture to see what each part does.
What's on the screen
- “Your membership in your pocket — even at the pit floor”
- The main headline with download buttons for iOS and Android.
- “Take the tour”
- Eight core experiences: sign-in, home, card, document capture, CPD, notifications, check-in and widgets.
- “Offline card”
- A digitally signed QR that works with no signal and can be added to your wallet.
- “Built for every condition”
- Works offline and supports dark mode, larger text, screen readers and secure payments.
- “Get the app now”
- The final section with a QR code for a quick phone download.
Tips
- One account for web and app; no need to register again.
- After the first sign-in, Face ID or fingerprint is enough.
/pay/PL-7Q4K2Pay by link
A secure payment link sent by Finance to settle one specific invoice. Pay in a few simple steps, no sign-in, and the receipt arrives by email.
Who uses it?
Anyone who received a payment link — the invoice owner, or someone paying on their or their company's behalf.
Features covered
Related journeys
Related screens
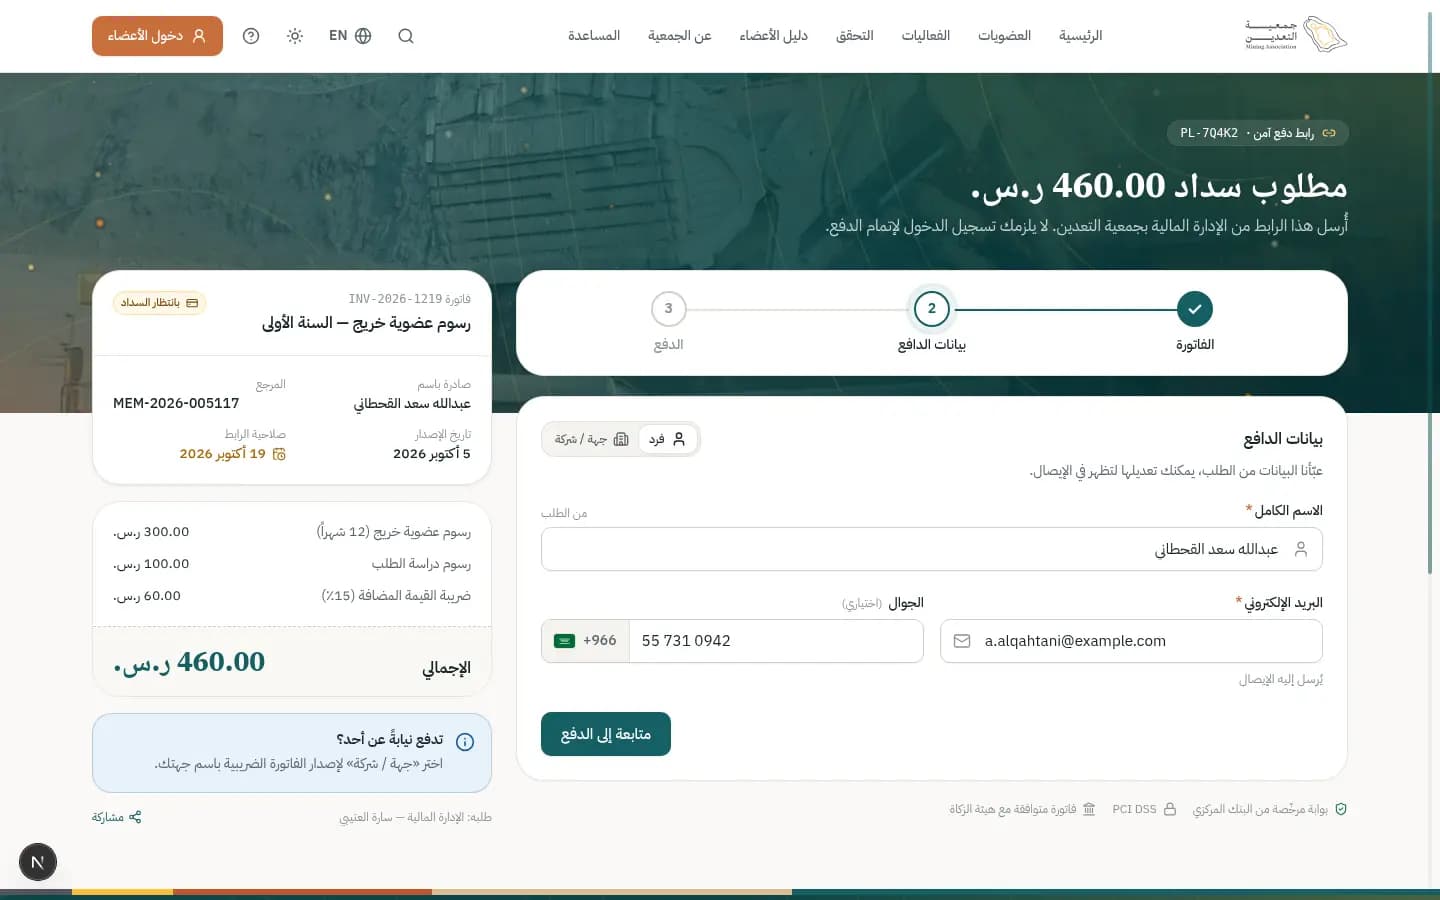
How to
Pay by card or mada
- 1Check the invoice summary: amount, “Link valid until” and “Reference”.
- 2Under “Payer details” choose “Individual” or “Organisation” and check “Full name” and “Email” (the receipt goes there).
- 3Press “Continue to payment” then choose “mada” or “Credit card”.
- 4Enter “Card number”, “Expiry” and CVV.
- 5Tick the agreement to the “terms of use” and refund policy, then press “Pay” with the amount.
- 6Complete 3-D Secure if your bank asks, then press “Download receipt” when “Payment successful” appears.
Pay by bank transfer
- 1Choose “Bank transfer” under “Payment method”.
- 2Transfer to the “Beneficiary” and “Bank” shown, and put the “Reference (required)” in the transfer details — copy it with “Copy”.
- 3Press “Upload transfer proof” and attach a PDF or image (up to 10 MB).
- 4Accept the terms and press “Submit transfer proof”; Finance confirms it within one working day.
Pay on behalf of your company
- 1Under “Payer details” choose “Organisation”.
- 2Enter “Organisation name” and “VAT number” (15 digits starting with 3) so the tax invoice is issued in its name.
- 3Continue to payment as above.
What's on the screen
- “Secure payment link”
- Header bar showing the link number, amount requested and that no sign-in is needed.
- “Invoice / Payer details / Payment”
- Three steps showing where you are.
- “Payer details”
- Pre-filled from the request; edit them to change what appears on the receipt.
- “Payment method”
- “mada”, “Credit card” or “Bank transfer”.
- “Link valid until”
- The last day you can pay; after it, ask the association for a new link.
- “Paying for someone else?”
- A hint to choose “Organisation” for the tax invoice.
- “Share”
- Copies the link so you can send it to whoever will pay.
Tips
- We don't store your card; payment goes through a SAMA-licensed gateway and the invoice is ZATCA-compliant.
- Always include the reference in a bank transfer; without it the payment takes longer to match.
- If you're a member, the payment also appears under “My payments”.
/privacyPrivacy policy
The privacy policy in plain language: what data we collect, why, who we share it with and how you can exercise your rights.
Who uses it?
Any visitor or member who wants to know how their data is protected. No account needed.
Features covered
Related journeys
Related screens
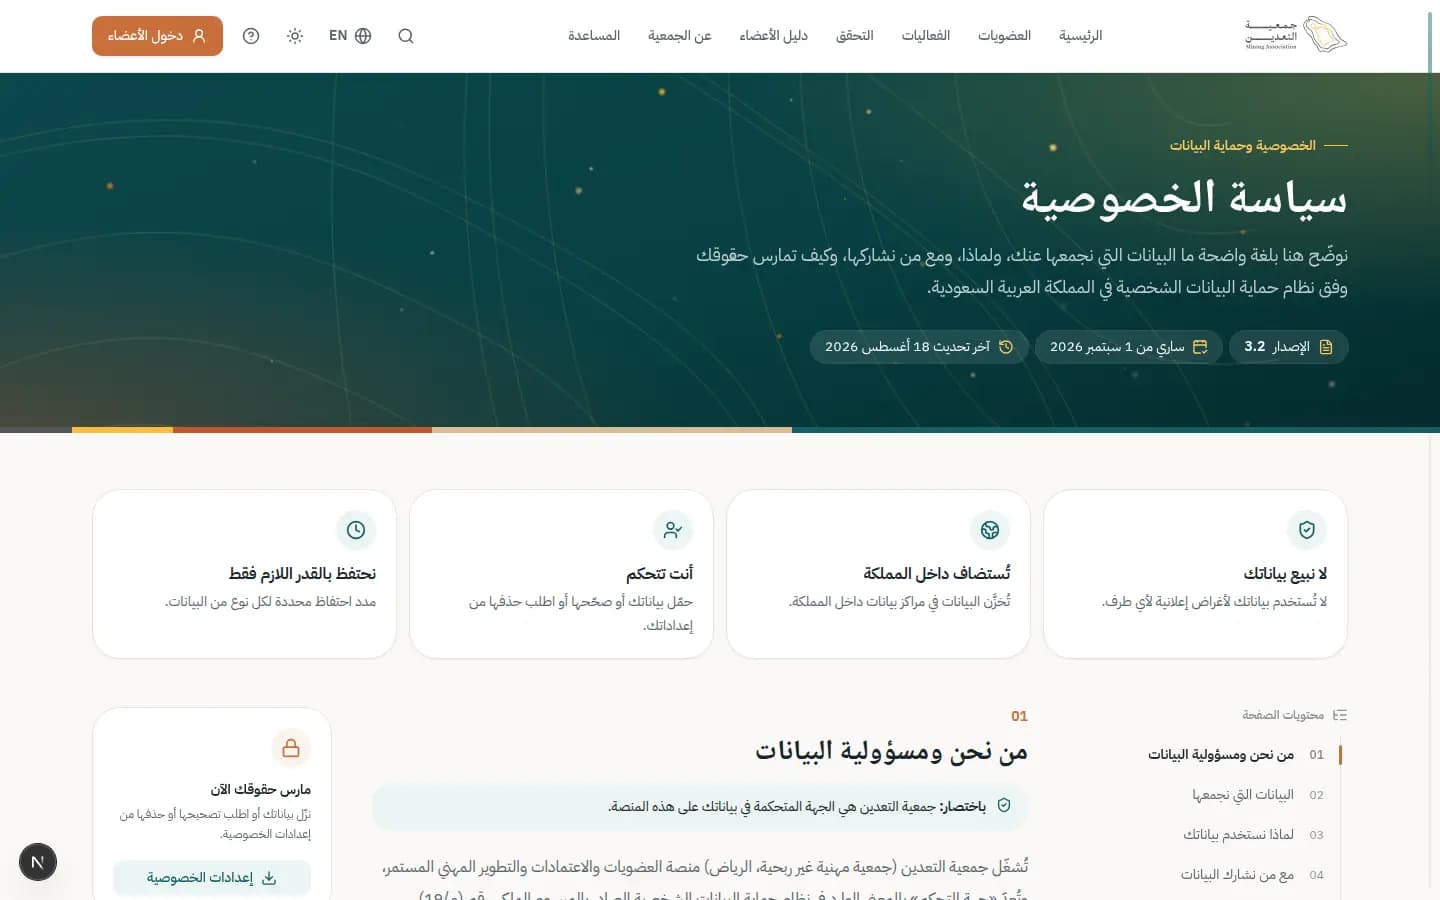
How to
See what we collect and why
- 1Start with the four cards at the top: “We never sell your data”, “Hosted in the Kingdom”, “You're in control” and “We keep only what's needed”.
- 2Choose “Data we collect” from “On this page” to see it in a table: category, examples and source.
- 3Move on to “Why we use your data” and “Who we share data with”.
Contact the data protection officer
- 1Scroll to “Questions about this document?”.
- 2Press “Contact form” or email the address shown; the officer replies within 5 working days.
Save a copy or follow updates
- 1Press “Print / save PDF” to keep a copy.
- 2Open “Version history” to see what changed, and turn on “Notify me of updates” for alerts.
What's on the screen
- “On this page”
- A list of sections that jumps straight to the one you want.
- “Version / Effective / Last updated”
- Shows which version you're reading and when it took effect.
- “In short”
- A one-line summary at the start of each section.
- “Print / save PDF”
- Prints the document or saves it as a file.
- “Version history”
- A list of previous versions and the current one.
- “Related documents”
- Links to the terms and the accessibility statement.
Tips
- We never store your full card details; a licensed payment gateway handles them.
- You can download, correct or ask to delete your data from your account settings.
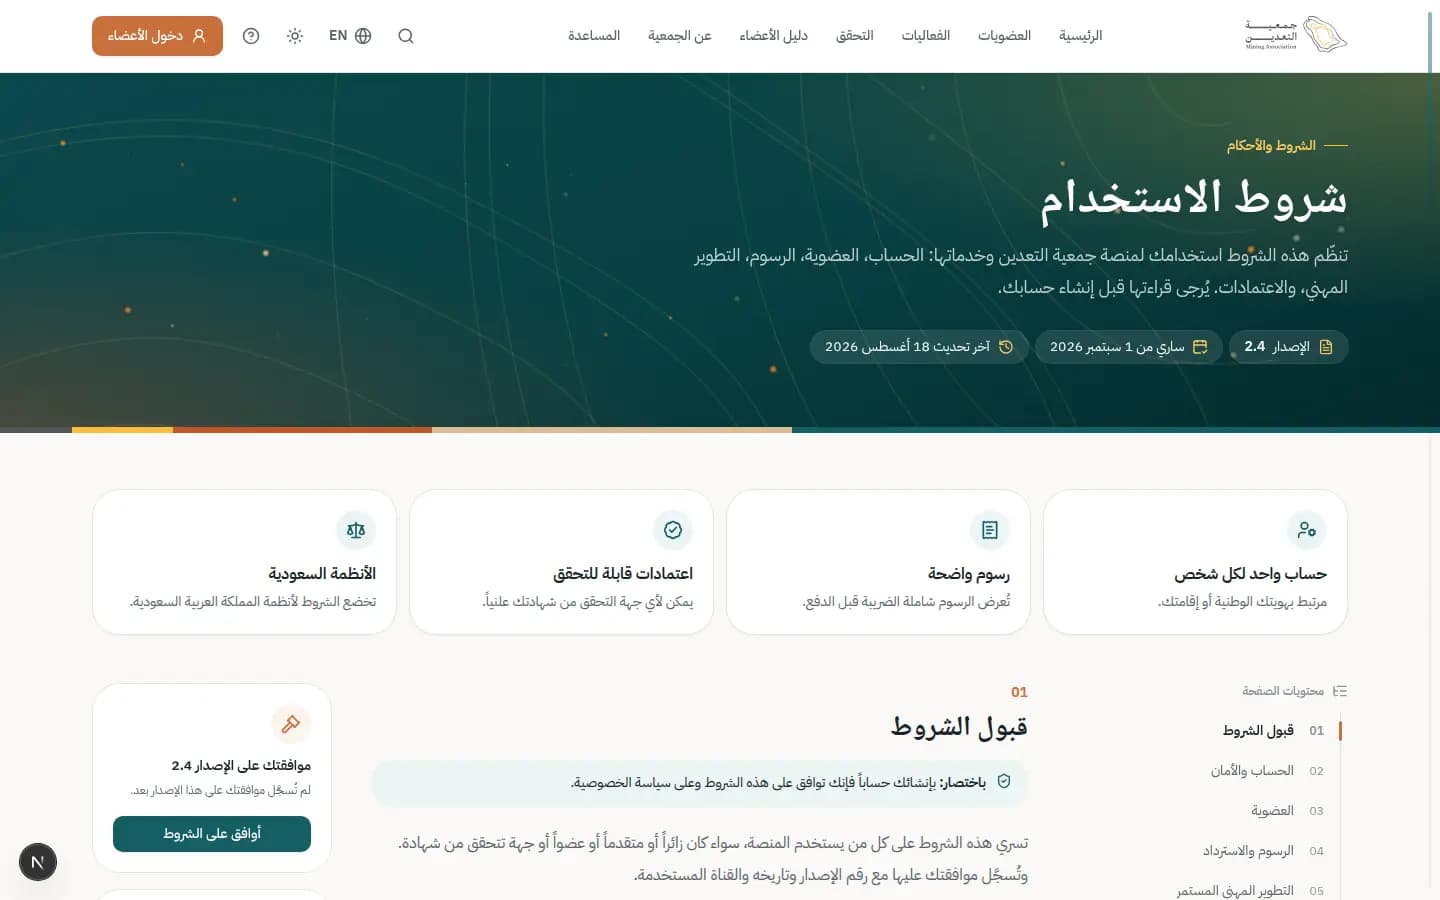
/termsTerms of use
The platform's terms of use: account, membership, fees and refunds, CPD and credentials, written clearly.
Who uses it?
Everyone who uses the platform — visitor, applicant or member. Creating an account means you accept them.
Features covered
Related journeys
Related screens
How to
Find out when you get a refund
- 1From “On this page” choose “Fees and refunds”.
- 2Read the “Status” / “Refund” table: rejection is a full refund within 14 working days, cancelling an event 7+ days ahead is a full refund, under 7 days is 50% or a seat transfer.
Record your acceptance of the current version
- 1Read the terms to the bottom.
- 2If you see “Your acceptance of this version hasn't been recorded yet”, press “I agree to the terms”.
- 3“Thanks, your acceptance is recorded” appears and the date and channel are saved.
What's on the screen
- “One account per person”
- Tied to your national ID or residency; duplicates are merged.
- “Account and security”
- Your responsibility for your password, and how to report via “It wasn't me”.
- “Membership”
- Review then activation for 12 months with a 30-day grace after expiry.
- “Fees and refunds”
- Fees include 15% VAT, plus the refund table.
- “Credentials and public verification”
- Anyone can publicly verify your certificate.
- “Acceptable use”
- What isn't allowed, such as scraping member data or impersonation.
- “Version history”
- What changed in each version of the terms.
Tips
- Membership fees are non-refundable once activated.
- If the Arabic and English differ, the Arabic prevails.
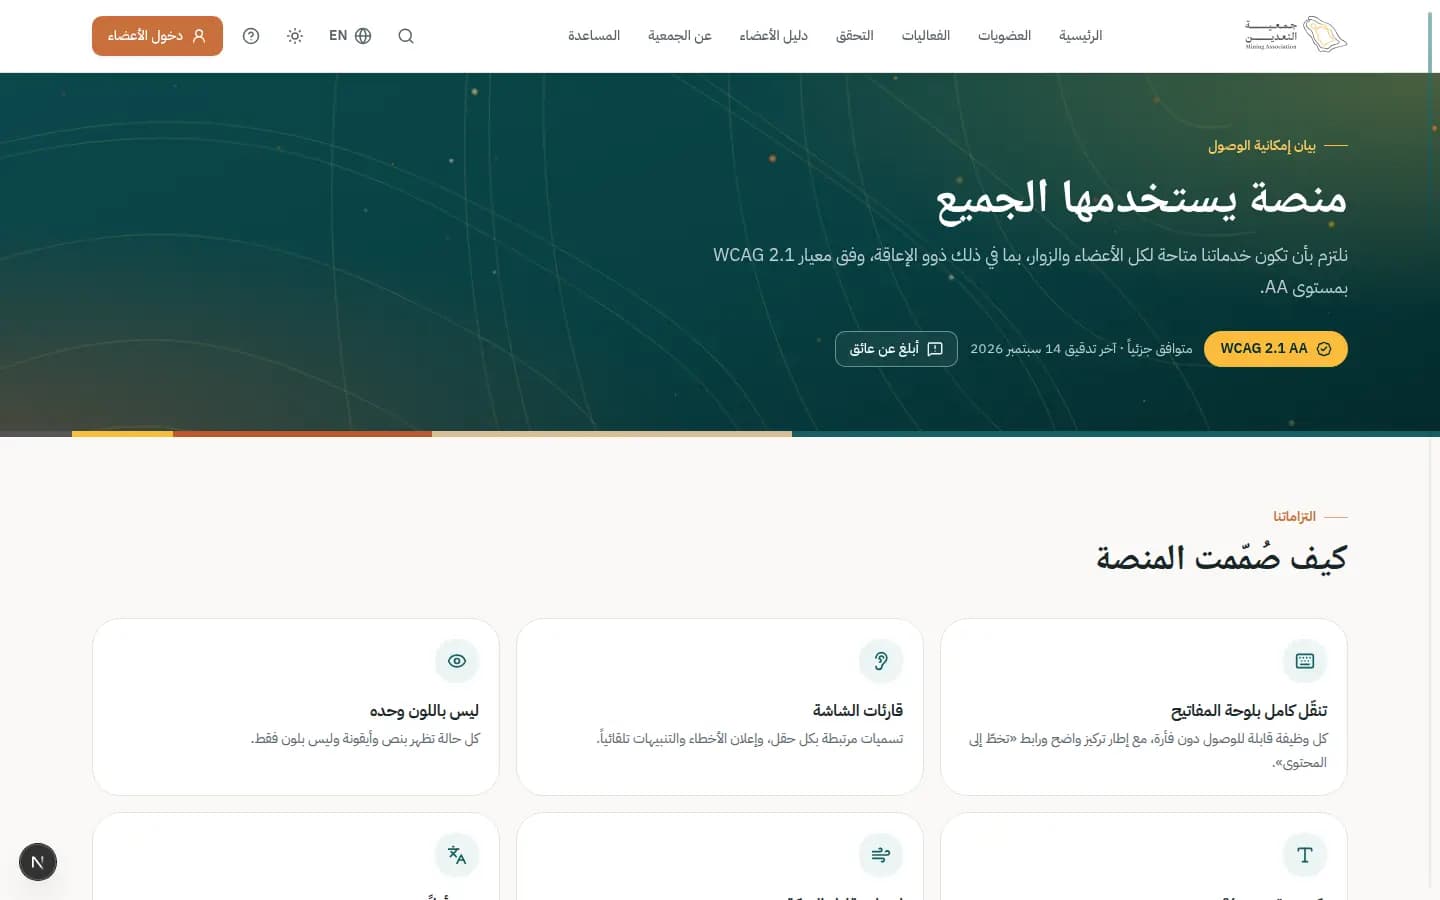
/accessibilityAccessibility statement
The association's commitment to making services usable by everyone, with display options you can adjust and a way to report any barrier.
Who uses it?
Anyone who wants easier reading and navigation: low-vision users, screen-reader or keyboard-only users, or anyone preferring larger text.
Features covered
Related journeys
Related screens
How to
Tune the display to suit you
- 1Under “Display options” change “Text size” with the slider.
- 2Turn on what you need: “High contrast”, “Comfortable spacing”, “Underline links” or “Stop motion”.
- 3See the effect in “Live preview” and press “Reset” if you don't like it.
Report an accessibility barrier
- 1Press “Report a barrier” to open “Report an accessibility barrier”.
- 2Enter “Page or service” and pick your assistive technology, such as “Screen reader” or “Keyboard only”.
- 3Describe in “What happened?” what you tried and what stopped you (at least 10 characters).
- 4Press “Send report”; you get a reference number and a reply within 2 working days.
What's on the screen
- “Display options”
- Preferences saved to your account and applied across web, portal and app.
- “Live preview”
- A sample card showing the effect of your settings.
- “Full keyboard navigation”
- A shortcut list for moving between items, opening search and closing menus.
- “Partially conformant · last audit”
- Our WCAG 2.1 conformance status and last audit date.
- “Report a barrier”
- A form that goes straight to the UX team.
- “Accessibility line”
- Phone line, Sunday to Thursday, 8 am – 4 pm.
Tips
- The page also lists known gaps and when they'll be fixed.
- We honour your device's “reduce motion” setting automatically.
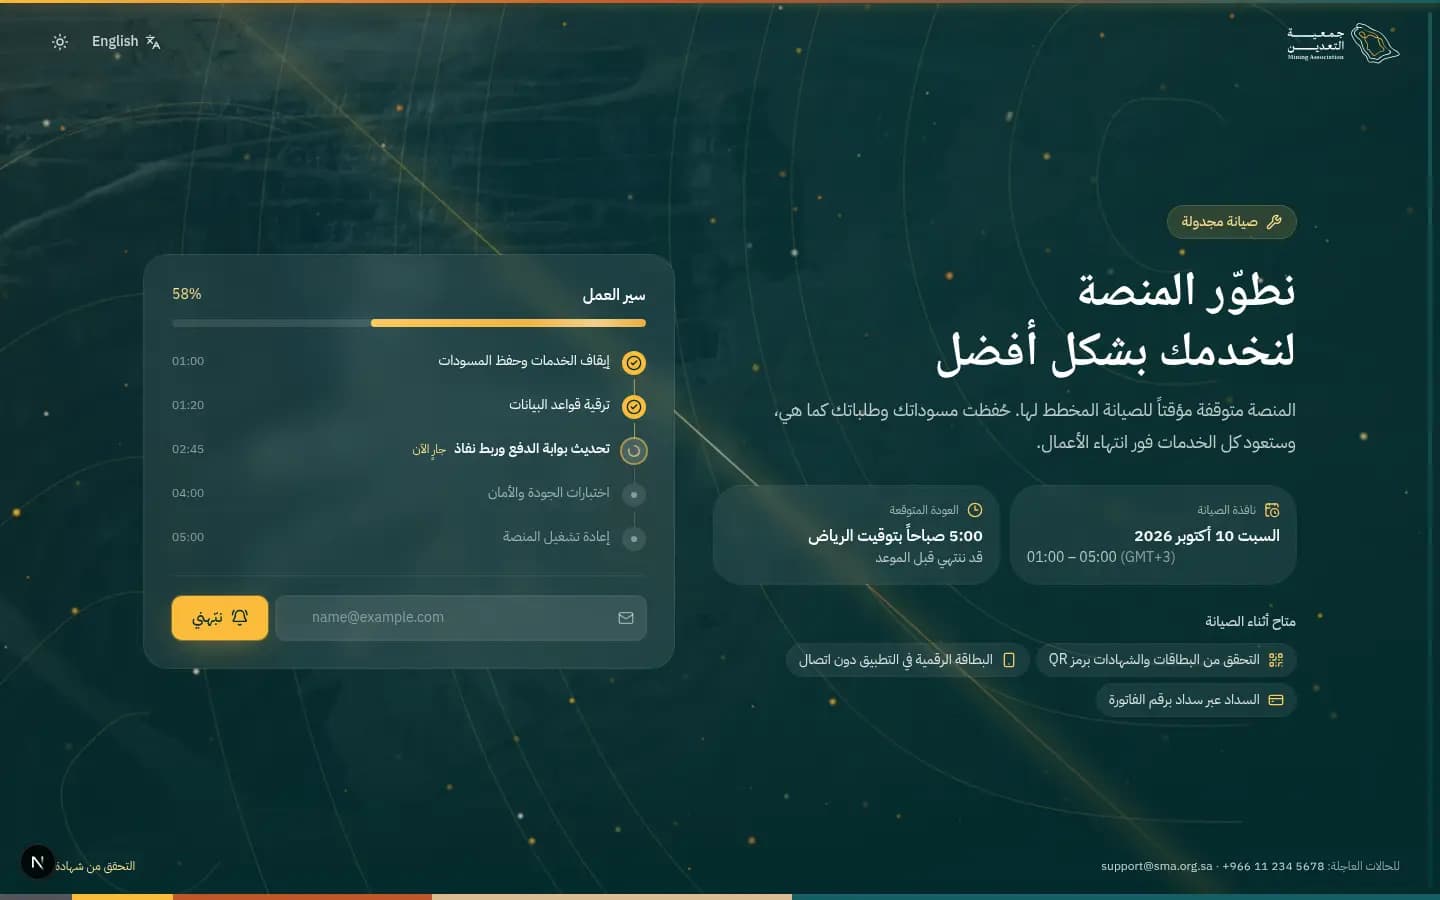
/maintenancePlanned maintenance
Shown when the platform is briefly down for scheduled maintenance, telling you when it returns and what still works.
Who uses it?
Anyone opening the platform during maintenance. You don't have to do anything — your drafts and requests are saved.
Features covered
Related journeys
Related screens
How to
Get notified when we're back
- 1Enter your address in “Email”.
- 2Press “Notify me”; we'll email you the moment service resumes.
Do something urgent during maintenance
- 1Check “Still available during maintenance”.
- 2To verify a certificate press “Verify a certificate”, or show your card from the app offline.
- 3For urgent cases use the contact shown at the bottom of the page.
What's on the screen
- “Maintenance window”
- Date and time of the maintenance.
- “Expected back”
- Expected return time in Riyadh time; we may finish early.
- “Maintenance progress”
- Work steps and the one marked “In progress”.
- “Still available during maintenance”
- QR verification, the in-app card and paying by invoice number.
- “Notify me”
- Registers your email for the return notice.
Tips
- No need to refresh repeatedly; you'll get a message when we're back.
5 screens
Sign-in & account
Create an account, sign in with Nafath or a password, and reset it.
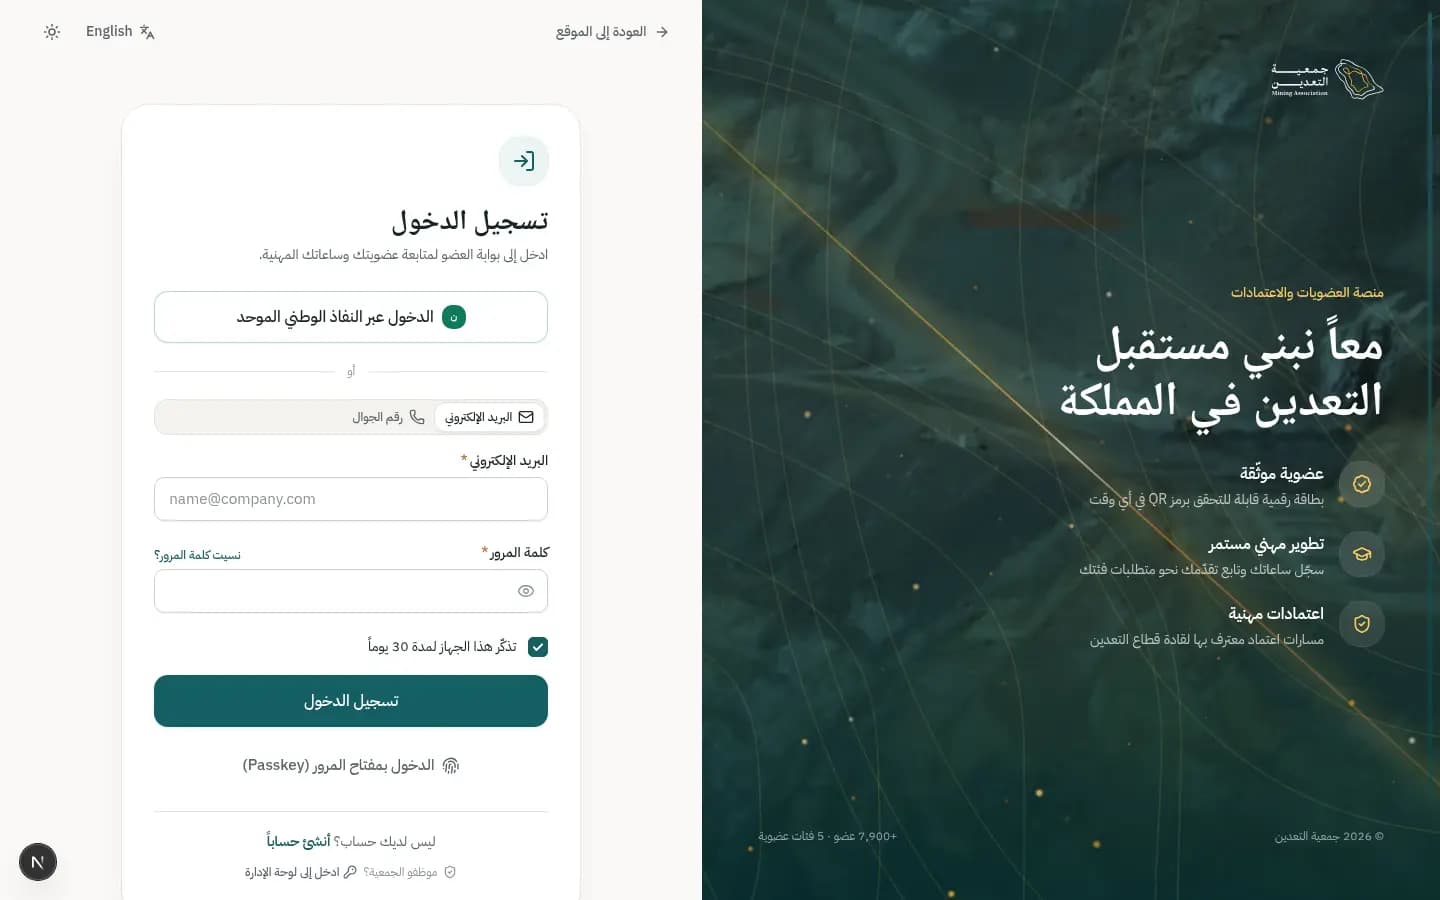
/loginSign in
Sign in to the member portal via Nafath, email/mobile and password, or a passkey.
Who uses it?
Members and applicants; staff via the admin link.
Features covered
Related journeys
Related screens
How to
Sign in with Nafath
- 1Press “Sign in with Nafath”.
- 2Open the Nafath app and pick the number shown.
- 3Wait for confirmation; you're taken to the portal.
Sign in with a password
- 1Choose email or mobile and enter it.
- 2Enter your password; tick “Remember this device for 30 days” on a personal device.
- 3Press “Sign in”. Forgot it? Press “Forgot password?”.
What's on the screen
- “Sign in with a passkey”
- Fingerprint or face sign-in, no password.
- “Couldn't sign in”
- Shown on wrong credentials, with a reset link.
- “Create an account”
- For people without an account.
- “Go to the admin console”
- Entry point for association staff.
Tips
- No Nafath prompt? Update the app and try again.
/registerCreate account
Create one account for applying, event registration and CPD — via Nafath or manually with a verification code.
Who uses it?
Anyone applying or registering for the first time.
Features covered
Related journeys
Related screens
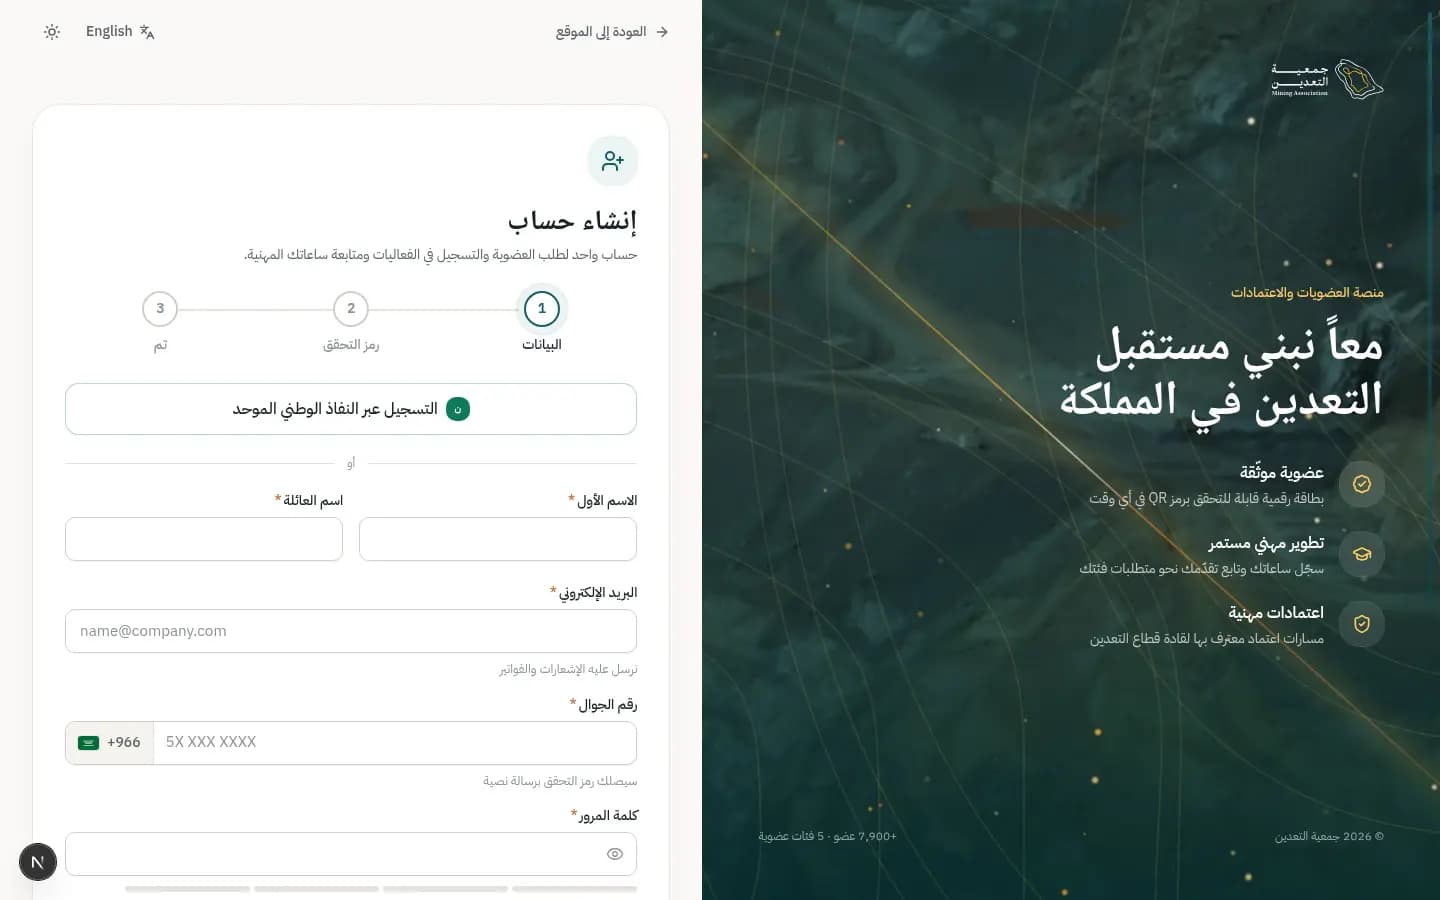
How to
Create your account
- 1Press “Register with Nafath” to fetch your name and ID — or continue manually.
- 2Enter first name, family name, email, mobile and password.
- 3Under “Consents” accept the terms and privacy policy, then press “Continue”.
- 4Enter the code sent to your mobile and press “Verify”.
- 5From the welcome screen press “Apply for membership” or “Go to the portal”.
What's on the screen
- “Details → Code → Done”
- The three-step indicator above the form.
- “Password strength”
- Meter from weak to strong with the rules: 8 chars, upper/lower case, a digit, a symbol.
- “Please fix the following”
- Error summary linking to the fields.
- “Resend code”
- Available after the countdown; “Edit details” to go back.
Tips
- In the prototype any 6-digit code except 000000 works.
/forgot-passwordReset password
Reset your password in three steps: account, code, new password.
Who uses it?
Anyone who forgot their password or got locked out.
Features covered
Related screens
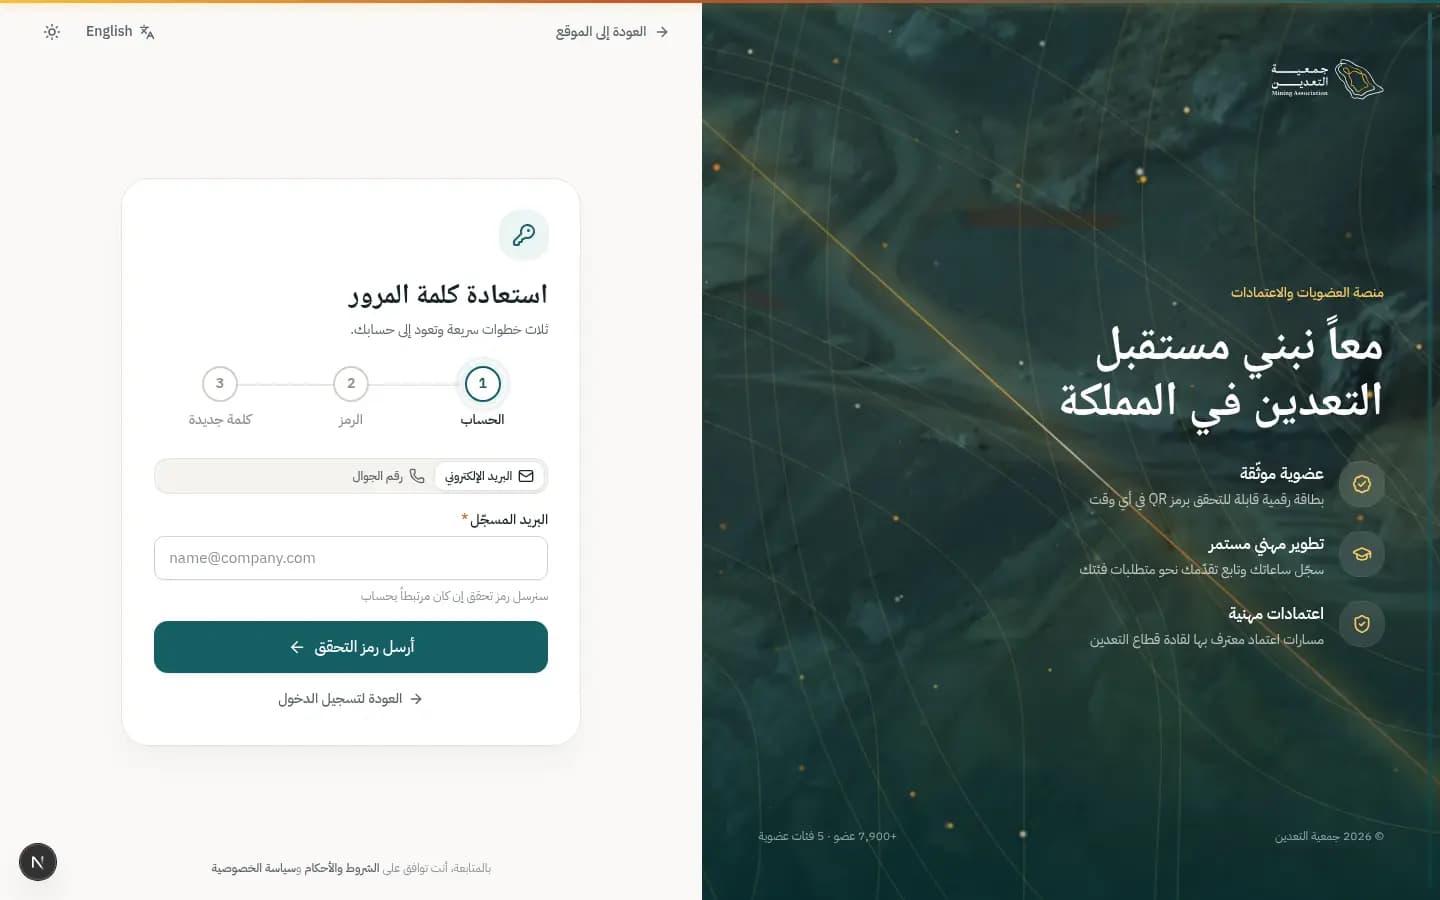
How to
Reset your password
- 1Choose email or mobile and enter the registered value.
- 2Press “Send verification code”.
- 3Enter the code and press “Verify”.
- 4Enter the new password and confirm it, then “Save password”.
- 5Press “Sign in” with the new password.
What's on the screen
- “Account / Code / New password”
- The three reset steps.
- “Resend code”
- After the countdown ends.
Tips
- You're signed out of all other devices after the change and notified.
/nafathSign in with Nafath
Sign in with your national identity through the Nafath app: pick a number in the app and confirm with biometrics, and your verified details transfer automatically.
Who uses it?
Citizens and residents registered with Nafath who want faster sign-in without typing details.
Features covered
Related journeys
Related screens
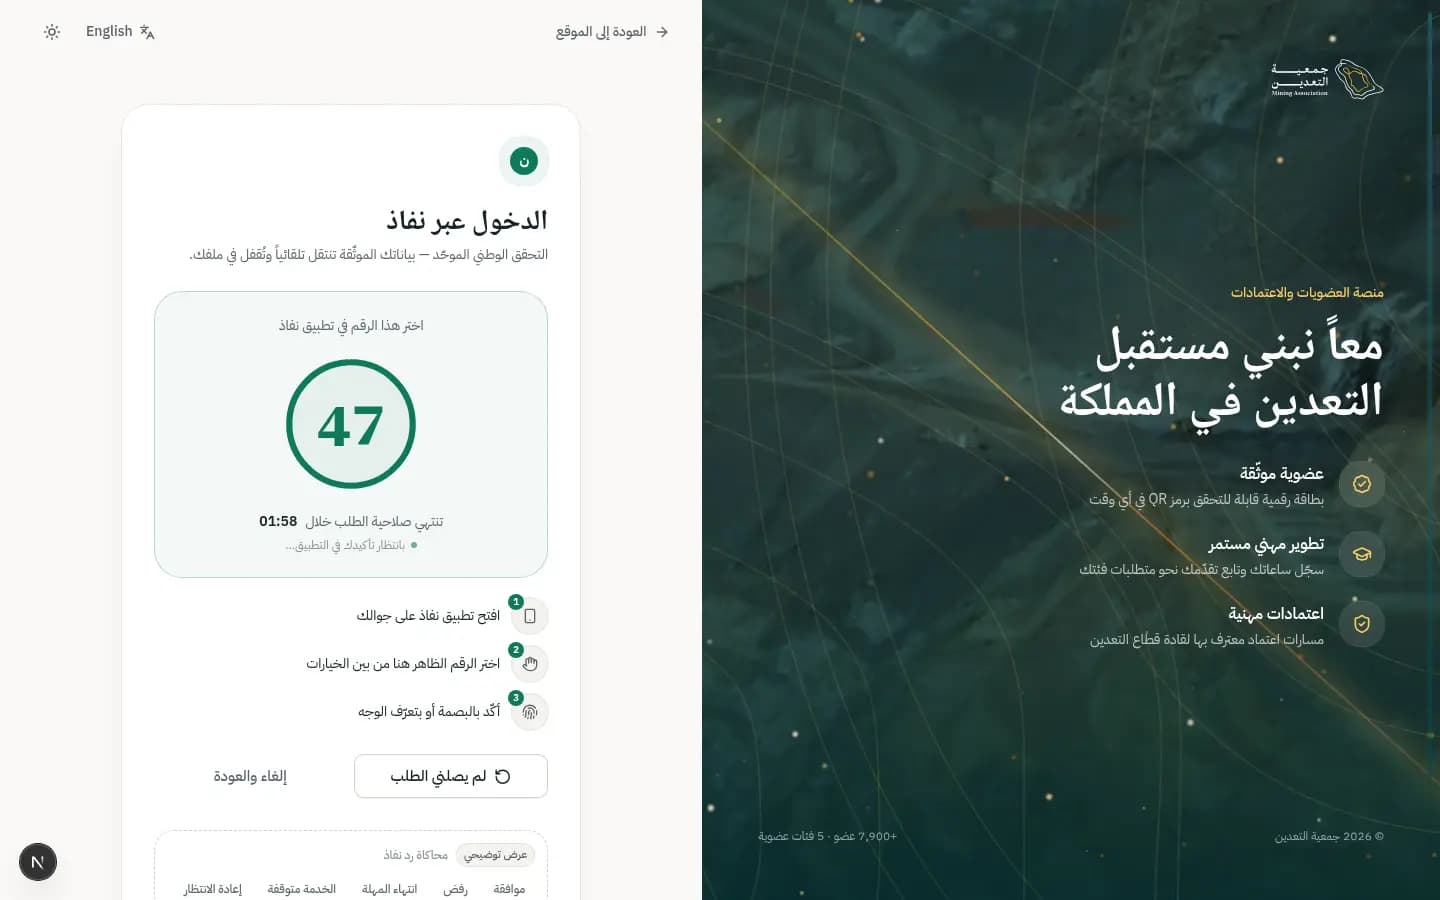
How to
Sign in with Nafath
- 1The “Sign in with Nafath” page shows a large number under “Choose this number in the Nafath app”.
- 2Open the Nafath app on your phone and pick the same number among the options.
- 3Confirm with fingerprint or face recognition.
- 4When “Identity verified” appears, review the details and press “Continue to the portal”.
If the request doesn't arrive or times out
- 1Press “I didn't get it” to re-send to the Nafath app.
- 2If “The request timed out” (2 minutes) appears, press “Send a new request”; a different number will show.
- 3If Nafath is unavailable, press “Sign in with email or mobile” and try again later.
What's on the screen
- “Choose this number in the Nafath app”
- The number you match in the app to prove the request is yours.
- “Request expires in”
- A countdown for the time limit.
- “I didn't get it”
- Re-sends the request to the app.
- “Verified and locked”
- Name, ID, date of birth and nationality come from Nafath and can't be edited by hand.
- “Cancel”
- Cancels the attempt and returns you to sign-in.
- “Sign in with email or mobile”
- A fallback when Nafath isn't working.
Tips
- The page updates by itself; no need to reload it.
- If you didn't request it, ignore the notification; your account is safe.
/mfaTwo-step verification
An extra check after your password to protect your account, also required before sensitive actions such as changing the refund bank account.
Who uses it?
Anyone who enabled two-step verification; it is mandatory for staff accounts.
Features covered
Related journeys
Related screens
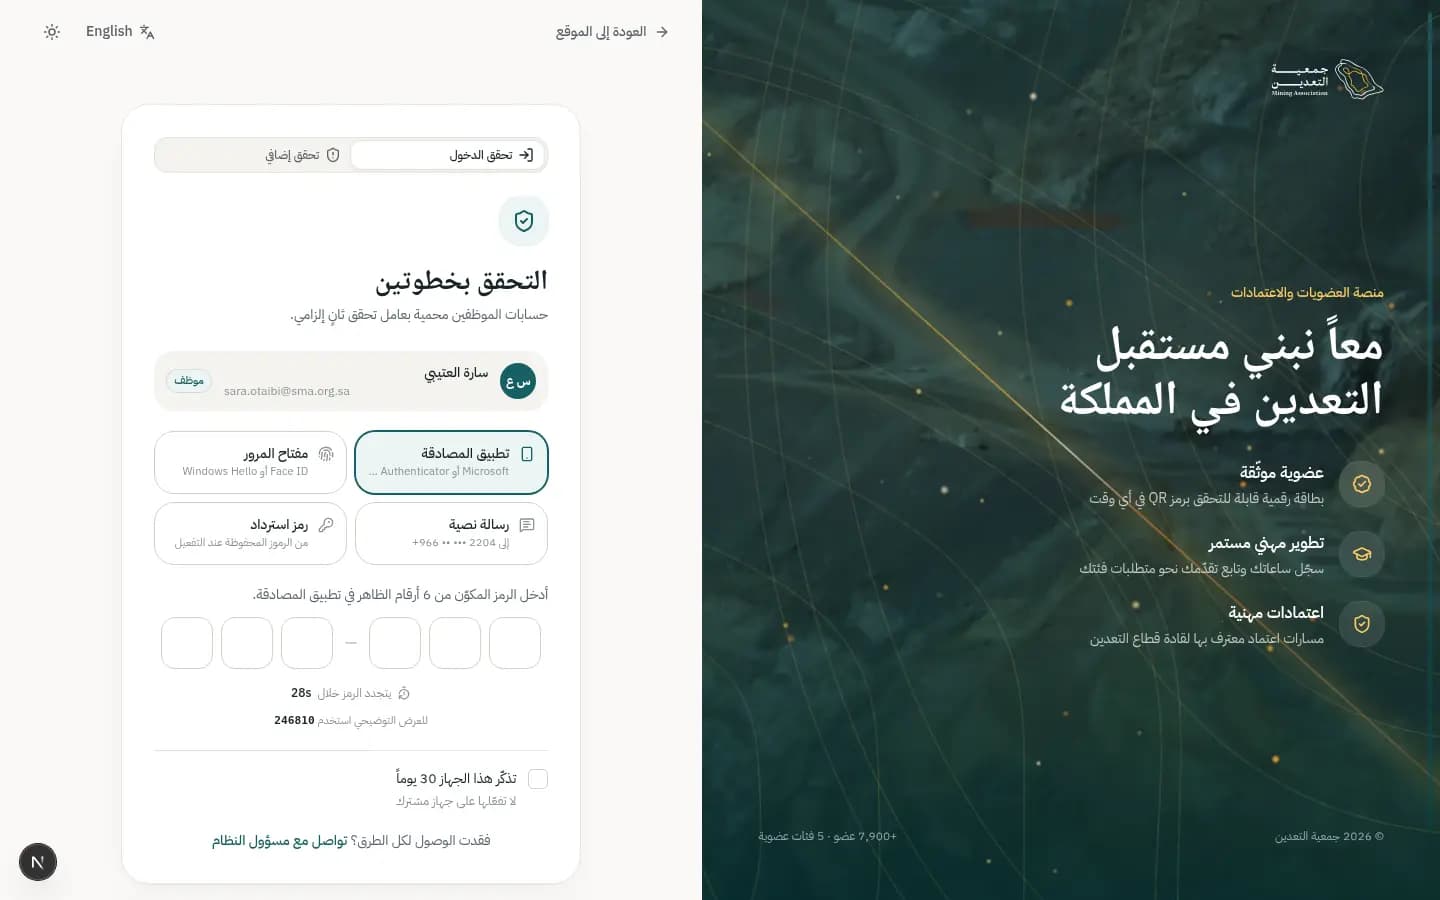
How to
Complete sign-in verification
- 1Pick a “Verification method”: “Authenticator app”, “Passkey”, “SMS” or “Recovery code”.
- 2Enter the 6-digit code (or press “Use passkey” and confirm with your fingerprint).
- 3Keep “Remember this device for 30 days” on only if it's your personal device.
- 4Press “Verify and sign in”.
If the code doesn't arrive
- 1Wait for “Resend in” to finish, then press “Resend code”.
- 2Or switch method, including “Recovery code” (10 characters, single use).
- 3If you lost every method press “Contact your administrator”.
Confirm yourself for a sensitive action
- 1“Confirm it's you” appears even if you're signed in.
- 2Enter the code and press “Confirm”.
- 3Finish the change within 10 minutes without another check; an alert goes to your email and mobile.
What's on the screen
- “Verification method”
- The four ways to prove it's you.
- “Code refreshes in”
- Countdown for the authenticator code.
- “Remember this device for 30 days”
- Skips the code on this device for the period.
- “Verify and sign in”
- Checks the code and opens your account.
- “Change refund bank account”
- Shows “Current” and “New” before you confirm.
- “Why are we asking?”
- A short note: protecting your funds from unauthorised changes.
Tips
- Repeated wrong codes cause a temporary lock; the alert shows how many tries remain.
- Keep recovery codes somewhere safe, and never remember a shared device.
25 screens
Member
Member portal: applications, membership, renewal, CPD, credentials, events, payments and support.
/portalHome
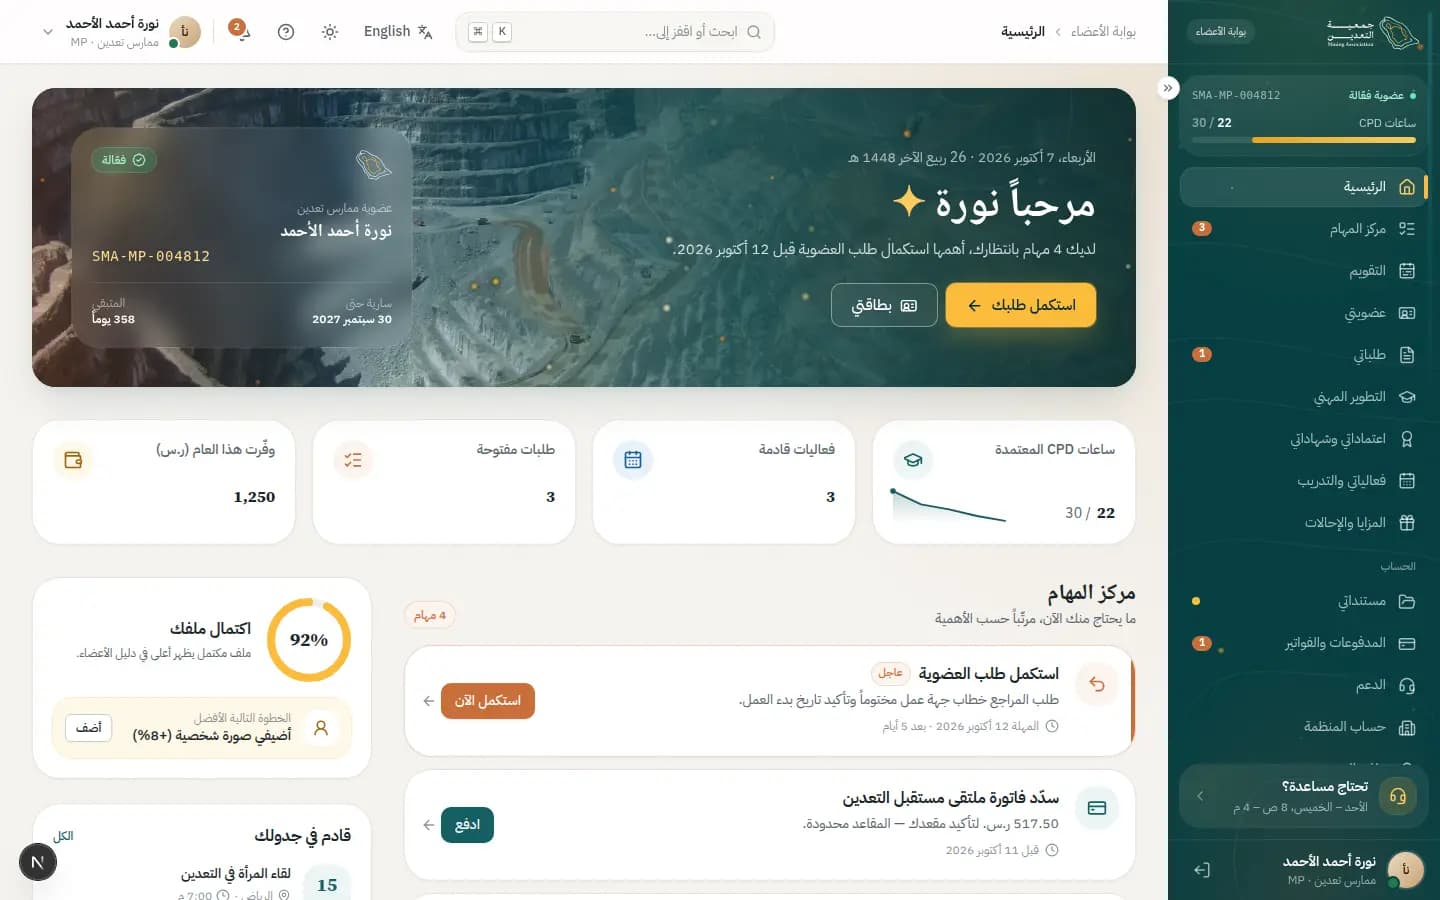
The portal home page: it gathers the tasks that need your action ordered by priority, your membership status, your CPD progress and your upcoming events.
Who uses it?
Every member, each time they sign in, to see right away what needs doing today — e.g. Noura, whose first task is the correction on application MEM-2026-004812.
Features covered
Related journeys
How to
Complete a task from the “Task center”
- 1Go to the “Task center” panel; tasks are ordered by priority, each with its deadline.
- 2Read the reason under each title, e.g. “Complete your application correction”.
- 3Press the action button next to the task: “Fix now”, “Pay”, “My plan” or “Rate”.
- 4Finish the action on the screen that opens, then come back home for the remaining tasks.
Rate a course you attended
- 1Press “Rate” next to “Rate Blasting Engineering Fundamentals”.
- 2Pick your score under “How was it overall?”.
- 3Optionally write a note in “What could be better?”.
- 4Press “Send rating”; the task closes automatically. Choose “Later” to postpone.
Jump to a common service
- 1Scroll to “Quick links”.
- 2Pick a service: “Renew membership”, “Upload a document”, “Submit CPD activity”, “New application” or “Contact support”.
- 3Note the hint under some links, such as when renewal opens or that your ID expires soon.
What's on the screen
- “Welcome and “Complete your request””
- States how many tasks are waiting and the top one, and takes you straight to the request that needs correction.
- “Membership card and “My card””
- Shows the membership status, “Valid until” and “Remaining” days; “My card” opens My membership.
- “Stat cards”
- Summarise “Approved CPD hours”, “Upcoming events”, “Open requests” and “Saved this year (SAR)”.
- “Task center”
- What needs you now, by priority — each task has a reason, a deadline and an action button.
- “Your CPD progress”
- Shows your hours in the current cycle; the “CPD log” link opens the CPD screen.
- “Recommended for you”
- Events picked to close your missing hours and match your specialty, with an “All events” link.
- “Recent requests and Coming up”
- Your latest requests with an “All requests” link, plus your nearest upcoming items.
Status meanings
- ActiveShown on the membership card when your membership is current.
- Needs correctionShown on a request in “Recent requests” when the reviewer is waiting for your correction.
Tips
- Always start with the first task in the “Task center” — it has the nearest deadline and the most impact.
- The “Profile completeness” card suggests the “Next best step”; complete profiles rank higher in the directory.
/portal/tasksTask center
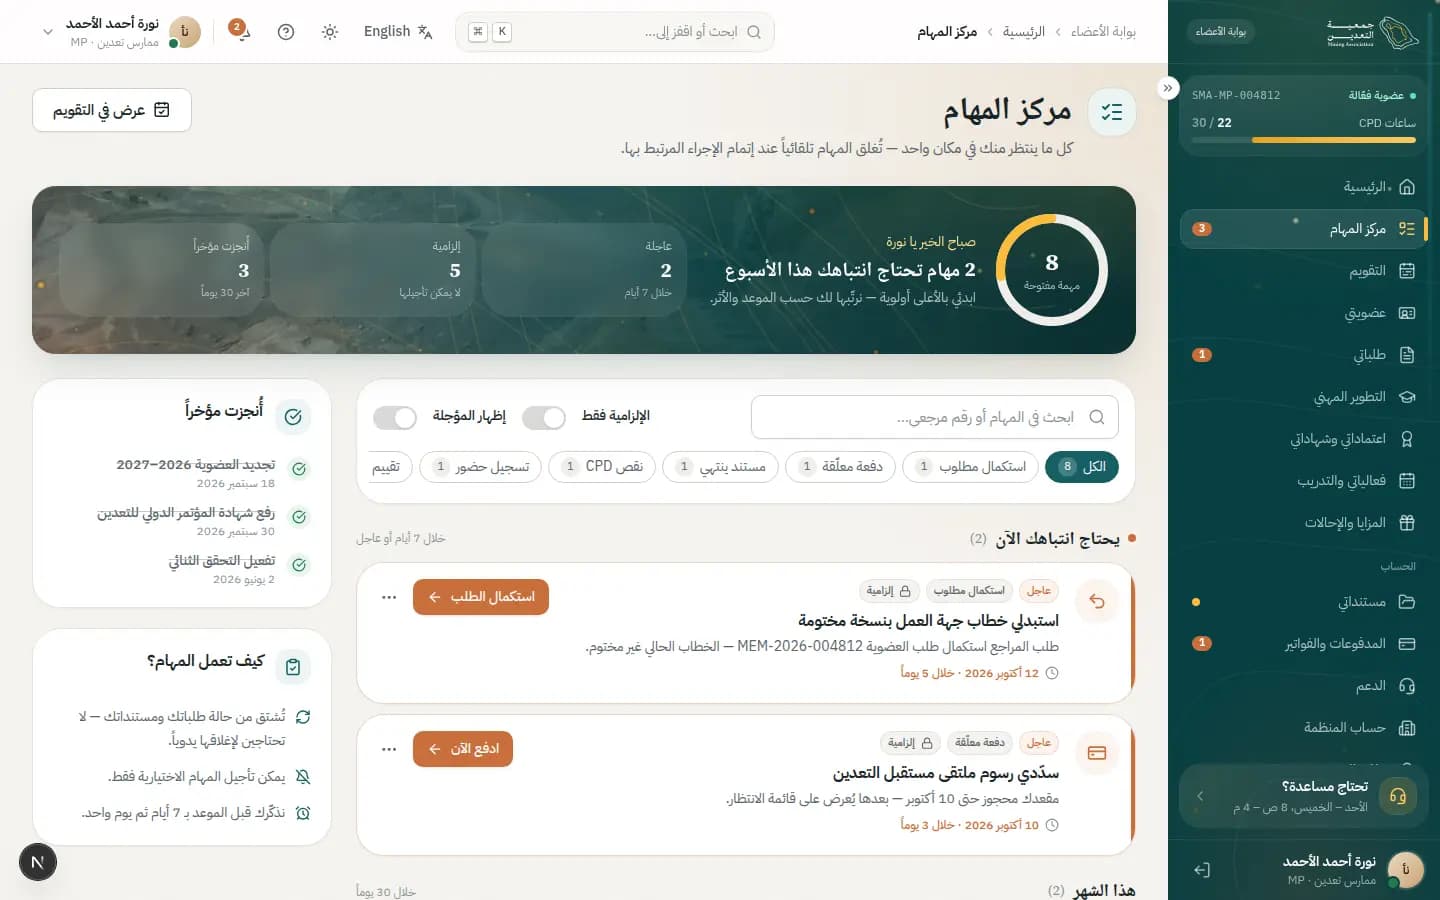
The Task center gathers everything waiting on you in one place, ordered by deadline and impact. A task closes by itself once you finish the related action.
Who uses it?
Any member who wants to know what to do today: fix a request, pay an invoice, renew, or replace an expiring document.
Features covered
Related screens
How to
Finish your first urgent task
- 1Open the “Task center” and look at the first group, “Needs you now”: items due within 7 days or marked urgent.
- 2Read the reason under the title and note the deadline, such as “in 3 days” or “overdue”.
- 3Press the action button beside the task (e.g. “Fix now” or “Pay”) to open the right screen.
- 4Finish the action there; the task will move to “Recently completed” on its own.
Snooze an optional task
- 1Press the “Options” (three dots) icon on the task card.
- 2Pick a snooze: “Until tomorrow”, “For 3 days” or “For a week”.
- 3Changed your mind? Press “Undo” in the notification, or open Options and choose “Unsnooze”.
Search and filter your tasks
- 1Type a task title or request number into “Search tasks or a reference…”.
- 2Pick a type from the filter pills, or turn on “Mandatory only” to see what can't be snoozed.
- 3Turn on “Show snoozed” to see what you postponed, and press “Clear filters” to return to all.
What's on the screen
- “Welcome and quick numbers”
- Tells you how many tasks need you this week, with “Urgent”, “Mandatory” and “Done recently”.
- “Task groups”
- “Needs you now”, “This month”, “Later” and “Anytime” (no deadline).
- “Task card”
- Shows priority (“Urgent” / “High” / “Normal” / “Low”), the type, a “Mandatory” badge, a short reason and the action button.
- “Details panel”
- Opening a task shows “Due”, “Hijri”, “Reference”, “Steps” and a note on when the task closes.
- “Recently completed”
- What you finished in the last 30 days, struck through for reassurance.
- “How tasks work”
- A reminder that tasks come from your requests and documents, only optional ones can be snoozed, and we remind you 7 days and 1 day ahead.
- “View in calendar”
- A button at the top that shows your task dates on the unified calendar.
Status meanings
- OverdueA task past its deadline, shown as “overdue”.
- PendingAn open task waiting for your action.
Tips
- You never need to close a task by hand — just do the action itself.
- Mandatory tasks (with a lock) can't be snoozed, so start with those.
/portal/calendarUnified calendar
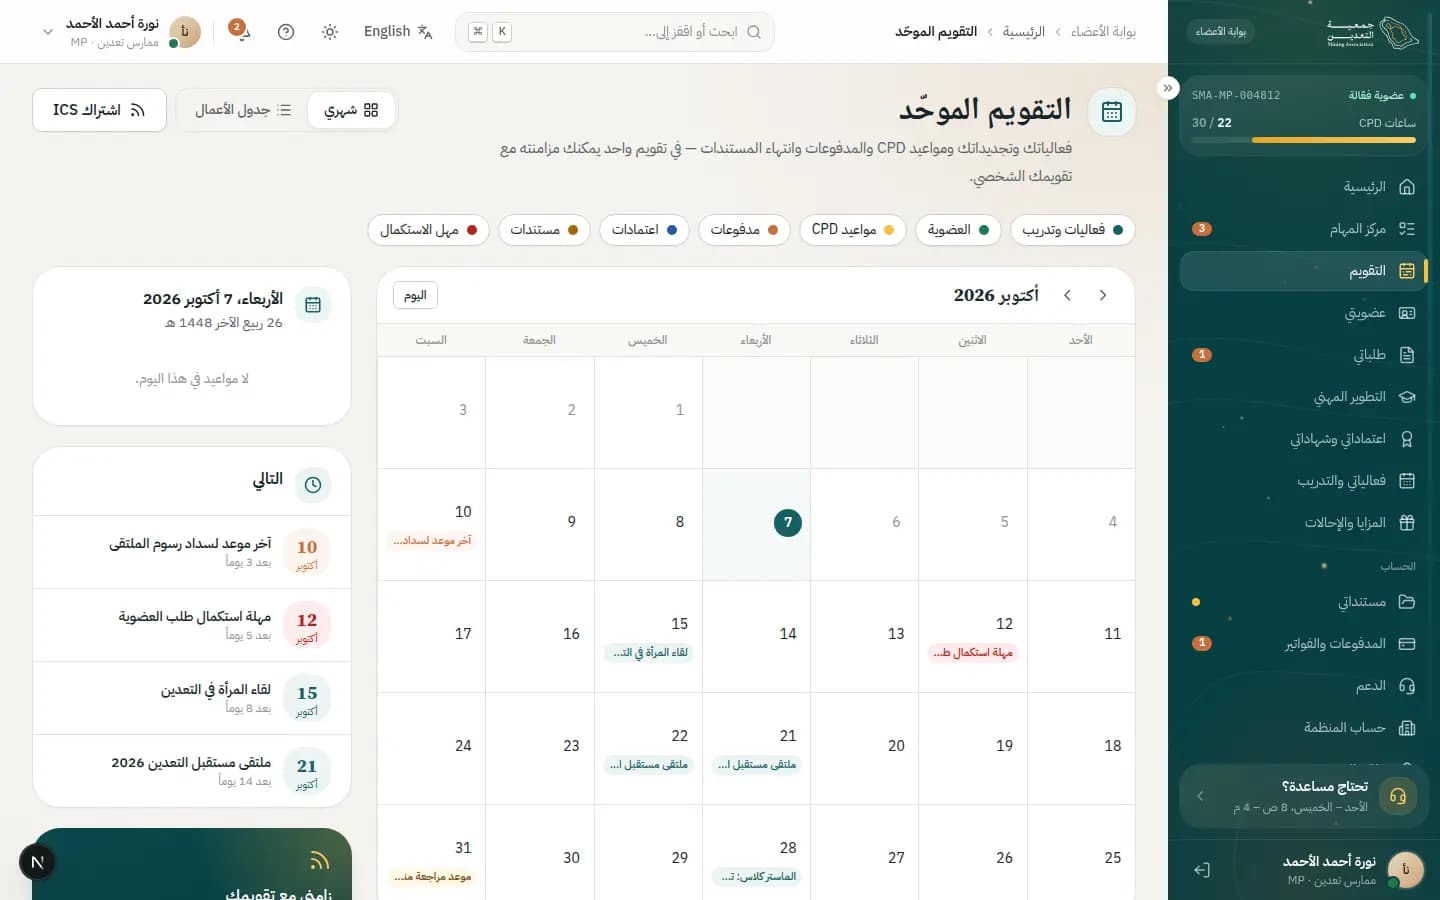
One calendar for your events, renewals, CPD deadlines, payments and document expiries, which you can sync with your phone's calendar.
Who uses it?
Members who never want to miss a date, or want to see their whole month at a glance.
Features covered
Related journeys
Related screens
How to
View an item and add it to your calendar
- 1Choose “Month” or “Agenda” at the top.
- 2Press an item to open its details: “Time”, “Location”, “CPD hours” and “Status”.
- 3Press “Add to calendar” to download a file that adds it to your device calendar.
Subscribe so it updates itself
- 1Press “Subscribe (ICS)” at the top, or copy the link from the “Sync with your calendar” card.
- 2Paste the link into your calendar app (Google, Apple or Outlook) as a subscribed calendar.
- 3New dates and changes will appear there without any further work.
Show only certain kinds of dates
- 1Press the category chips under the title: “Events & training”, “Membership”, “CPD deadlines”, “Payments”, “Credentials”, “Documents”, “Correction deadlines”.
- 2A bright chip is shown, a faded one is hidden; press again to toggle.
What's on the screen
- “Month / Agenda”
- Month view shows days with coloured dots per type; Agenda lists what's coming, grouped by month.
- “Previous month / Next month / Today”
- Move between months and jump back to today.
- “Category chips”
- Show or hide each kind of date by its colour.
- “Next up”
- Your nearest dates with “Today” or “in N days”.
- “Sync with your calendar”
- A personal ICS link you copy with “Copy”; it updates automatically.
- “Show past / Hide past”
- In Agenda, show or hide dates that have passed.
Status meanings
- RegisteredAn event you registered for, shown on its date.
- WaitlistedAn event where you're on the waitlist.
Tips
- A subscription beats “Add to calendar” if you want everything always up to date.
- If a day looks empty, try turning on more categories.
/portal/year-in-reviewYear in review
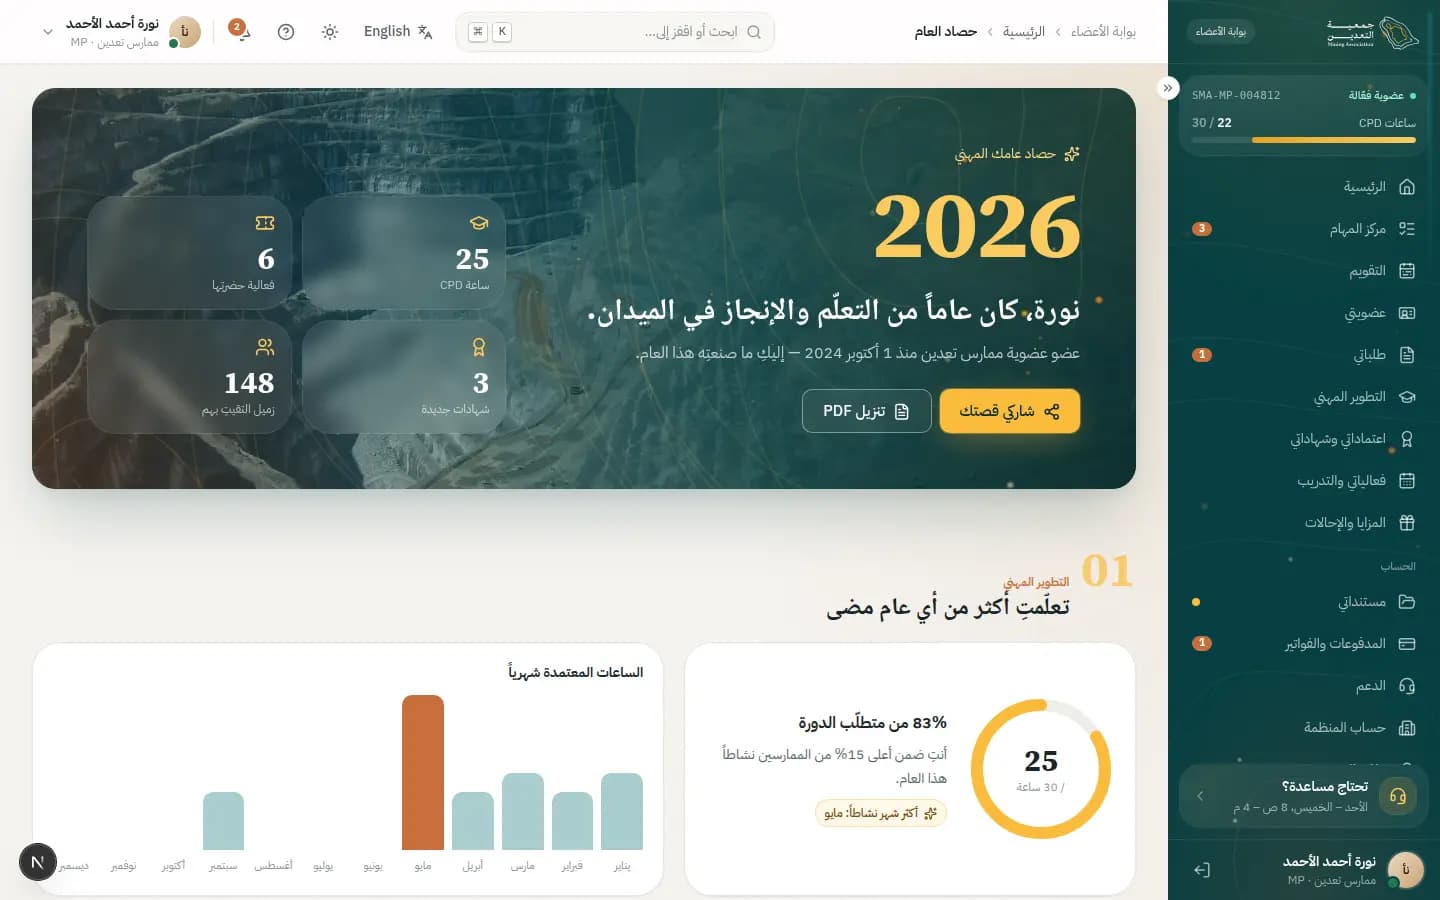
Your professional year on one page: CPD hours, events, certificates and what you saved, plus a share-ready card.
Who uses it?
Members who want to see their achievements, share them with peers or on LinkedIn, or plan next year.
Features covered
Related journeys
Related screens
How to
Share your year card
- 1Press “Share your story” at the top to jump to “Your share-ready card”.
- 2Pick the “Card style”: “Dusk” or “Sand”.
- 3Press “Download image”, “LinkedIn” or “Copy link” as you prefer.
Read your year chapter by chapter
- 1Start with the top numbers: CPD hours, events, certificates and peers met.
- 2Scroll the chapters: “Professional development”, “Events & training”, “Credentials & certificates”, “Highlights”.
- 3Press “Explore benefits” in Highlights to see how your membership saved you money.
Get ready for next year
- 1Scroll to “Get ready for 2027”.
- 2Press “CPD plan” to set your goal, “Calendar” for dates, or “My membership” to review renewal.
What's on the screen
- “Your professional year”
- A personal welcome, four big numbers, a “Share your story” button and a PDF download.
- “Professional development”
- Your progress toward the required hours, an “Approved hours per month” chart and your busiest month.
- “Events & training”
- The stops you attended, with the “Moment of the year”.
- “Credentials & certificates”
- Documented achievements anyone can verify.
- “Highlights”
- What your membership saved you from event discounts, the library and partner offers.
- “Your share-ready card”
- A card with aggregate numbers only and a verification QR, in two styles.
Tips
- The card holds no sensitive personal data, so sharing it is safe.
/portal/membershipMy membership
Brings your digital membership card, benefits and membership history together, and lets you share proof of membership through a secure verification link.
Who uses it?
Members who need to show their card, send proof of membership to an employer, or follow their renewal date and benefits.
Features covered
Related journeys
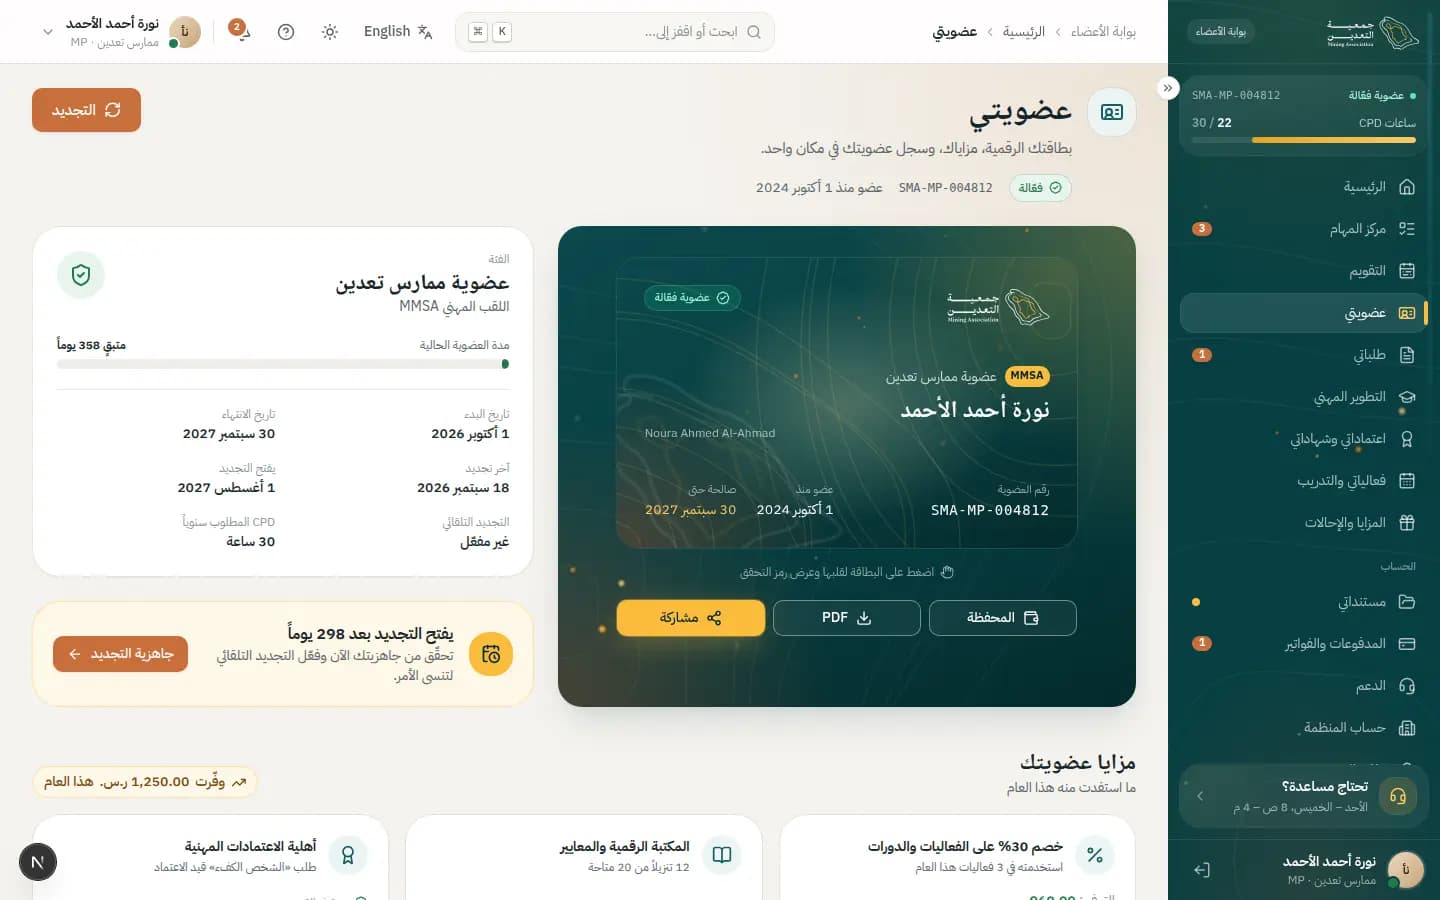
How to
Share proof of membership
- 1Press “Share” under the digital card.
- 2Choose “Link valid for”: “24 hours”, “7 days” or “30 days”.
- 3Under “What the recipient sees” pick extra fields; “Name, number and status” is always included.
- 4Press “Create link”, copy it with the copy button, send it, then press “Done”.
Save or download your card
- 1Tap the card to flip it and show the verification QR.
- 2Press “Wallet” to add it to your device wallet; it updates automatically on renewal.
- 3Press “PDF” to download a copy of the card.
Check renewal readiness
- 1Review “Expires”, “Renewal opens” and “Auto-renew” in the membership summary.
- 2Press “Renewal readiness” or the “Renewal” button at the top.
- 3Complete any required items on the Renew membership screen.
What's on the screen
- “Digital card”
- A flippable card with your details and a verification QR, plus “Wallet”, “PDF” and “Share” buttons.
- “Category and Current term”
- Shows your category, post-nominal and days left, with “Started”, “Last renewed” and “CPD per year”.
- “Renewal readiness”
- A notice of when renewal opens, with a link to check your readiness.
- “Your benefits”
- How much you used each benefit this year and how much you saved.
- “Membership history”
- Every membership period with its linked requests and payments.
- “Your next step”
- A suggested upgrade with met and missing conditions, plus “Compare categories” and “Start an application”.
Status meanings
- ActiveYour membership is current and all its benefits are available.
- CompletedA past membership period that was completed, in “Membership history”.
- ExpiredA past period that ended, e.g. the graduate membership before the upgrade.
Tips
- You can revoke a share link any time — choose the shortest validity the recipient needs.
- The recipient can also scan the QR on the card to verify instantly.
/portal/membership/renewRenew membership
Renew your membership in two minutes: check readiness, choose a term, optionally turn on auto-renew, then pay.
Who uses it?
Members once renewal opens or as their membership nears expiry.
Features covered
Related journeys
Related screens
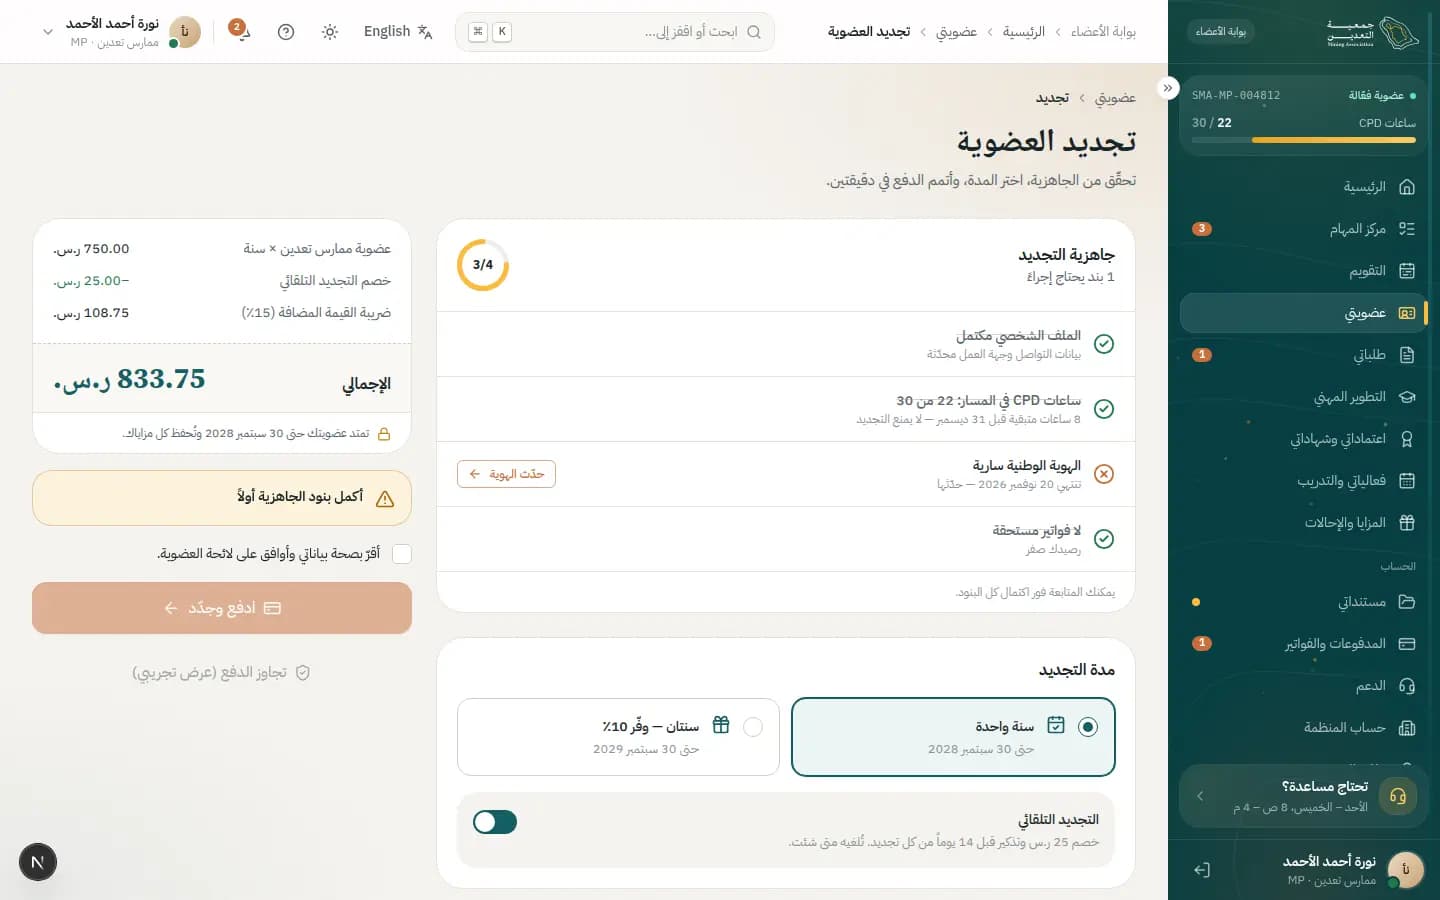
How to
Renew your membership
- 1Review the “Renewal readiness” panel; if an item needs action press its button, e.g. “Update ID”.
- 2Choose the “Renewal term”: “1 year” or “2 years — save 10%”.
- 3Optionally turn on “Auto-renew” for SAR 25 off and a reminder before each renewal.
- 4Review the amount summary, then tick “I confirm my details are accurate and accept the membership bylaws.”.
- 5Press “Pay & renew” to complete payment.
- 6When “Your membership is renewed” appears, press “View my card” to see the new expiry.
Fix an item that isn't ready
- 1Find the item flagged in “Renewal readiness” (the panel shows how many items need action).
- 2Press the item's button, e.g. “Update ID” when your National ID is about to expire.
- 3Once every item is done, “All set — continue below” appears and payment is enabled.
What's on the screen
- “Renewal readiness”
- A checklist: profile, CPD hours, ID validity and no outstanding invoices.
- “Renewal term”
- Choose one year or two years at 10% off, each showing the new expiry date.
- “Auto-renew”
- A switch giving SAR 25 off and a reminder 14 days before each renewal; turn it off any time.
- “Amount summary”
- Breaks down fees, discounts and total, and what the renewal unlocks.
- “Pay & renew”
- Enabled once readiness is complete and the declaration is ticked.
Tips
- If “Finish the readiness items first” appears, payment stays disabled until the items are fixed.
- The receipt is emailed right after renewal, and the wallet card updates automatically.
/portal/membership/upgradeUpgrade / change category
Upgrade or change your membership category in five steps: pick the category, check eligibility, see the fee difference, attach documents, then submit.
Who uses it?
Members whose experience or path has grown and who want a higher or different category. Your member number does not change.
Features covered
Related journeys
Related screens
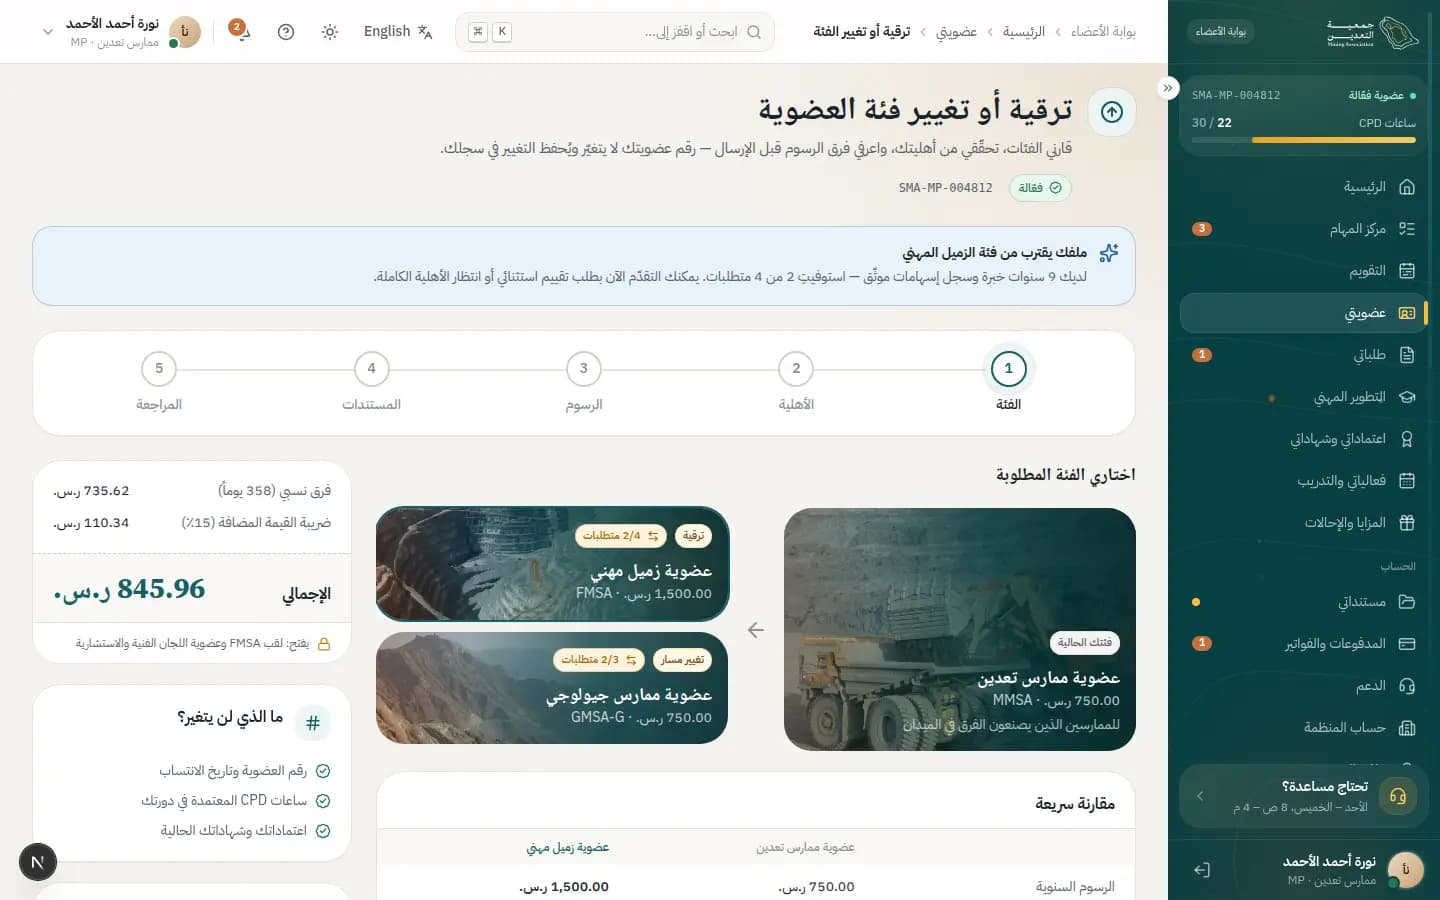
How to
Submit an upgrade request
- 1In the “Category” step choose the target and review the “Quick comparison” (fee, CPD hours, designation, review time).
- 2In “Eligibility” read each requirement against your current status, then press “Continue”.
- 3In “Fees” choose “Pay the pro-rata difference now” or “New fee at next renewal”.
- 4In “Documents”, verified files from your vault are attached automatically; upload only what's missing.
- 5In “Review” check “From”, “To” and “Due now”, and tick the confirmation box.
- 6Press submit (or “Submit & continue to payment” if a difference is due), then “Track request”.
Apply before meeting every requirement
- 1If you see “You meet X of Y requirements”, note the expected date for full eligibility.
- 2Write your key achievements in “Justification for exceptional review” (at least 20 characters).
- 3Continue; “Review type: Exceptional review” will show at the end.
What's on the screen
- “Choose the target category”
- Tiles for your current and available categories (“Upgrade” or “Lateral change”) with met-requirement counts.
- “Quick comparison”
- A table comparing annual fee, CPD hours, designation and review time.
- “Fee difference & policy”
- “Current fee”, “New fee”, “Days remaining” and “How we calculated it”.
- “Supporting documents”
- Upload fields that reuse what's already in your vault.
- “Review & submit”
- A summary before sending, with “Fee policy” and “Due now”.
- “What stays the same and Category history”
- Your number, hours and credentials stay the same, alongside your earlier categories.
Status meanings
- SubmittedYour category change was received and has a reference number.
- Awaiting paymentWaiting for the pro-rata payment if you chose to pay now.
Tips
- The result is advisory; the final decision rests with the review committee.
- Prepare your files in Documents beforehand to breeze through the upload step.
/portal/benefitsBenefits & referrals
All your membership benefits and partner offers, plus the referral programme that discounts your renewal for each colleague who joins.
Who uses it?
Members who want the most from their membership or want to invite colleagues.
Features covered
Related journeys
Related screens
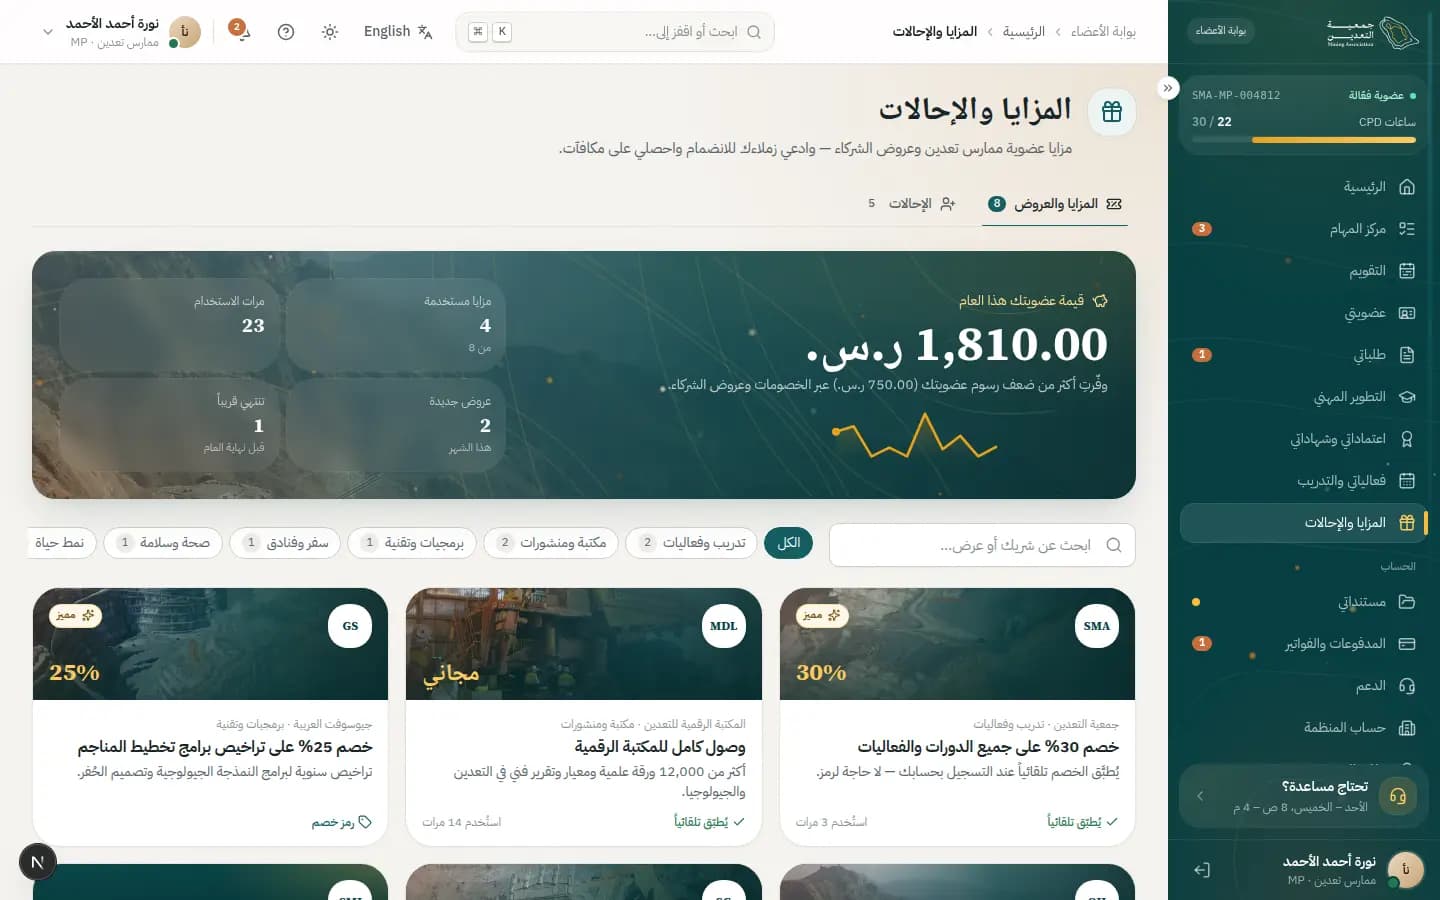
How to
Use an offer
- 1In the “Benefits & offers” tab, search “Search a partner or offer…” or pick a category chip.
- 2Open an offer to read “How to redeem”, “Terms” and “Valid until”.
- 3If it has a code press “Reveal code” then “Copy”; if “Auto-applied” you need nothing.
- 4After using it press “I used this benefit” so it counts in your value report.
Invite a colleague
- 1Open the “Referrals” tab to find the “Member referral programme”.
- 2Copy your link or share it by “WhatsApp”, “Email” or show the “QR code”.
- 3Or type the “Colleague's email” under “Invite directly” and press “Send”.
- 4Follow your invite in “Referral history” and your reward in “Your rewards”.
What's on the screen
- “Your membership value this year”
- Total saved, with “Benefits used”, “Redemptions”, “New offers” and “Expiring soon”.
- “Benefits & offers”
- Partner cards with “Featured”, “Promo code” and “Auto-applied” badges.
- “Fellows only”
- An offer reserved for a higher category; the “Upgrade” button helps you check eligibility.
- “Referrals”
- Your link, QR, direct invite and the “Invited” / “Joined” counters.
- “Referral history”
- A table of colleague, invite date, status and reward.
Tips
- Always press “I used this benefit” so you know what you really saved.
- A referral is credited to you when the account is created via your link or invite.
/portal/organizationOrganization account
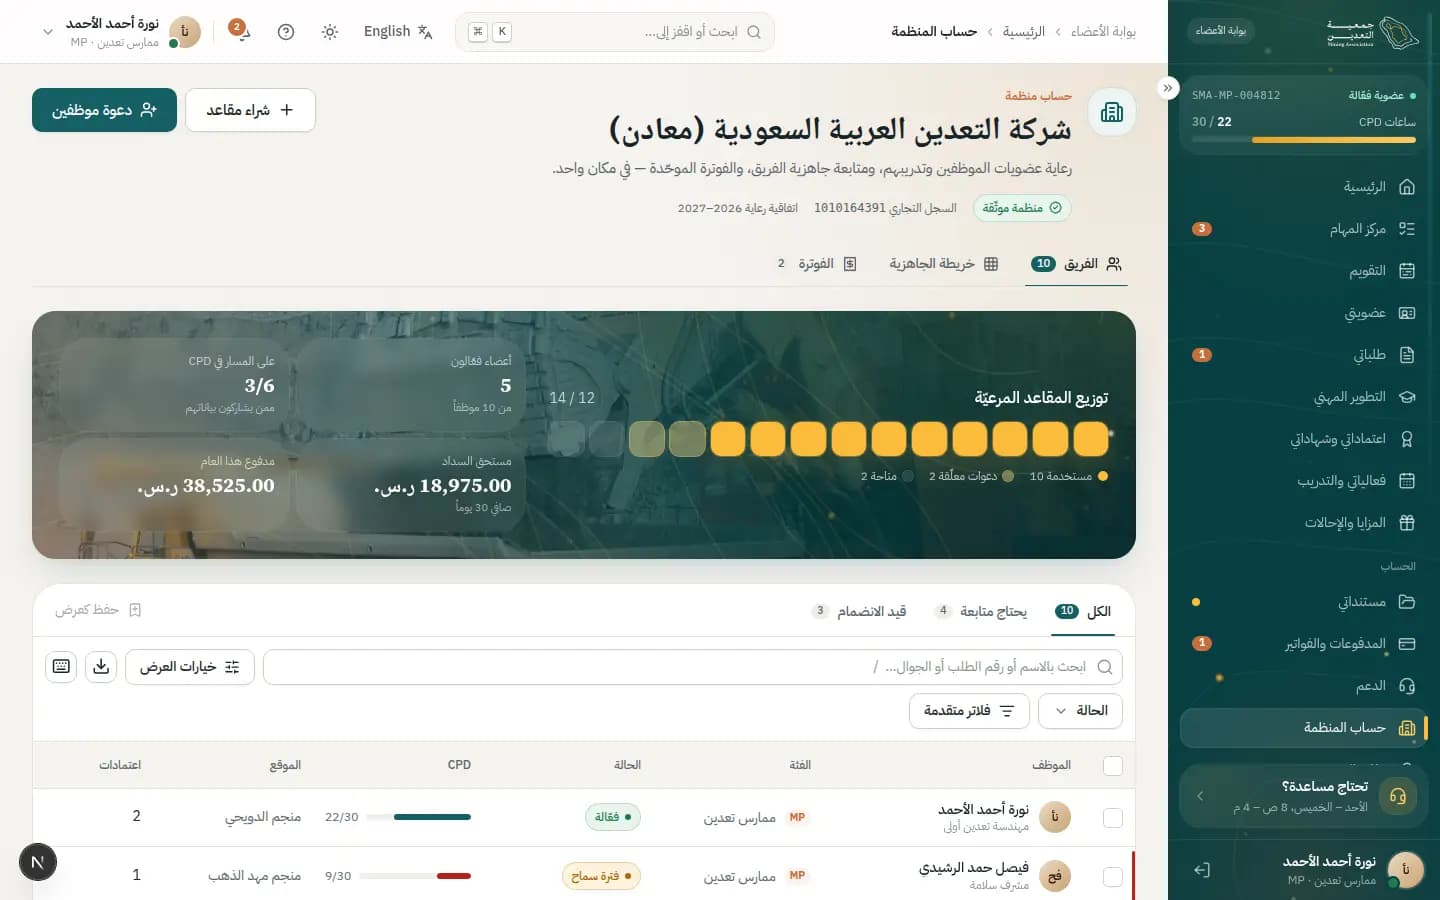
The organization account for those who sponsor staff memberships: invite them, track team readiness, and use consolidated PO invoices.
Who uses it?
An organization admin (e.g. training or HR lead) who manages employee seats and invoices.
Features covered
Related journeys
Related screens
How to
Invite employees
- 1Press “Invite employees” at the top.
- 2Choose “By email” and enter “Email addresses” separated by commas or new lines, or a “CSV file” with name, email and category columns.
- 3Choose the “Sponsored category” and make sure you don't exceed the available seats.
- 4Press “Import & send”; invites appear under “Pending invitations” where you can “Resend” or “Revoke”.
Check team readiness
- 1Open the “Readiness map” tab.
- 2Read each cell's colour: “On track”, “Needs a push” , “Behind” or “Not shared”.
- 3From the “Team” tab open an employee and press “Send reminder” or “Book a training seat”.
Pay an invoice and get the statement
- 1Open the “Billing” tab and review “Organization invoices” (invoice, PO, due, amount).
- 2Open the invoice, then press “Pay invoice”.
- 3For the full picture press “Download statement PDF”.
What's on the screen
- “Verified organization”
- Name, verification badge and CR number, with “Buy seats” and “Invite employees”.
- “Top figures”
- “Active members”, “On track for CPD”, “Outstanding” and “Paid this year”.
- “Team”
- Employee table with category, status, CPD and site, filterable by “Needs attention” and “Onboarding”.
- “Sponsored seat allocation”
- How many seats are used, free and pending.
- “Readiness map”
- A grid comparing “Membership”, “CPD”, “Credentials” and “Attendance” per employee.
- “Billing”
- Invoices, the statement, “Billing details” and “Org admins”.
Status meanings
- PendingAn invitation waiting for the employee to accept and apply.
- PaidAn invoice that has been paid.
- OverdueAn invoice past its due date.
Tips
- CPD data shows only for employees who agreed to share it; otherwise you see “Not shared”.
- If an employee leaves they keep their personal membership; sponsorship ends at the next renewal.
/portal/applyNew membership application
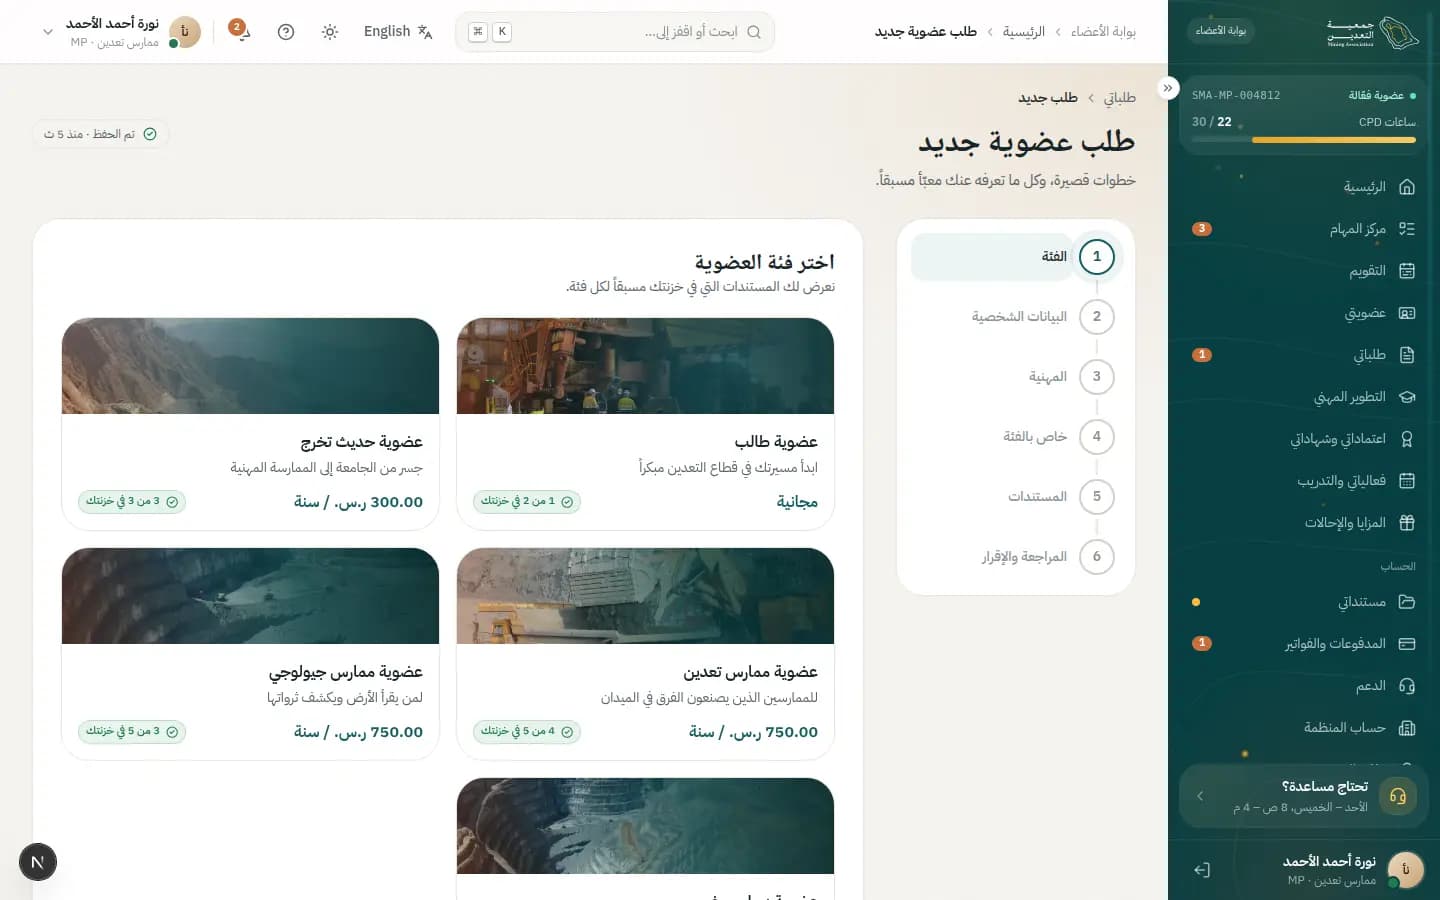
A six-step wizard for a new or upgrade membership application; it pre-fills what we know about you and lets you attach documents from your vault.
Who uses it?
Members or account holders who want to join a membership category or upgrade to a higher one.
Features covered
Related journeys
Related screens
How to
Submit a membership application
- 1In the “Category” step pick one under “Choose your category”, then press “Next”.
- 2Review the pre-filled “Personal details”, edit only what changed, then press “Next”.
- 3Fill “Professional details” such as “Employer”, “Job title” and “Years of experience”, then the “Category details” questions.
- 4In “Documents” press “Attach all from vault”, or “From vault” / “Upload” for each document.
- 5In “Review & declare” check the “Readiness check” and press “Edit” to fix any section.
- 6Tick the declaration, press “Submit application”, and keep the reference number shown.
Attach a document from your vault
- 1In “Documents”, find an item marked “Available in your vault”.
- 2Press “From vault” to attach it in one tap.
- 3To replace it press “Remove”, then “Upload” to pick a new file.
What's on the screen
- “Step bar”
- The six steps: “Category”, “Personal”, “Professional”, “Category details”, “Documents” and “Review & declare”.
- “Choose your category”
- Category cards with the annual fee and how many required documents you already have in your vault.
- “from your profile”
- A tag beside fields pre-filled from your profile.
- “Documents”
- The category's required documents with “From vault”, “Upload” and “Remove”, plus “Supporting documents (optional)”.
- “Readiness check”
- Lists incomplete sections with a “Complete” button to jump there; shows “Ready to submit” when done.
- “Back / Next / Submit application”
- Navigation at the bottom of the wizard, with the “Incl. VAT” total for paid categories.
Status meanings
- SubmittedYour application arrived and is waiting for document review.
- Under reviewA membership officer is reviewing your documents within the category's working days.
Tips
- “This field is required” appears under any empty mandatory field when you press “Next”.
- After submitting, “What happens next” shows the stages; follow up via “Track my requests”.
/portal/requestsMy requests
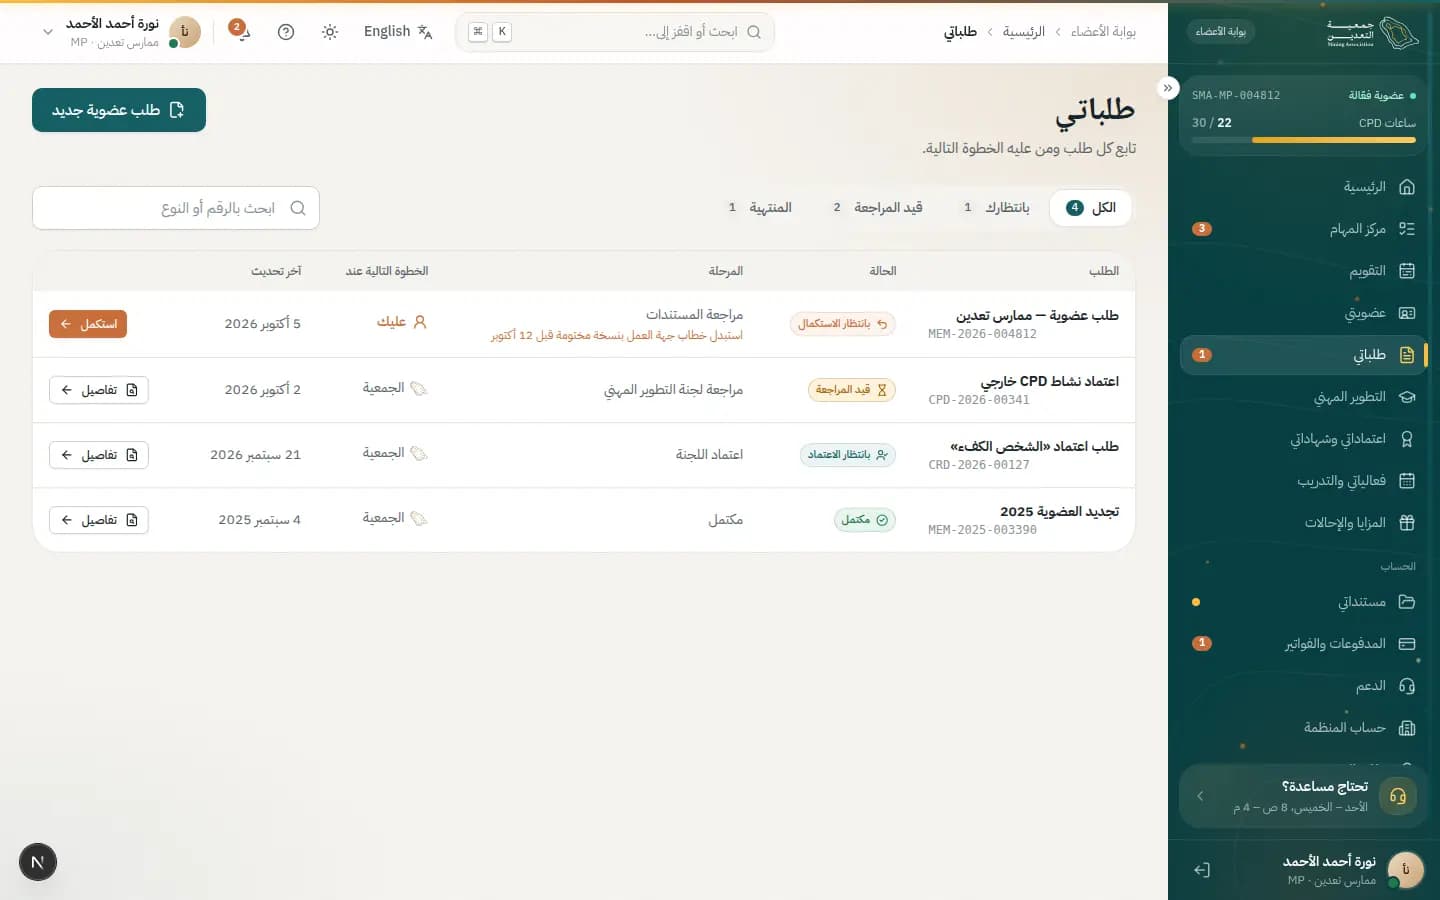
A list of all your requests with each one's status, stage and who owns the next step — you or the association.
Who uses it?
Members tracking their requests, especially one waiting on them — like Noura's MEM-2026-004812.
Features covered
Related journeys
How to
Find requests waiting on you
- 1Press the “Needs you” tab.
- 2Check the “Next step with” column; “You” marks requests that need your action.
- 3Press “Fix now” to open the request and complete what's needed.
Search for a request
- 1Type the number or type in “Search by number or type”.
- 2Pick a tab: “All”, “In review” or “Closed”.
- 3Press “Details” next to the request to see its full timeline.
Start a new application
- 1Press “New application” at the top.
- 2Complete the wizard steps on the New membership application screen.
What's on the screen
- “Tabs”
- “All”, “Needs you”, “In review” and “Closed”, each with a count.
- “Search by number or type”
- Filters the list instantly by request number or type.
- “Requests table”
- Columns “Request”, “Status”, “Stage”, “Next step with” and “Updated”.
- “You / Association”
- A tag showing who owns the next step on each request.
- “Fix now / Details”
- Opens the request detail; shows “Fix now” when the action is yours.
Status meanings
- Needs correctionThe reviewer asked for a correction; the next step is yours before the deadline.
- Under reviewThe association is reviewing it; nothing needed from you now.
- Awaiting approvalReview is done and the request awaits committee approval.
- CompletedThe request is finished and listed under “Closed”.
- CancelledThe request was withdrawn or cancelled.
Tips
- If “No matching requests” appears, change the filter or clear the search.
- Keep an eye on “Needs you” — missing a correction deadline can delay the decision.
/portal/requests/MEM-2026-004812Request detail + corrections
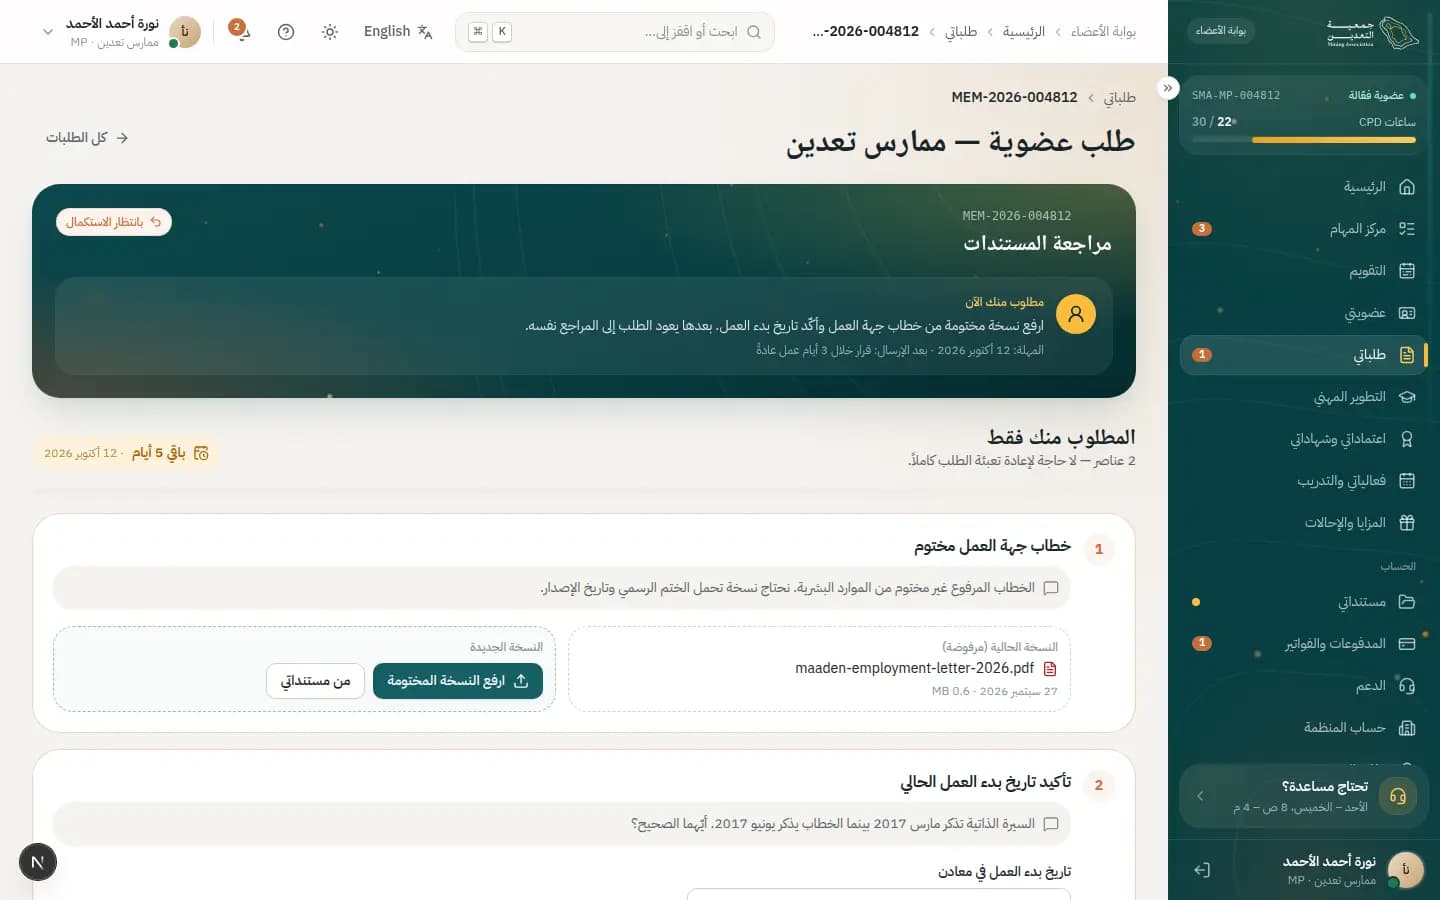
One request in detail — status, timeline, team messages, documents and payments — with an “Only what's requested” section to send a correction without refilling the whole application.
Who uses it?
Members asked for a correction — like Noura, whose reviewer needs a stamped employer letter and her start date confirmed before 12 Oct.
Features covered
Related journeys
Related screens
How to
Send the requested correction
- 1Go to “Only what's requested”, read the reviewer's note on each item and note the “… days left”.
- 2For the employer letter press “Upload stamped copy” or “From my vault”; the “New version” appears next to “Current version (rejected)”.
- 3For the start date pick the correct date, then press “Confirm this date”.
- 4Make sure “Everything is ready to send.” shows, then press “Resubmit for review”.
- 5“Correction sent” appears and the request status changes to “Under review”.
Withdraw the request
- 1Press “Withdraw request” at the bottom.
- 2Read the “Withdraw this request?” notice — the request closes and paid fees aren't refunded.
- 3Press “Yes, withdraw” to confirm or “Keep it” to keep the request.
What's on the screen
- “Request header”
- Request number, status, next step and expected timing, with an “All requests” button to go back.
- “Only what's requested”
- Only the correction items, a progress count, and “Resubmit for review”, enabled once all are done.
- “Request timeline”
- Everything that happened in order: submission, payment, assignment, correction request.
- “Messages”
- Messages exchanged with the membership officer about the request.
- “Documents”
- The request's documents and each one's status.
- “Payments”
- Fees linked to the request, with an “All payments” link.
- “Withdraw request”
- Closes the request after confirmation; you can apply again later.
Status meanings
- Needs correctionThe reviewer is waiting for your correction before the deadline; also shown on the rejected document.
- Under reviewYou resubmitted and your reply reached the reviewer; you'll be notified of the decision.
- CancelledYou withdrew the request; you can start a new one anytime.
- PaidThe application fee is paid, in the “Payments” section.
Tips
- No need to refill the whole application — just complete the requested items.
- The same reviewer checks your correction, usually within 3 working days.
- Press “Replace” to swap the uploaded file before resubmitting.
/portal/cpdCPD
Your CPD record: where you stand in the current cycle, per-type caps, a gap planner, your activity ledger, plus logging external activities and exporting the official transcript.
Who uses it?
Members who must complete required CPD hours before the cycle ends, or log an activity attended outside the association.
Features covered
Related journeys
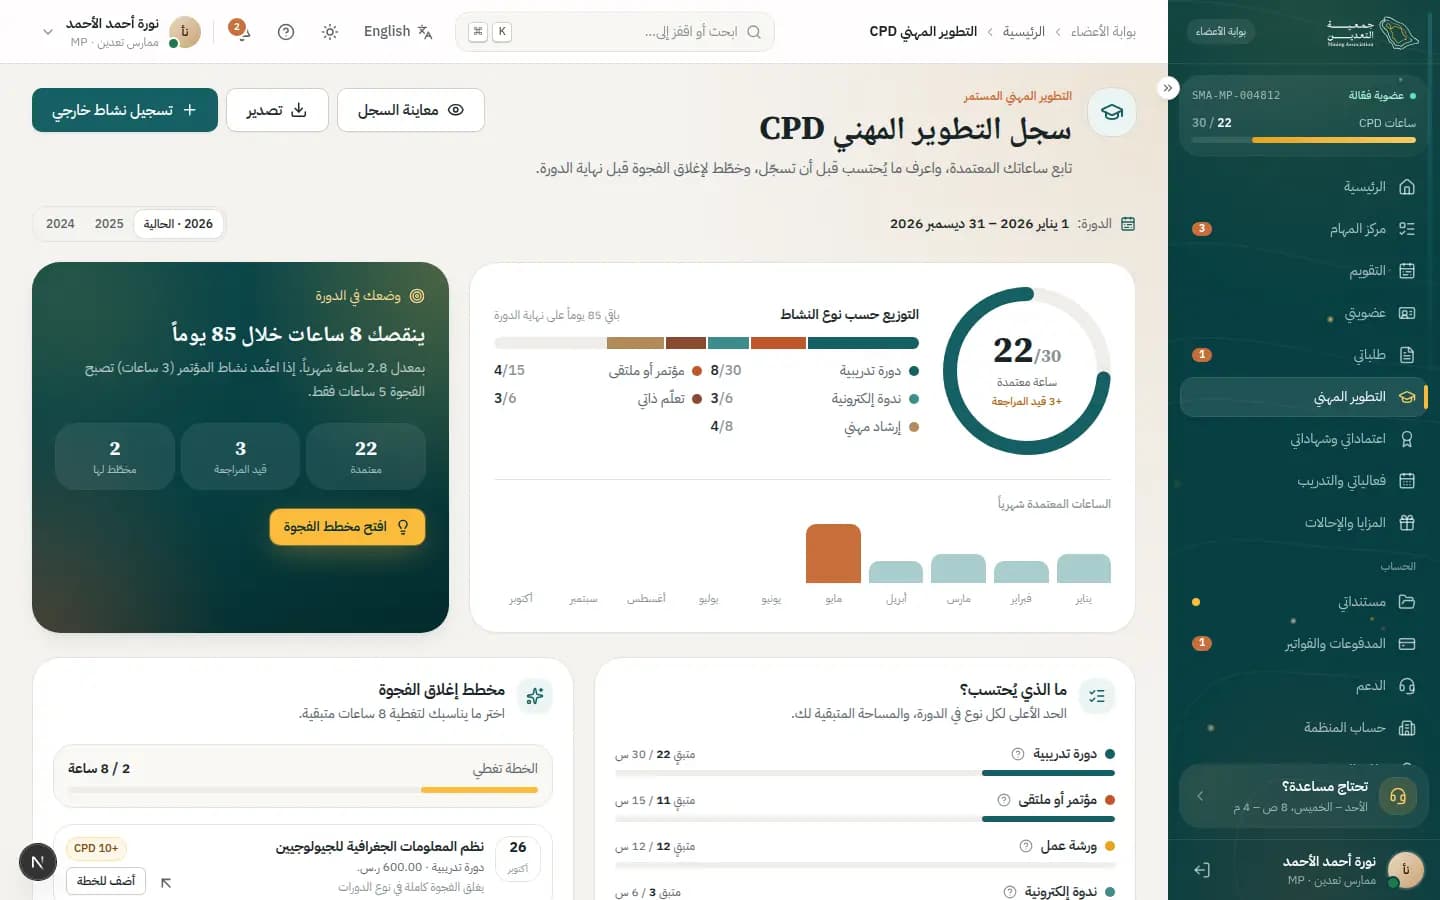
How to
Log an external CPD activity
- 1Press “Log external activity” at the top.
- 2Fill “Activity title”, “Provider” and “Activity type”, noting the cap and room left for that type.
- 3Set “Start date”, “End date” and “Hours”.
- 4Attach the required “Evidence” and write “What did you learn?” in two sentences.
- 5Press “Submit for review”, or “Save draft” to finish later.
Build a plan to close the gap
- 1Press “Open gap planner” in the “Where you stand” panel.
- 2Press “Add” on the suggested events that suit you.
- 3Watch “Your plan covers” until “Your plan completes the cycle” appears.
- 4Press “Event details” to register.
Download the official transcript
- 1Press “Preview transcript” to see the “Official CPD transcript preview”.
- 2Press “Download PDF”, or choose from “Export”: “Signed PDF” or “Excel sheet”.
Handle a rejected activity
- 1Filter the “Activity ledger” and open the rejected activity.
- 2Read the “Reason for rejection” or “Reviewer note”.
- 3Press “Appeal with new evidence” and attach proof, or “Ask support”.
What's on the screen
- “Cycle”
- Picks the cycle shown; a closed cycle is read-only and accepts no new activities.
- “Where you stand”
- Hours “Approved”, “In review” and “Planned”, how many you still need and when the cycle ends.
- “What counts”
- Per-type cap for the cycle, the evidence needed and the room you have left.
- “Gap planner”
- Suggested events you add to your plan to cover the remaining hours.
- “Activity ledger”
- Every activity with its status, filterable by status, “All types” and “All sources” (Association/External).
- “Export / Preview transcript”
- Downloads the official transcript as a signed PDF or Excel, verifiable by code.
Status meanings
- ApprovedThe activity is approved and its hours credited.
- Under reviewThe activity is with the committee for review.
- Needs correctionThe reviewer needs more evidence or a change before approval.
- RejectedThe activity was rejected; read the reason and you can appeal with new evidence.
- DraftA draft not yet sent; press “Finish & submit”.
Tips
- Association activities are credited automatically on attendance — don't log them manually.
- The CPD committee reviews external activities within 5 working days.
- Once a type's cap is reached extra hours won't count this cycle; the log form warns you in advance.
/portal/credentialsCredentials & certificates
Shows your professional credentials, your path to the next grade and all your verifiable certificates, with an eligibility check before applying for any credential.
Who uses it?
Members applying for a professional credential, tracking a credential renewal, or sharing a certificate with an employer.
Features covered
Related journeys
Related screens
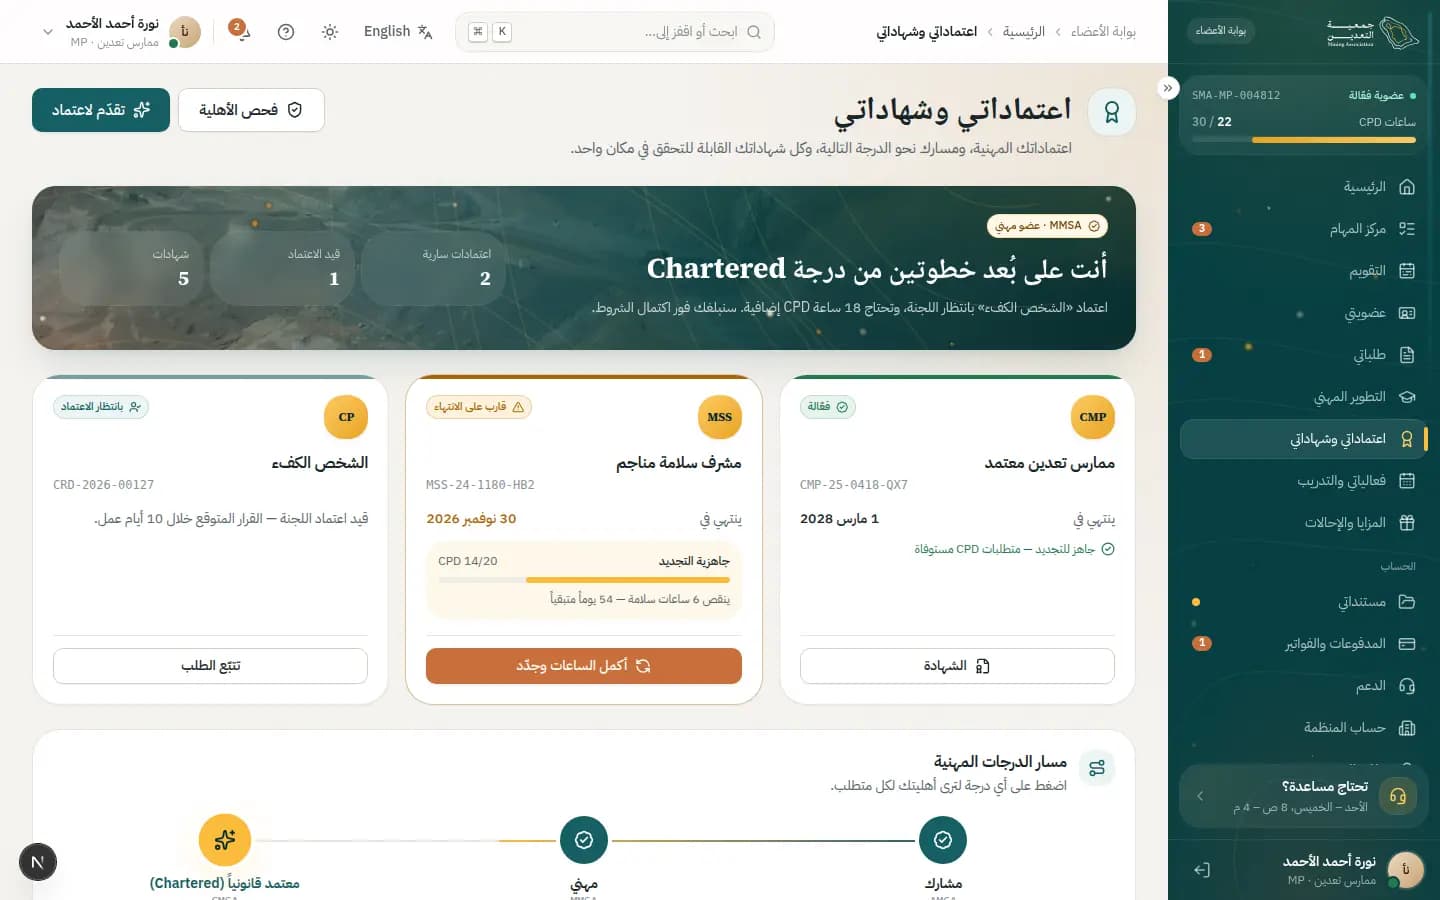
How to
Check eligibility and apply for a credential
- 1Press “Check eligibility” or “Apply for a credential” at the top.
- 2Pick the credential in the “Eligibility pre-check” dialog; its validity and yearly CPD hours appear.
- 3Review the result: how many requirements are met and which are missing.
- 4Press “Start application” to save a draft in My requests, or “Close”.
Share or verify a certificate
- 1Go to “My certificates”.
- 2Press “Share” on the certificate, then “Copy” to copy the verification link.
- 3Press “Open verification page” to see what others see, or have them scan the QR.
- 4Press “Download PDF” to save it, or “Download all” for every certificate.
Renew a credential nearing expiry
- 1Check “Renewal readiness” on the credential card; it shows missing hours and days left.
- 2Press “Finish hours & renew” to go complete the hours.
What's on the screen
- “Grade summary”
- Your current grade and how many steps to the next one.
- “Active / Pending / Certificates”
- Counters of your credentials by state.
- “Credential cards”
- Each shows “Expires”, renewal readiness, and “Track request” for those with the committee.
- “Professional pathway”
- Select a grade to see your eligibility per requirement, tagged “Achieved” or “Next”.
- “My certificates”
- Each certificate has a public-verification QR, “Issued” and “Expires” dates, with “Download PDF” and “Share”.
Status meanings
- ActiveThe credential is valid and publicly verifiable.
- Awaiting approvalThe application is with the committee; decision expected within 10 working days.
- Expiring soonThe credential is nearing expiry; complete the required CPD hours and renew.
- ExpiredThe credential has expired and is no longer valid.
Tips
- The “Eligibility pre-check” compares your profile against the rules before you pay anything — use it first.
- You can add a certificate to LinkedIn's Licenses & certifications section from the share button.
/portal/credentials/applyApply for a credential
Apply for a professional credential in four steps: choose it, auto-check eligibility, fill in the application, then review and pay.
Who uses it?
Members who want a verified professional credential, such as Blasting Engineering.
Features covered
Related journeys
Related screens
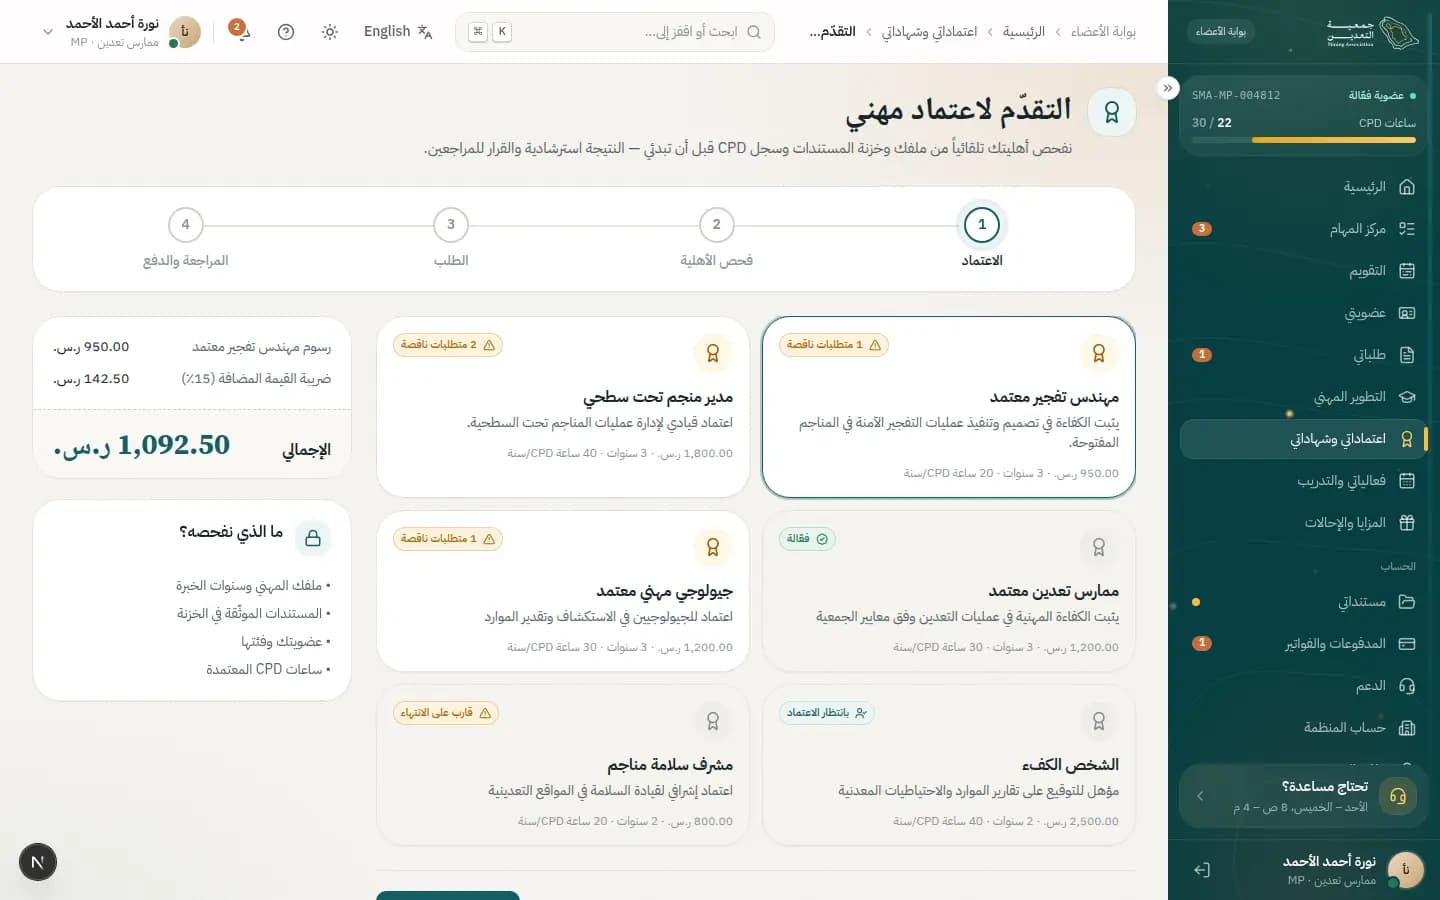
How to
Apply for a credential
- 1In the “Credential” step pick a card; a “Likely eligible” badge means you qualify.
- 2Press “Check eligibility”; we check your profile, documents and CPD automatically.
- 3In “Application” enter the “SCE membership number” and “Grade” and upload the “Licence copy”.
- 4Add “Referees” with name and email via “Add referee” and write the experience summary.
- 5In “Review & pay” choose the payment method, tick the confirmation and press “Submit application”.
When you see “Not eligible yet”
- 1Read the suggested actions under the result and complete them (e.g. upload a document or add CPD hours).
- 2Re-run “Check eligibility”, or press “Remind me” and we'll tell you once you're eligible.
What's on the screen
- “Credential cards”
- Name, description, fee, validity and yearly CPD hours, plus the blocking reason if any.
- “Pre-check”
- An advisory result per requirement with an action to close any gap.
- “Professional licence”
- SCE number, grade and licence copy.
- “From your vault”
- Verified documents attached automatically, no re-upload.
- “Referees”
- Each referee gets a secure link to submit a structured reference.
- “Application summary and Payment”
- “Pay online now” or “Invoice my employer”, and the stages: documents, references, interview, committee.
- “What we check”
- A side list of what's checked: profile, documents, membership, CPD hours.
Status meanings
- SubmittedYour credential application was sent and review begins.
- Under reviewThe team is verifying documents and references.
Tips
- Update your vault early and line up referees — they are usually the slowest part.
/portal/eventsMy events & learning
Gathers your tickets, upcoming and past events, waitlists and online learning, with the certificates and CPD hours each one earns.
Who uses it?
Members registered for events or courses, waiting for a seat, or evaluating an event to get its certificate.
Features covered
Related journeys
Related screens
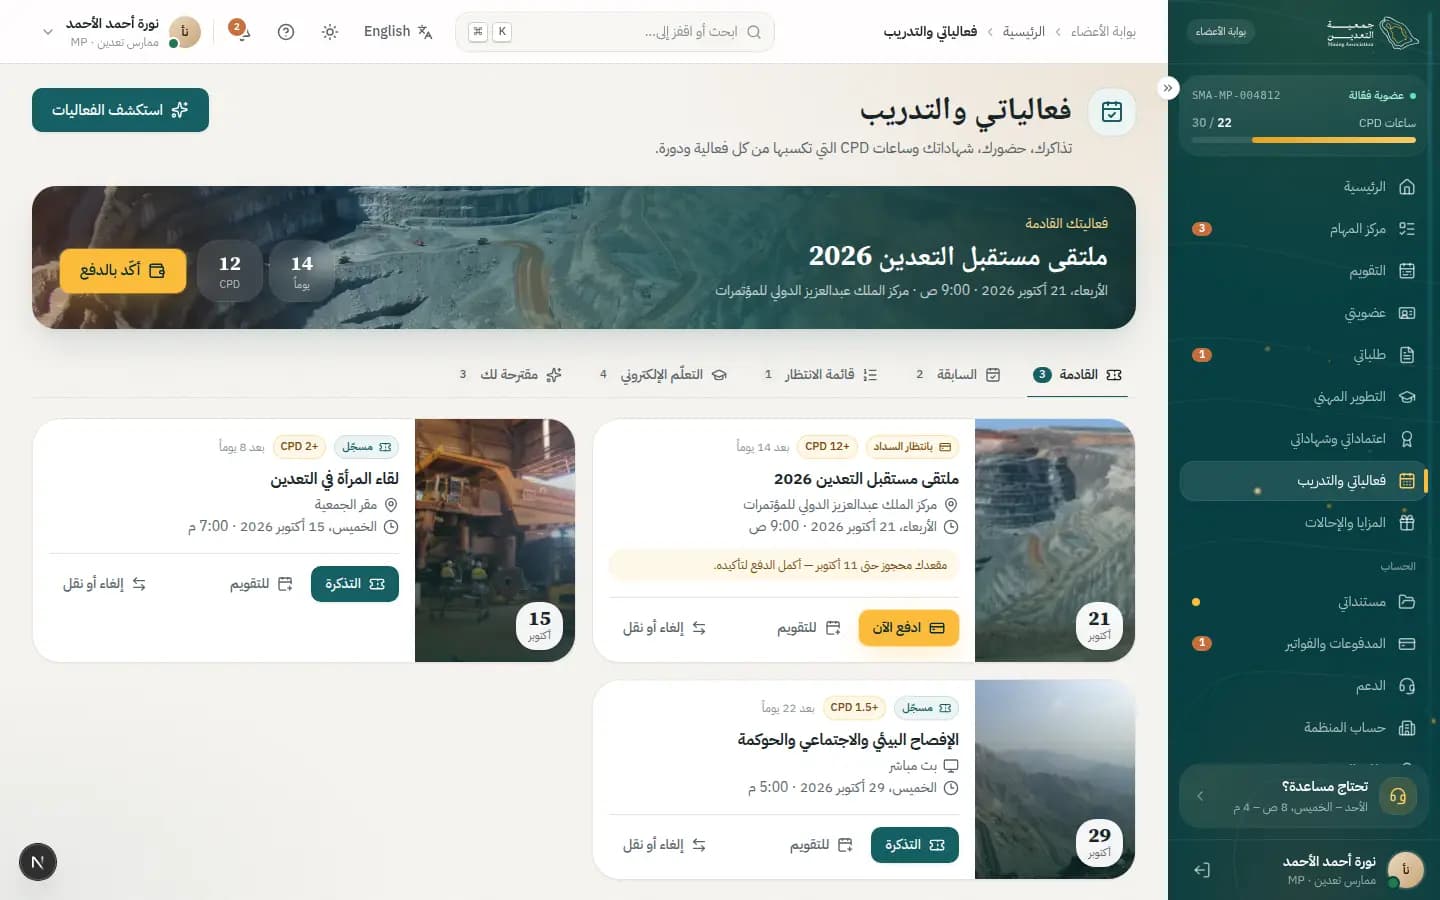
How to
Confirm a held seat by paying
- 1In “Upcoming”, find the event showing “Seat held until 11 Oct”.
- 2Press “Pay now” or “Pay to confirm”.
- 3Complete payment on the secure checkout screen to confirm your seat.
View your ticket and add it to your calendar
- 1Press “Ticket” on the upcoming event.
- 2Show it at the door, or press “Download PDF” or add it to Apple Wallet.
- 3Press “Calendar” and choose one, e.g. “Apple / .ics file”.
Cancel or transfer your seat
- 1Press “Cancel or transfer” to open “Manage your seat”.
- 2To transfer press “Transfer seat”, enter the “Recipient's membership no. or email”, then “Transfer”.
- 3To cancel review “Amount paid” and “Refund”, then press “Cancel registration” and “Yes, cancel my registration”.
Evaluate an event and get your certificate
- 1In “Past”, press “Evaluate” on the event.
- 2Choose your “Overall rating” and answer “Was the content useful for your work?”.
- 3Optionally add “Notes for the organisers”, then press “Submit & get certificate”.
- 4When “Your certificate is issued” appears, press “View certificate” or “CPD ledger”.
What's on the screen
- “Your next event”
- Your nearest event with a countdown and “Ticket” or “Pay to confirm” buttons.
- “Upcoming”
- Your registered events with “Ticket”, “Cancel or transfer” and “Calendar”.
- “Past”
- Events you attended with “Attendance”, credited hours and “Certificate” or “Evaluate”.
- “Waitlist”
- Your position; when a seat opens “Accept seat” or “Decline” appears, and you can “Leave waitlist”.
- “Online learning”
- Courses from linked accounts with progress, “Continue”, and “Claim … CPD hours” on completion.
- “Recommended”
- Events picked for your specialty and CPD gap, with a “Browse events” link.
Status meanings
- RegisteredYou're registered and your ticket is ready.
- Awaiting paymentThe seat is held until you complete payment.
- WaitlistedYou're on the waitlist; we'll tell you as soon as a seat opens.
- AttendedYour attendance is recorded; evaluate the event to get the certificate.
- CompletedThe event or course is complete and its hours credited.
Tips
- When a waitlist seat opens accept it before the hold ends, then pay within 24 hours to confirm it.
- Cancelling is final — your seat goes to the waitlist immediately and can't be restored.
- CPD hours for association events are credited automatically once your attendance is recorded.
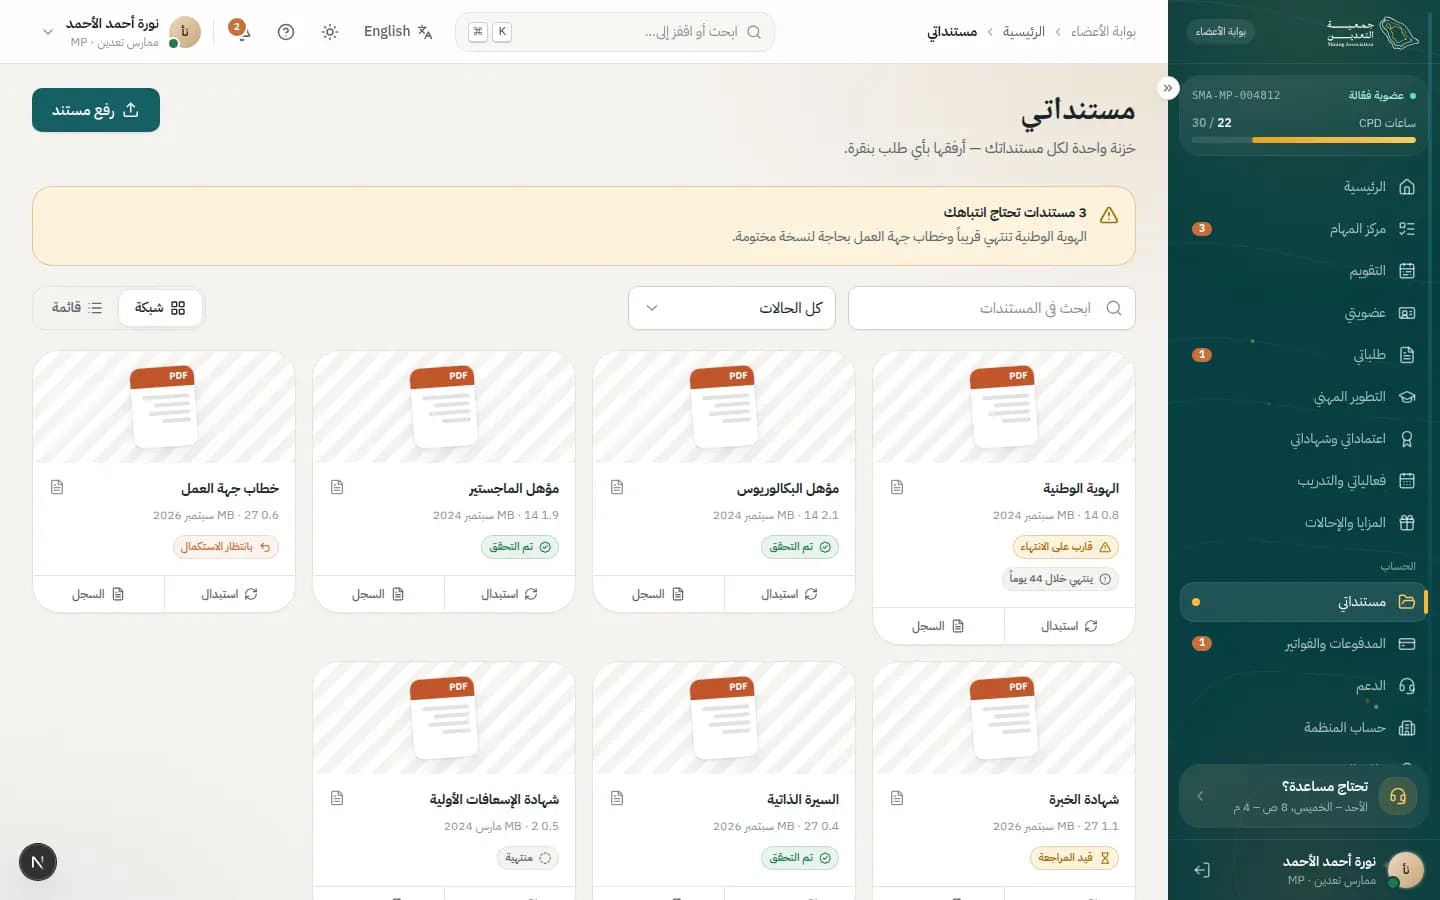
/portal/documentsMy documents
One vault for all your documents: upload once, attach to any request in one tap, and follow their status, expiry dates and versions.
Who uses it?
Members uploading a new document or updating an expired one — like Noura, who needs a stamped employer letter and an updated National ID.
Features covered
Related journeys
How to
Upload a new document
- 1Press “Upload document” at the top.
- 2Choose the “Document type”, e.g. “National ID” or “Employer letter”.
- 3Enter “Issue date” and “Expiry date” if any (optional).
- 4Attach the “File” and press “Save to vault”; it's scanned automatically before saving.
Upload a new version of a document
- 1Click the document to open its preview.
- 2Review “Status”, “Expires”, “Version history” and “Used in”.
- 3Press “New version” and upload the updated file.
Find documents that need attention
- 1Read the “… documents need attention” alert at the top.
- 2Pick “Expiring soon” or “Needs correction” from the status filter.
- 3Type in “Search documents” to narrow results, or press “Reset” to clear filters.
What's on the screen
- “Upload document”
- Opens the upload dialog to choose type, dates and file.
- “Attention alert”
- Counts documents that are expired, expiring or need correction.
- “Search and status filter”
- “Search documents” and a list starting with “All statuses”.
- “Grid / List”
- Switches how documents are displayed.
- “Document preview”
- Document details with “Download”, “New version”, “Delete” and “Rotate”, plus “Version history” and “Used in”.
Status meanings
- VerifiedThe team verified the document; it can be used in requests.
- Under reviewThe document was uploaded and is under automated or manual review.
- Expiring soonThe document is close to its expiry; upload a new version.
- ExpiredThe document has expired and isn't accepted for new requests.
- Needs correctionThe document needs fixing, e.g. a stamped copy of the employer letter.
Tips
- Enter the “Expiry date” when uploading so the system warns you before it expires.
- Vault documents appear automatically when you apply, ready to attach in one tap.
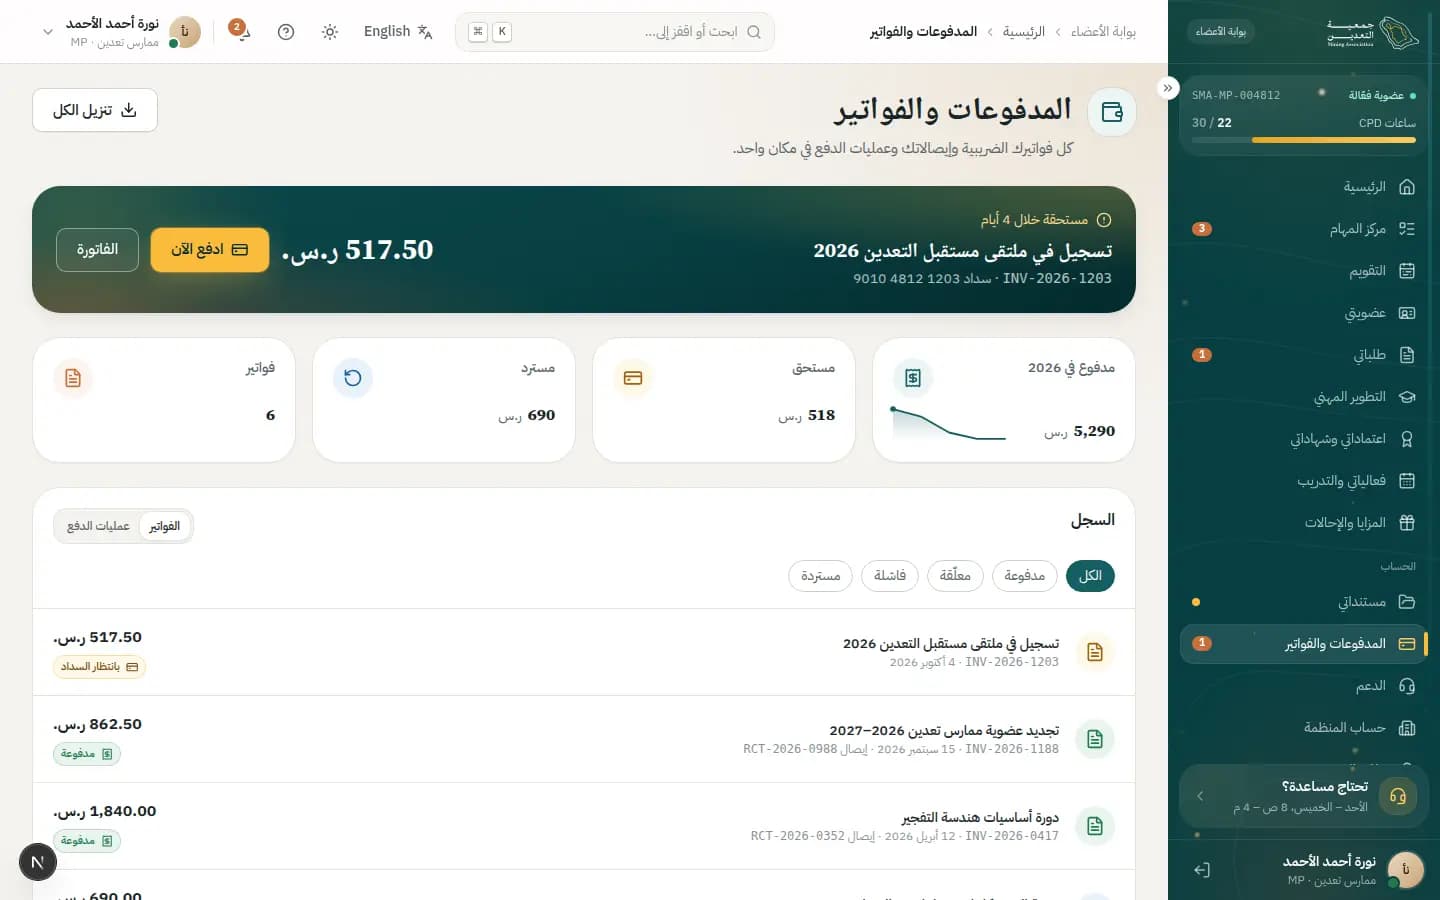
/portal/paymentsPayments & invoices
All your tax invoices, receipts and payment attempts in one place, with a notice for due invoices and retry for failed payments.
Who uses it?
Members paying a due invoice, needing an invoice or receipt for their employer, or following a failed payment or refund.
Features covered
Related journeys
Related screens
How to
Pay a due invoice
- 1Review the due invoice card at the top and its “Due in … days”.
- 2Press “Pay now” to go to secure checkout, or use the “SADAD” number shown.
- 3Press “Invoice” to see its details before paying.
Download an invoice or receipt
- 1In the “History” panel choose “Invoices”.
- 2Click the invoice to open “Invoice preview”.
- 3Press “Download PDF” or “Print”. To get every invoice at once press “Download all”.
Retry a failed payment
- 1Press the “Failed” filter; the list switches to “Payments”.
- 2Review the payment, its method, date and amount.
- 3Press “Retry” to pay again.
What's on the screen
- “Due invoice”
- A notice of the nearest due invoice with “Pay now” and the “SADAD” number.
- “Year totals”
- “Paid in 2026”, “Outstanding” and “Refunded” in SAR, plus the number of “Invoices”.
- “Invoices / Payments”
- Toggles the “History” panel between tax invoices and payment attempts.
- “Status filter”
- “All”, “Paid”, “Pending”, “Failed” and “Refunded”.
- “Invoice preview”
- A panel showing the tax invoice with “Download PDF” and “Print”.
Status meanings
- PaidThe invoice is paid and its receipt issued.
- Awaiting paymentThe invoice is due and not yet paid.
- FailedThe bank declined and nothing was charged; retry.
- RefundedThe amount was returned to the original payment method.
Tips
- A “Receipt” number appears next to each paid invoice for easy reconciliation with your employer.
- Every failed attempt is logged under “Payments”; nothing is charged when the bank declines.
/portal/payments/checkoutCheckout
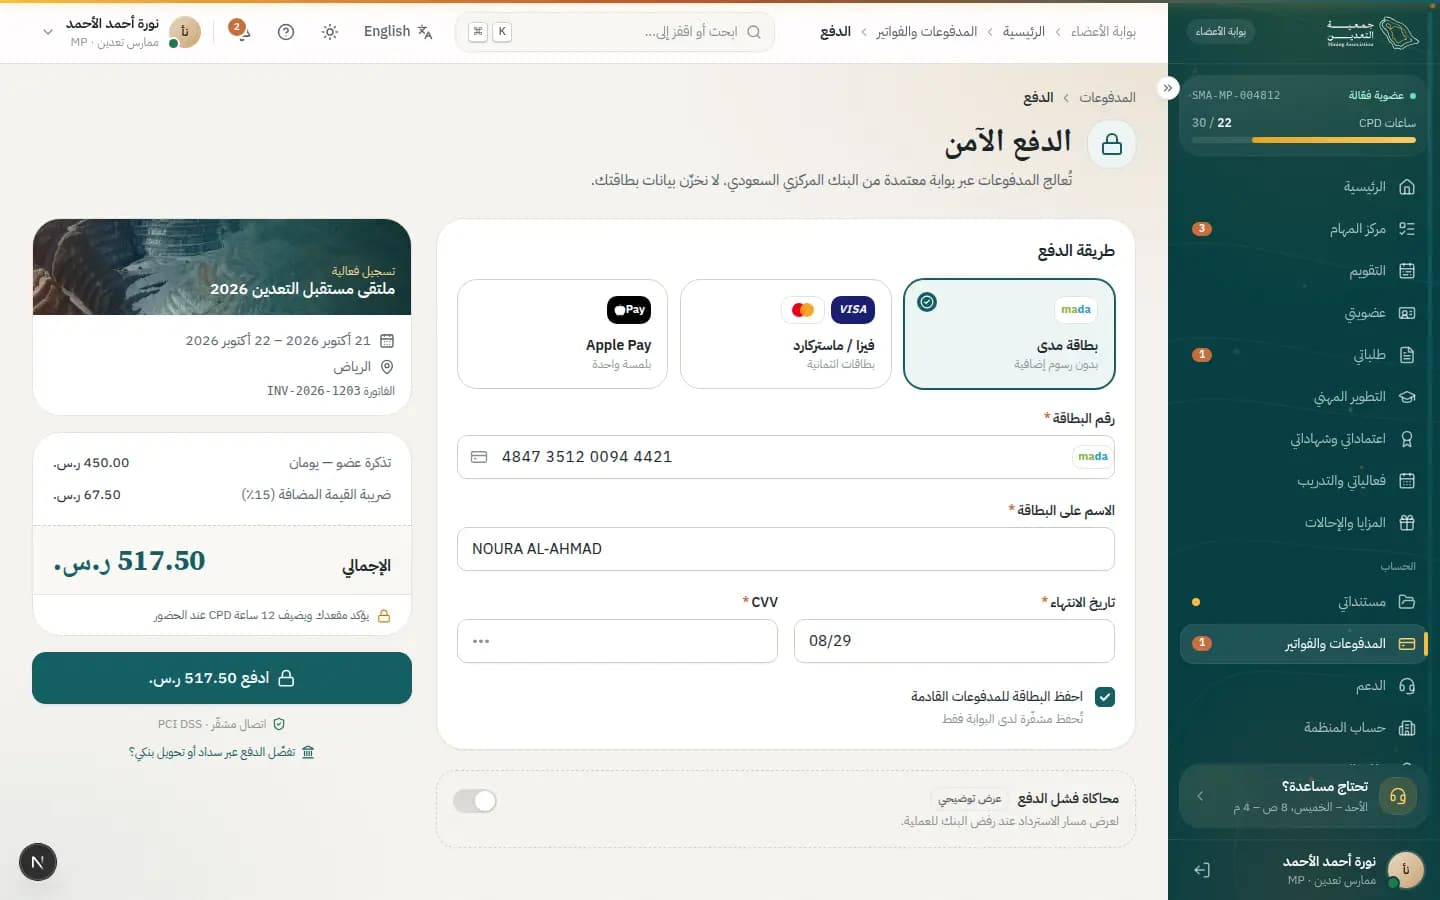
Secure checkout: pick a payment method and pay; if the bank declines it shows the reason and alternatives, with nothing charged.
Who uses it?
Members paying an invoice — like Noura confirming her seat at the Future Mining Forum.
Features covered
Related journeys
Related screens
How to
Pay by card
- 1Review the order summary on the side, e.g. “Event registration” and the “Invoice” number.
- 2Choose the “Payment method”: “mada card” or “Visa / Mastercard”.
- 3Enter the “Card number”, “Name on card”, “Expiry” and the 3 digits on the back.
- 4Optionally tick “Save card for future payments”.
- 5Press “Pay …” and keep the page open until “Payment complete — your seat is confirmed” appears.
What to do when the bank declines
- 1Read “Your bank declined the payment — nothing was charged” and the bank's reason.
- 2Press “Try again” after fixing the details or choosing another card.
- 3Or press “Use Apple Pay”, or pay via SADAD with the invoice number.
- 4If it persists press “Contact support”; your seat stays held until 11 Oct.
Pay with Apple Pay
- 1Choose Apple Pay under “Payment method” (“One touch”).
- 2Press “Pay …” and confirm with Face ID or Touch ID on your device.
What's on the screen
- “Secure checkout”
- Payments go through a SAMA-licensed gateway; your card details aren't stored.
- “Payment method”
- “mada card” with no extra fees, “Visa / Mastercard”, and Apple Pay.
- “Card details”
- “Card number”, “Name on card”, “Expiry” and security code, with the option to save the card.
- “Order summary”
- Item, invoice number, amount and what payment unlocks — e.g. confirms your seat and adds 12 CPD hours on attendance.
- “Prefer SADAD or bank transfer?”
- Shows the “SADAD biller number” to pay from your banking app.
- “Bank decline notice”
- Appears on failure with “Try again”, “Use Apple Pay” and “Contact support”.
Status meanings
- PaidPayment completed and your seat is confirmed.
- FailedThe bank declined and nothing was charged; try another method.
Tips
- The failed attempt is logged in your payment history, so there's no risk of a double charge.
- After success the receipt and ticket arrive by email; press “View receipt” or “Back to my events”.
/portal/notificationsNotifications
All your notifications about requests, payments, CPD, events and security, grouped by date and filterable by type and read state.
Who uses it?
Members following the latest updates on their account and jumping straight to what changed.
Features covered
Related journeys
Related screens
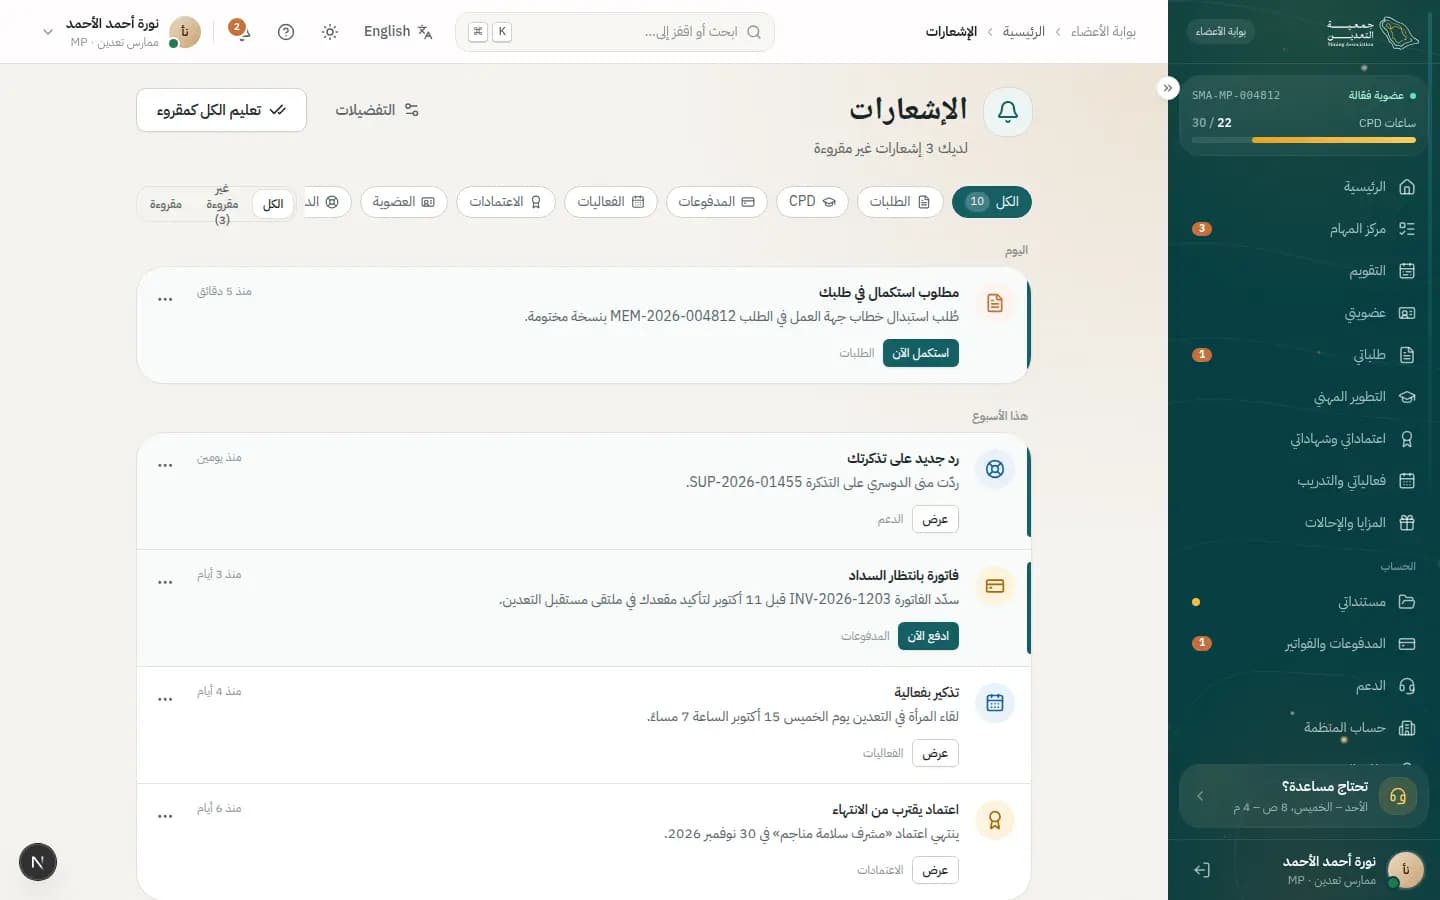
How to
Catch up on unread notifications
- 1Press “Unread” to see only new notifications.
- 2Press “Open” on a notification to go to its screen.
- 3Press “Mark all read” when done; you can “Undo” right away.
Manage a notification or a type
- 1Press “Options” on the notification.
- 2Choose “Mark as read”, “Mark as unread” or “Delete”.
- 3To stop that kind choose “Mute this type”; adjust it later from “Preferences”.
What's on the screen
- “Type filter”
- “All”, “Requests”, “CPD”, “Payments”, “Events”, “Credentials”, “Membership”, “Support” and “Security”.
- “All / Unread / Read”
- Filters by read state, with the unread count.
- “Date groups”
- “Today”, “Yesterday”, “This week”, “This month” and “Earlier”.
- “Mark all read”
- Marks everything read, with undo.
- “Preferences”
- Takes you to notification channel settings.
Tips
- Mandatory notices about your membership always arrive, even if you mute a type.
- Start with the “Requests” filter if you have a request waiting for correction.
/portal/supportSupport
Track your support tickets, talk to member services, and find instant answers in Help center articles.
Who uses it?
Members with a problem or question — e.g. CPD hours not showing or a payment failing.
Features covered
Related journeys
Related screens
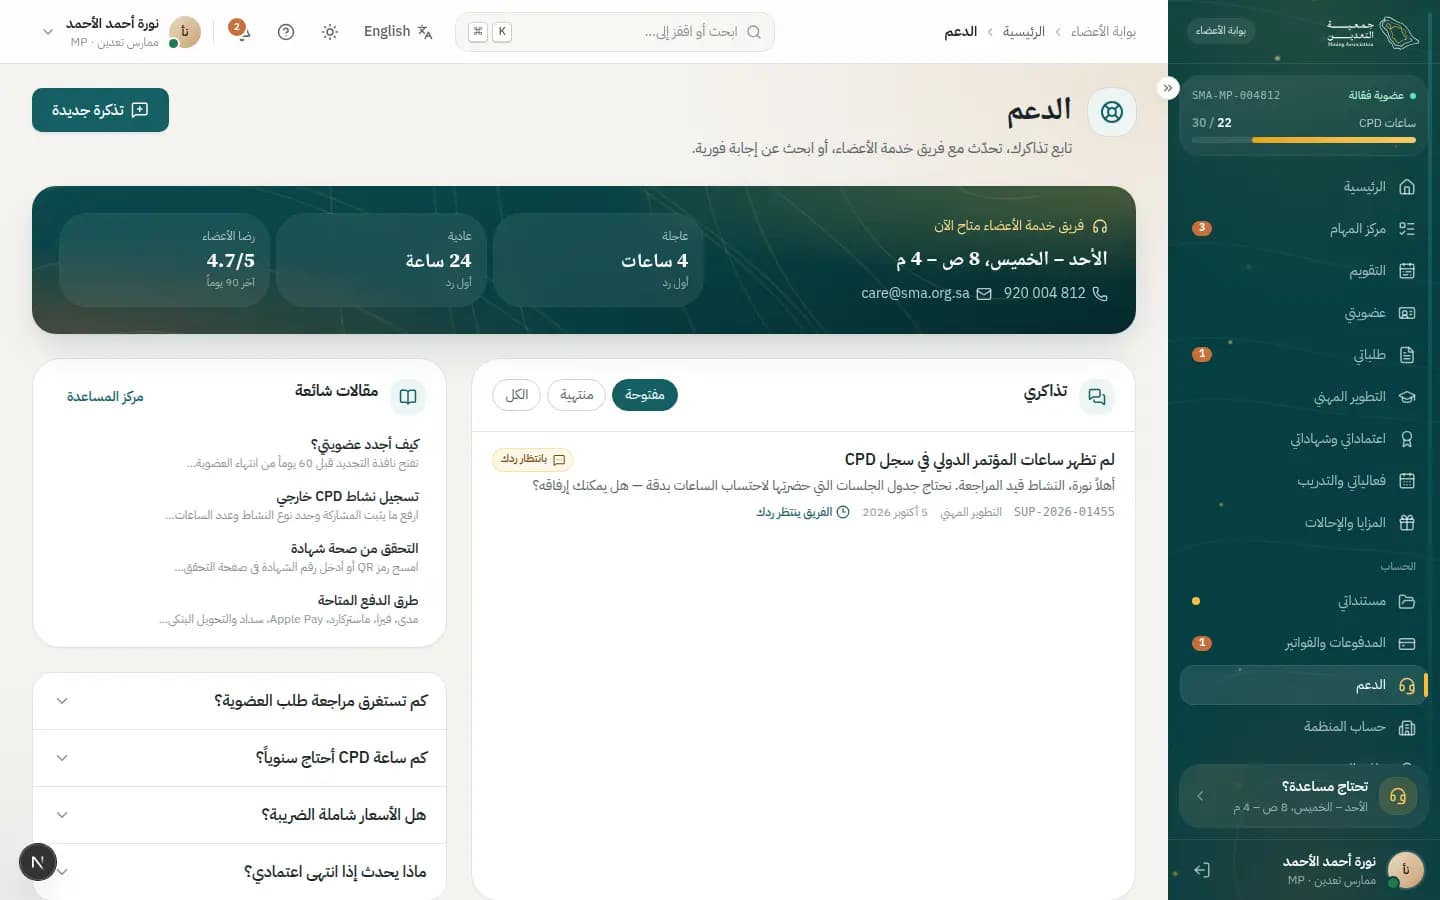
How to
Open a new support ticket
- 1Press “New ticket” at the top.
- 2Choose the “Topic” and write a short “Subject”.
- 3Check “These articles might help” — you may find the answer right away.
- 4Write the “Details” (at least 10 characters) and add “Attachments” if needed.
- 5Press “Submit ticket”; it's linked to your membership SMA-MP-004812 automatically.
Reply to a ticket waiting on you
- 1Open the ticket showing “The team is waiting for you” in “My tickets”.
- 2Write in “Write a reply…”, and press “Attach file” if a document was requested.
- 3Press “Send”; you'll be notified when the team replies.
Rate the service or reopen a ticket
- 1Open a resolved ticket from the “Closed” tab.
- 2Answer “How was your support experience?”.
- 3If the issue isn't solved press “Reopen ticket”.
What's on the screen
- “New ticket”
- Opens the “New support ticket” form, suggesting articles as you type.
- “Team status and response times”
- Shows whether member services is online, first-reply times for “Urgent” and “Normal” tickets, and “Satisfaction”.
- “My tickets”
- Your tickets with “Open”, “Closed” and “All” tabs.
- “Ticket conversation”
- Messages with the team, the reply box with “Attach file” and “Send”, plus “Agent” and “Related”.
- “Popular articles”
- The most-read “Help center” articles for instant answers.
Status meanings
- NewThe ticket was created and awaits the team's first reply.
- In progressThe team is working on your ticket.
- Awaiting your replyThe team is waiting for your reply or a document to continue.
- ResolvedThe issue is solved; rate the service or reopen if needed.
- ClosedThe ticket is closed and listed under “Closed”.
Tips
- Use “Urgent” only for issues that block you; its first reply is within 4 hours.
- Team hours: Sun – Thu, 8 am – 4 pm.
/portal/support/SUP-2026-01455Support ticket
Your conversation with Member Services about one ticket: reply, attach files, follow the ticket's progress and rate the service after it's resolved.
Who uses it?
Members who opened a support ticket and want to follow it or answer the team.
Features covered
Related journeys
Related screens
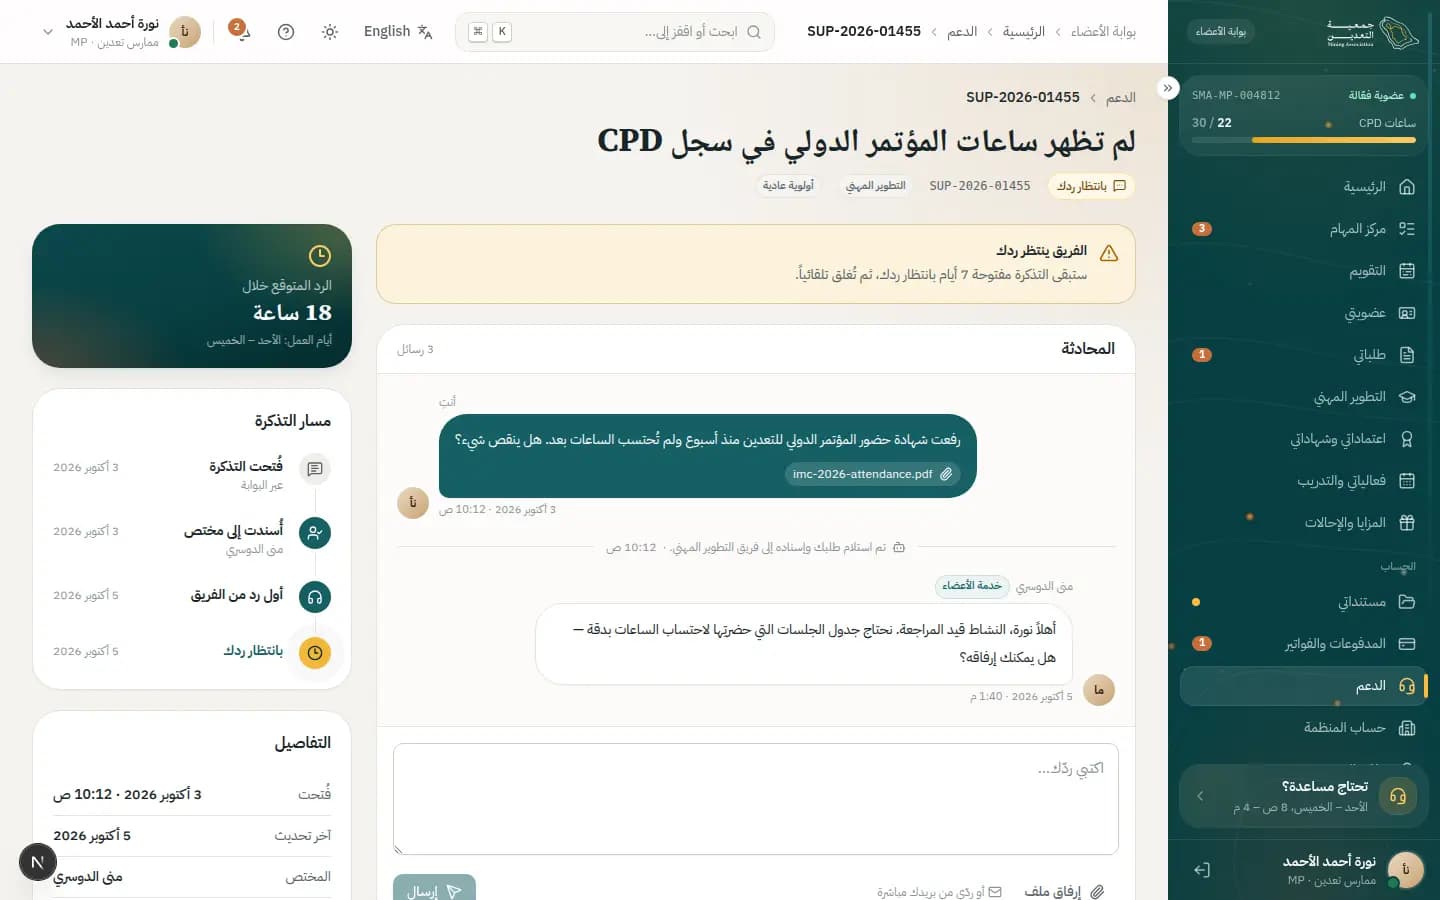
How to
Reply to the team
- 1If “The team is waiting for you” shows, type in “Write your reply…” under “Conversation”.
- 2Press “Attach file” to add an image or document (remove it with “Remove”).
- 3Press “Send”; you'll be notified when the team replies. You can also reply straight from your email.
Rate the service
- 1Once resolved, pick a score under “How was your support experience?” from “Very poor” to “Excellent”.
- 2Add an “Optional comment…” if you like, then press “Send rating”.
Reopen a ticket
- 1If your problem isn't solved press “Reopen” at the top.
- 2Write what's left in your reply; for a new problem press “Open a new ticket”.
What's on the screen
- “Conversation”
- Your messages and “Member services” replies in time order, with attachments.
- “Expected reply within”
- The expected reply time (working days Sun – Thu); if we're late the ticket goes to a supervisor.
- “Ticket journey”
- “Ticket opened”, “Assigned to a specialist”, “First team reply”, then “Awaiting your reply” or “In progress”, then “Resolved”.
- “Details”
- “Opened”, “Last update”, “Specialist” and “Linked to” (the related request, if any).
- “Attachments”
- Every file shared in the conversation.
- “You might find useful”
- Suggested help articles on your ticket's topic.
Status meanings
- Awaiting your replyThe team is waiting for your reply.
- In progressA specialist is working on it.
- ResolvedResolved; you can rate it or reopen.
- ClosedThe ticket is closed.
Tips
- A ticket stays open 7 days waiting for you, then closes automatically — reply before then.
/portal/profileMy profile
Your profile: Nafath-verified identity data, contact details, professional background, and control over what shows in the member directory.
Who uses it?
Members updating their details or background, adjusting their directory listing, or correcting verified data.
Features covered
Related screens
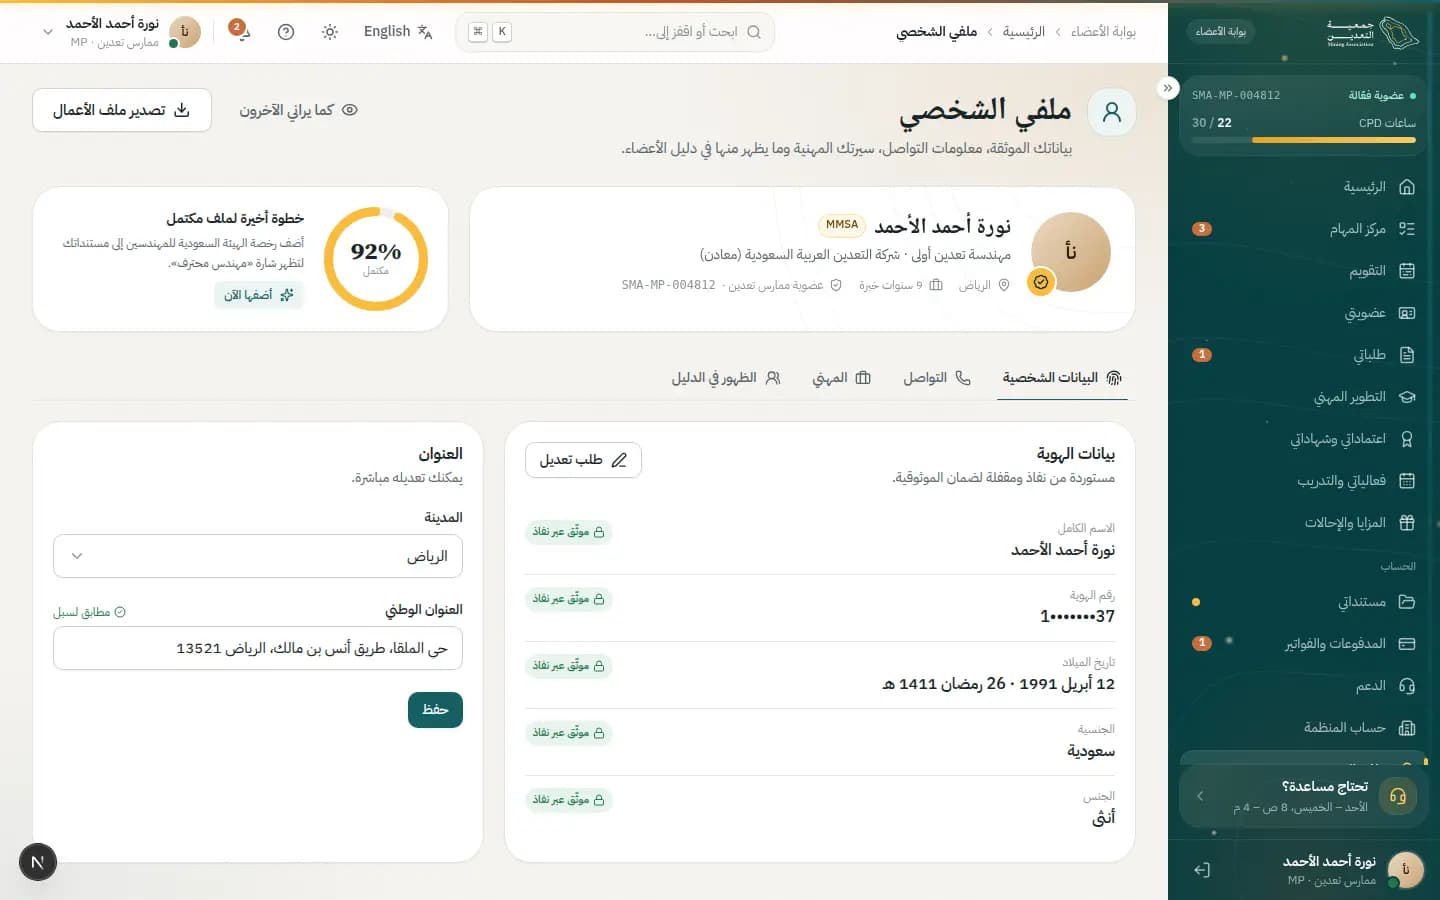
How to
Change your email or mobile
- 1Open “Contact” and press “Change” next to “Email” or “Mobile”.
- 2Enter the new value and press “Send code”.
- 3Enter the code you received and press “Verify”.
- 4When “Verified & updated” appears press “Done”; a security notice goes to the old value.
Request a change to verified data
- 1In “Identity” press “Request change”.
- 2Choose the “Field”, enter the “Correct value” and pick a “Reason”.
- 3Attach the “Supporting document” (passport or ID copy) and add notes if you like.
- 4Press “Submit request”; “Change request under review” appears and we reply within 2 working days.
Control your directory listing
- 1Open the “Directory” section.
- 2Toggle each field under “What shows in the member directory?” — changes apply instantly.
- 3Check the “Live preview” or press “Public view” to confirm.
What's on the screen
- “Profile header and completeness”
- Your name, grade, years of experience and completeness, with the suggested last step such as “Add it now”.
- “Personal”
- Locked Nafath-imported “Identity” data, and the “Address” you edit directly then “Save”.
- “Contact”
- Email and mobile used for sign-in and two-step verification; changing them needs a code.
- “Professional”
- “Employment history”, “Professional summary”, “Licences” and “Education”.
- “Directory”
- Control each field members see, with a “Live preview”.
- “Export portfolio”
- Download your profile as “Formatted PDF”, “CV (Word)” or “JSON (portable)”.
Status meanings
- VerifiedThe email, mobile or employment entry is verified.
- Under reviewYour verified-data change request is being reviewed.
Tips
- Nafath data updates automatically when changed in Absher; use “Request change” only for an error.
- Add an employer letter in “Employment history” to verify your experience and earn the “Verified” tag.
/portal/portfolioProfessional portfolio
Your signed bilingual professional summary of membership, credentials, certificates and CPD, with full control of what others see in the member directory.
Who uses it?
Members applying for a job, sending proof to an employer, or tuning their privacy.
Features covered
Related journeys
Related screens
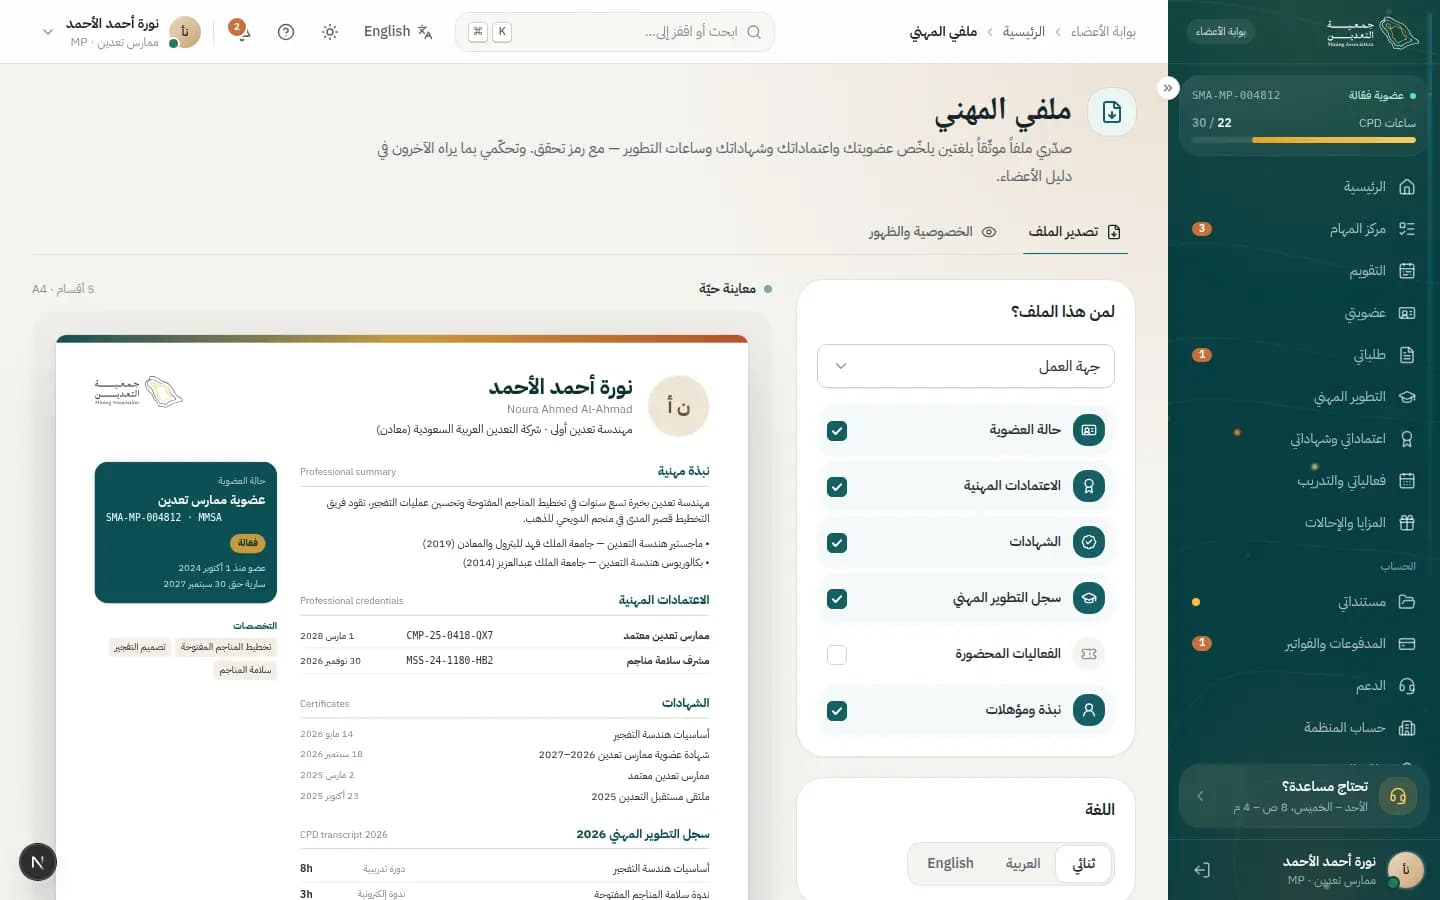
How to
Export and share your portfolio
- 1In the “Export portfolio” tab choose “Who is it for?”: “Employer”, “Job application”, “Full record” or “Custom”.
- 2Adjust the sections (e.g. “Certificates”, “CPD log”) and pick the “Language”: Arabic, English or “Bilingual”.
- 3Check the “Live preview”, then press “Download signed PDF”.
- 4To share by link pick the validity (“Valid 7 days”, 30 or 90) and copy the “Link”; you can “Revoke link” anytime.
Control your directory listing
- 1Open the “Privacy & visibility” tab.
- 2Turn “List me in the public directory” on or off.
- 3Under “What's visible?” toggle each field: bio, photo, job title, city, specialties and more.
- 4Check the outcome in “How others see you”, switching between “Visitor” and “Member”.
What's on the screen
- “Export portfolio”
- Choose purpose, sections and language, then download or link.
- “Sections”
- “Membership status”, “Professional credentials”, “Certificates”, “CPD log” and “Events attended”.
- “Live preview”
- See the file exactly as it will arrive, with a verification QR.
- “Member directory listing”
- A master switch to be listed or hidden.
- “What's visible?”
- Per-field control; sensitive fields carry a “Members only” badge.
- “Consent change history”
- Every change you made to your visibility, with its date.
- “Communication consents”
- What outreach and contact you allow.
Tips
- Contact details are never shown to visitors, even if enabled.
- Even if unlisted, anyone can still verify your membership by its number.
/portal/settingsSettings & security
Control how you sign in and secure your account, your devices, notification channels, how the platform looks, and your personal data.
Who uses it?
Members strengthening account security, adjusting notifications, language and theme, or requesting a copy of their data.
Features covered
Related screens
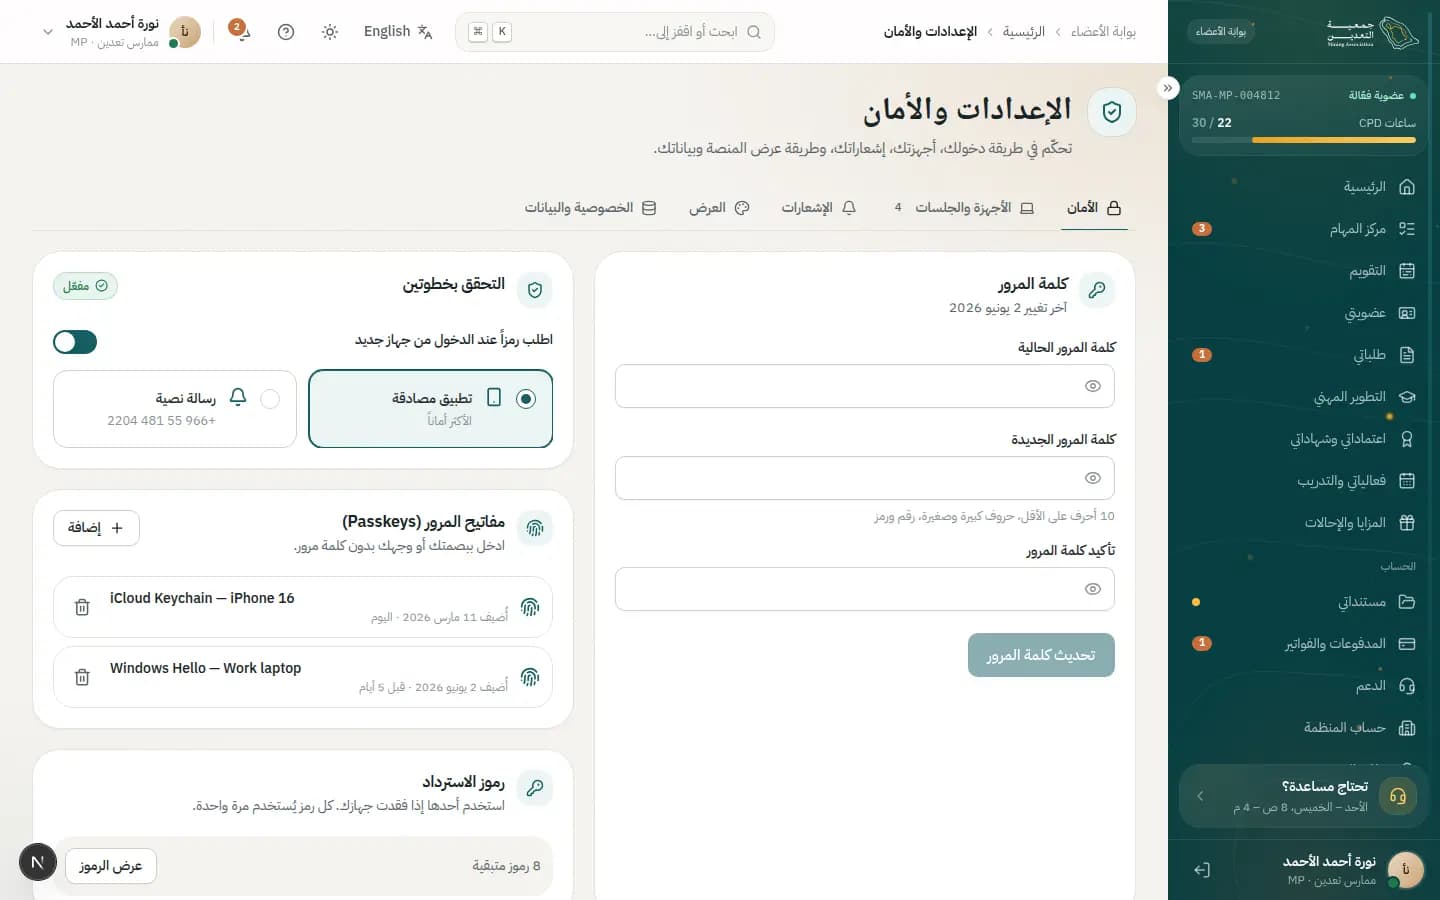
How to
Change your password
- 1Open the “Security” tab.
- 2Enter the “Current password”, then the “New password” (10+ characters, upper and lower case, a number and a symbol).
- 3Repeat it in “Confirm password”.
- 4Press “Update password”; other devices are signed out for safety.
Turn on two-step verification and passkeys
- 1Turn on “Two-step verification” in the “Security” tab.
- 2Choose a method: “Authenticator app” (most secure) or “SMS”.
- 3Press “Add” under “Passkeys” to sign in with your fingerprint or face.
- 4Press “Show codes” under “Recovery codes” and keep them via “Copy” or “Download”.
Set notification channels
- 1Open “Notifications” and set channels per type in “Channels by notification type”.
- 2Turn on “Quiet hours” and set “From” and “To” to stop SMS and WhatsApp at night.
- 3Choose the “Digest”: “Instant”, “Daily digest” or “Weekly digest”.
- 4Press “Save changes”, or “Discard” to revert.
Review signed-in devices
- 1Open “Devices & sessions”.
- 2Look for any device marked “Unusual location” and press “Sign out”.
- 3Or press “Sign out other devices”, then “Yes”, and change your password.
What's on the screen
- “Security”
- “Password”, “Two-step verification”, “Passkeys” and “Recovery codes”.
- “Devices & sessions”
- “Signed-in devices”, marking “This device”, with sign-out options.
- “Notifications”
- Channels per type, “Quiet hours” and “Digest”; mandatory notices can't have email and app turned off.
- “Display”
- “Interface language”, “Numerals”, Hijri dates, “Text size”, “Reduce motion” and “Theme”, with a “Preview”.
- “Privacy & data”
- “Download my data” to request a full copy, and “Close my account” via a request reviewed within 14 days.
Tips
- Keep your “Recovery codes” safe — each works once if you lose your device.
- Display preferences apply across all your devices after you press “Save”.
- You can withdraw an account-closure request any time before it's carried out with “Withdraw request”.
35 screens
Staff & administration
Admin console: reviews, members, CPD, credentials, events, finance, support, reports and settings.
/adminControl room
The control room shows your working day on one screen: what is waiting on you, the requests closest to breaching SLA, team indicators and live activity.
Who uses it?
Every staff member opens it at the start of the day — reviewers and membership officers in particular — and supervisors use it to watch team workload and SLA compliance.
Features covered
Related journeys
Related screens
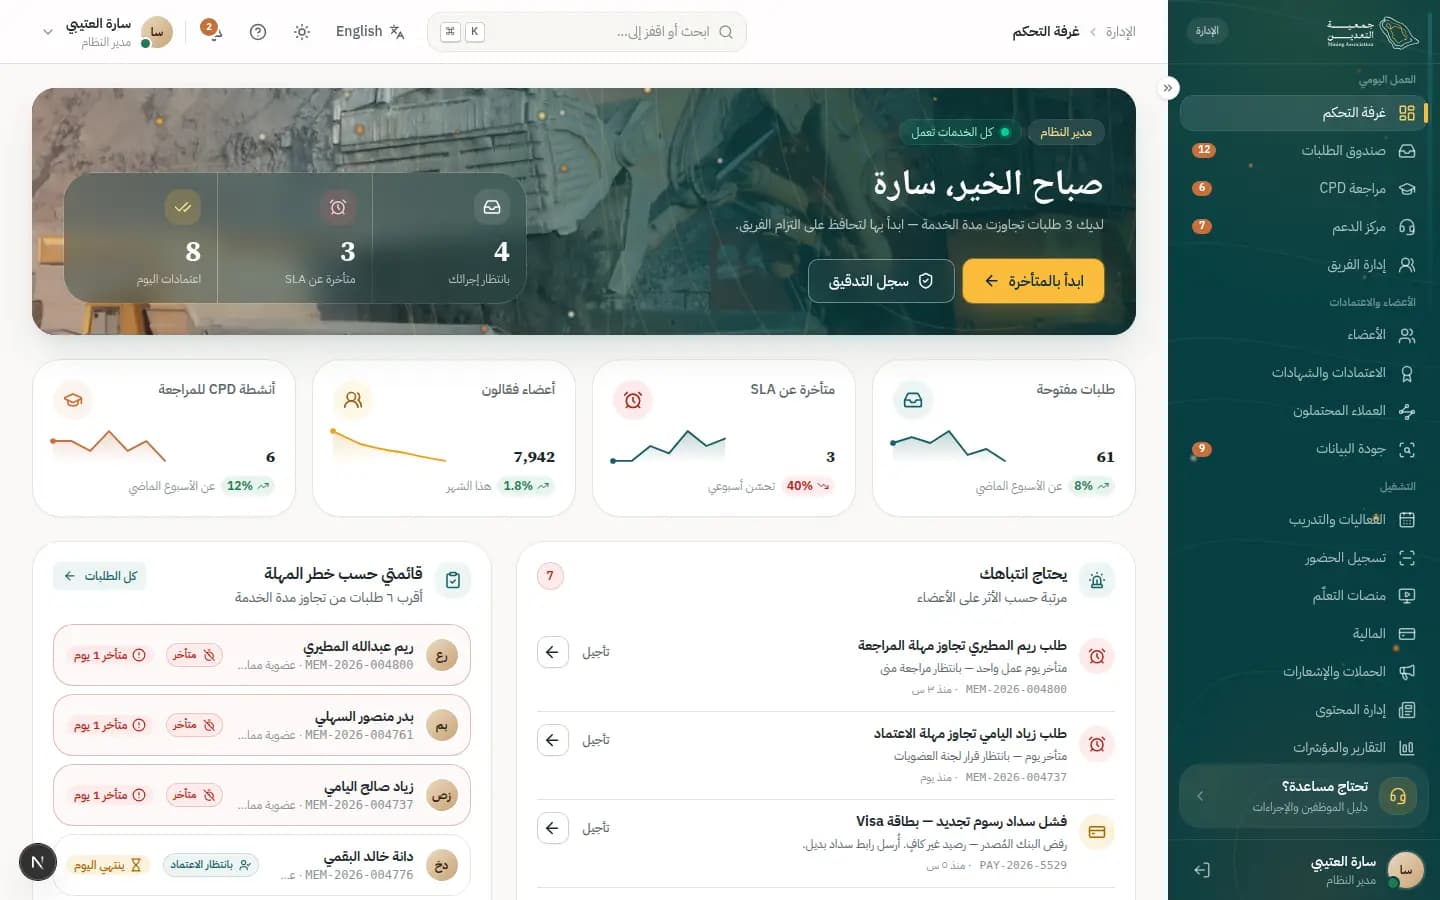
How to
Start your day with overdue requests
- 1Read the greeting strip and check 'Waiting on you', 'Past SLA' and 'Approved today'.
- 2Go to the 'My queue by SLA risk' panel, which lists the 6 requests closest to breaching SLA.
- 3Open the highest-risk request to jump straight to its review screen.
- 4Press 'All requests' when you need the full inbox.
Handle items that need your attention
- 1Review the 'Needs attention' panel; items are ordered by impact on members.
- 2Press 'Open' on an item to handle it in its own screen.
- 3Press 'Snooze' to hide an item for now if it isn't the right time.
- 4When the panel is empty you see 'Nothing waiting — great work'.
Balance workload across the team
- 1Scroll to the 'Team workload' panel to see open items per staff member.
- 2Compare the load with the 'SLA compliance' panel for each stage.
- 3Press 'Auto-balance workload' to redistribute requests away from the overloaded colleague.
What's on the screen
- “Waiting on you”
- Open requests assigned to you, alongside 'Past SLA' and 'Approved today'.
- “Open requests”
- KPI cards: open requests, past SLA, active members and CPD activities to review, each with its trend.
- “Needs attention”
- Urgent items ordered by impact, each with 'Open' and 'Snooze'.
- “My queue by SLA risk”
- The six requests closest to breaching SLA, with an 'All requests' link.
- “Team workload”
- Open items per staff member and the 'Auto-balance workload' button.
- “Recent activity”
- A live feed marked 'Live' that flags critical events, warnings and new requests as they arrive.
- “Quick actions”
- Shortcuts to 'Request inbox', 'Assisted request', 'Review CPD' and 'Credentials committee'.
Tips
- Always start with overdue requests; delays are visible to members and count against SLA compliance.
- Remember that 'Snooze' only hides the item from your panel; it does not change the request status.
- Check the 'Today' schedule each morning to see committee meetings and events before planning your work.
/admin/requestsRequest inbox
The request inbox gathers every membership, upgrade and update request in one place; sort by SLA, assign, and preview each request without leaving the page.
Who uses it?
Reviewers and membership officers work in it daily; supervisors use it to assign unassigned requests and chase overdue ones.
Features covered
Related journeys
Related screens
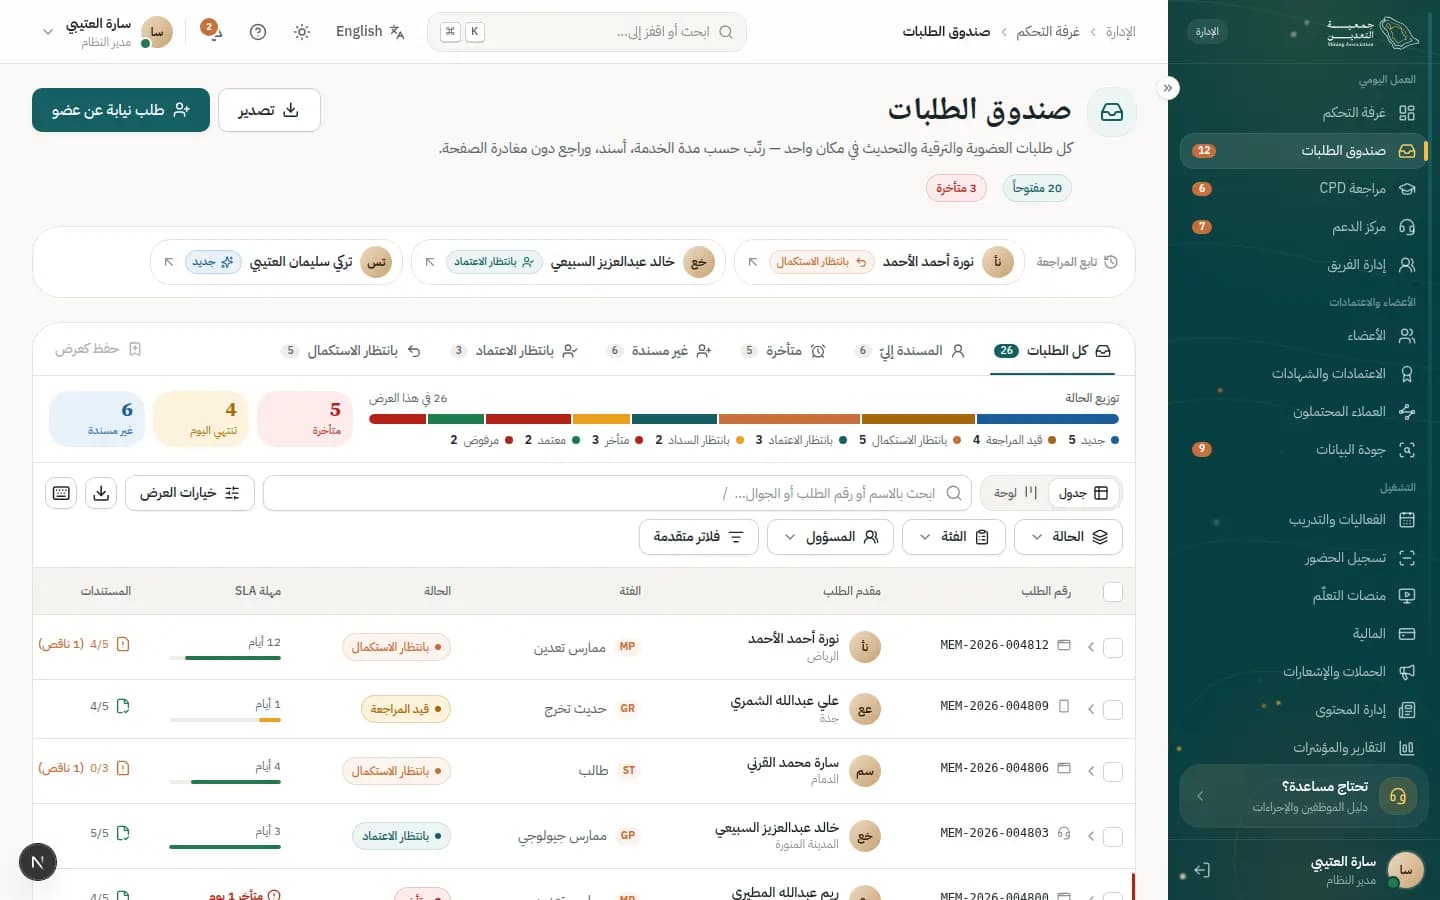
How to
Find and open your overdue requests
- 1Pick the 'Assigned to me' or 'Overdue' view tab above the table.
- 2Click the 'Overdue' figure in the insight strip to apply the 'SLA risk' filter instantly.
- 3Move between rows with ↑ ↓ and press Enter to open the request in the side sheet.
- 4Check 'Applicant', 'Attached documents' and 'History' in the sheet.
- 5Press 'Open full review' to continue in the review screen.
Assign one request or several
- 1Choose the 'Unassigned' view to see requests without an owner.
- 2Press 'Assign' in the 'Assignee' column and pick a colleague from 'Assign to'.
- 3To assign several at once, select rows with X or the checkbox, then press 'Assign' in the bottom bar.
- 4Use 'Send reminder' in the same bar to nudge the selected applicants.
Build a saved view from filters
- 1Press 'Advanced filters' and choose, for example, 'Documents' = 'Has missing' plus a 'Category'.
- 2Press 'Show results' to apply them.
- 3Press 'Save view', type a name, then 'Save'.
- 4The new view appears as a tab next to the others and can be deleted later.
Track requests on the board
- 1Switch from 'Table' to 'Board'.
- 2Drag a card to another status column to change its status.
- 3Press 'Undo' in the toast if you moved a card by mistake.
What's on the screen
- “All requests”
- View tabs: 'All requests', 'Assigned to me', 'Overdue', 'Unassigned', 'Awaiting approval', 'Awaiting correction', plus your saved views.
- “Search name, reference or mobile…”
- Instant search across reference, name, mobile and email; press / to focus it.
- “Advanced filters”
- Filters for 'Status', 'Category', 'Assignee', 'SLA risk', 'Submitted', 'Documents', 'Channel' and 'City', with 'Clear all'.
- “Display”
- Set 'Density', 'Group by', column visibility and order, and 'Reset to defaults'.
- “Table / Board”
- The table for sorting and selecting (Shift-click for multi-sort); the board for dragging cards between statuses.
- “Export”
- Export the filtered rows as Excel, CSV or PDF.
- “Keyboard shortcuts”
- Shortcuts: / search, ↑ ↓ move, Enter open, X select, E expand preview, J/K previous/next in the sheet, ? show the list.
Status meanings
- NewJust arrived and not yet triaged.
- Under reviewBeing reviewed by an officer.
- Needs correctionSent back to the applicant to fix something, like Noura's MEM-2026-004812 awaiting a stamped experience letter.
- Awaiting approvalRecommended and waiting for the membership committee.
- OverduePast its SLA; its row is highlighted in red.
Tips
- Note the bottom bar says 'Bulk decisions are disabled by policy'; approvals and rejections are made one request at a time to guarantee individual review.
- Write an 'Internal note' in the side sheet for colleagues; it is 'Hidden from applicant' and supports @ mentions.
- When a 'new requests arrived' bar appears, press 'Show' to insert them without losing your place.
/admin/requests/MEM-2026-004812Request review
The review screen shows one request in full: data, documents, history, notes and payments, with the checklist and decision panel. Here it shows Noura's MEM-2026-004812, 'Needs correction' because a stamped experience letter is missing.
Who uses it?
Used by the reviewer assigned to the request — you, in this story — to verify documents and then request a correction, refer to the committee or reject.
Features covered
Related journeys
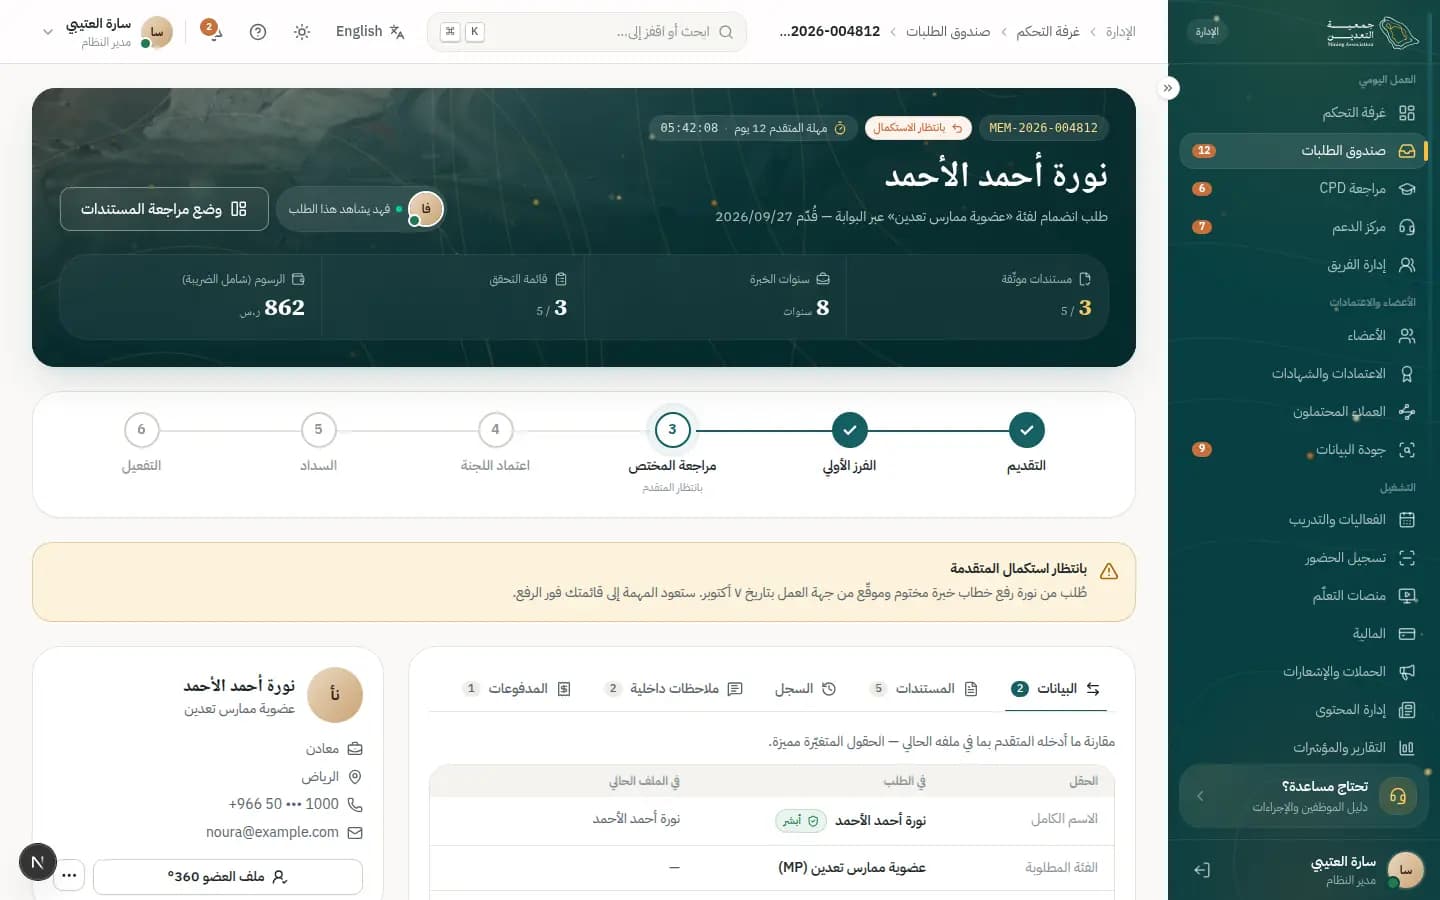
How to
Verify documents in review mode
- 1Press 'Document review mode' at the top, or 'Side-by-side review' in the 'Documents' tab.
- 2Zoom or rotate with 'Zoom in', 'Zoom out' and 'Rotate'; use 'Compare with vault copy' when available.
- 3Press 'Verify' (V), 'Reject' (R) or 'Request correction' (C) for each document.
- 4Move with 'Next' and 'Previous', then press 'Exit review mode'.
Request a correction from the applicant
- 1Press 'Request correction' in the 'Decision' panel.
- 2Tick the missing item under 'Items to fix', such as the unstamped experience letter.
- 3Pick a 'Message template' (e.g. 'Unstamped letter') and adjust the 'Message' if needed.
- 4Set the 'Deadline' (3, 7 or 14 days) and check 'Preview — what the applicant sees'.
- 5Press 'Send correction request'; it goes out by email and SMS and the request becomes 'Needs correction'.
Refer the request to the committee
- 1Complete every item in the 'Review checklist'; the recommendation stays disabled until then.
- 2Press 'Recommend to committee'.
- 3Choose 'Approve as requested', 'Approve with conditions' or 'Approve in a lower category'.
- 4Optionally write a 'Note for the committee', then press 'Send to committee'.
Reject the request with a clear reason
- 1Press 'Reject' in the 'Decision' panel or 'Reject application' from the 'More' menu.
- 2Choose a 'Reason' from the list.
- 3Write an 'Explanation for the applicant' of at least 10 characters.
- 4Press 'Confirm rejection'; the applicant is notified and may appeal within 30 days.
What's on the screen
- “Request stages”
- Stage bar: 'Submitted', 'Intake', 'Officer review', 'Committee', 'Payment', 'Activation', showing 'With applicant' during a correction.
- “Waiting for the applicant”
- Alert explaining what Noura was asked for; the task returns to your queue as soon as she uploads it.
- “Data”
- Compares 'In application' with 'Current profile', highlighting changed fields.
- “Documents”
- Document list with verification state and progress, plus 'Side-by-side review'.
- “Internal notes”
- Team notes, 'Never shown to the applicant — team only'; use 'Mention' then 'Add note'.
- “Review checklist”
- Five mandatory checks, including identity matching Absher and no conflict of interest with the reviewer.
- “Decision”
- Buttons 'Recommend to committee', 'Request correction' and 'Reject'; locked once the review stage closes.
Status meanings
- Under reviewIn 'Officer review' and being worked on by you.
- Needs correctionCorrection sent and waiting for the applicant; the applicant's deadline replaces the SLA.
- Awaiting approvalReferred to the committee with your recommendation; the decision is locked here.
- RejectedRejected and the applicant told the reason.
Tips
- Watch for 'Fahad is viewing this request' at the top; coordinate before deciding so actions don't clash.
- Remember you only recommend; final approval belongs to the membership committee to keep duties separated, and every action is recorded in 'History'.
- A rejection can't be undone once sent, so prefer 'Request correction' whenever the gap can be fixed.
/admin/membersMembers
The unified member register: search, filter and open any member's full file in one click, with membership, renewal and CPD compliance indicators.
Who uses it?
Membership officers and member-services staff use it to look up members, follow up on expiring memberships and start assisted requests.
Features covered
Related journeys
Related screens
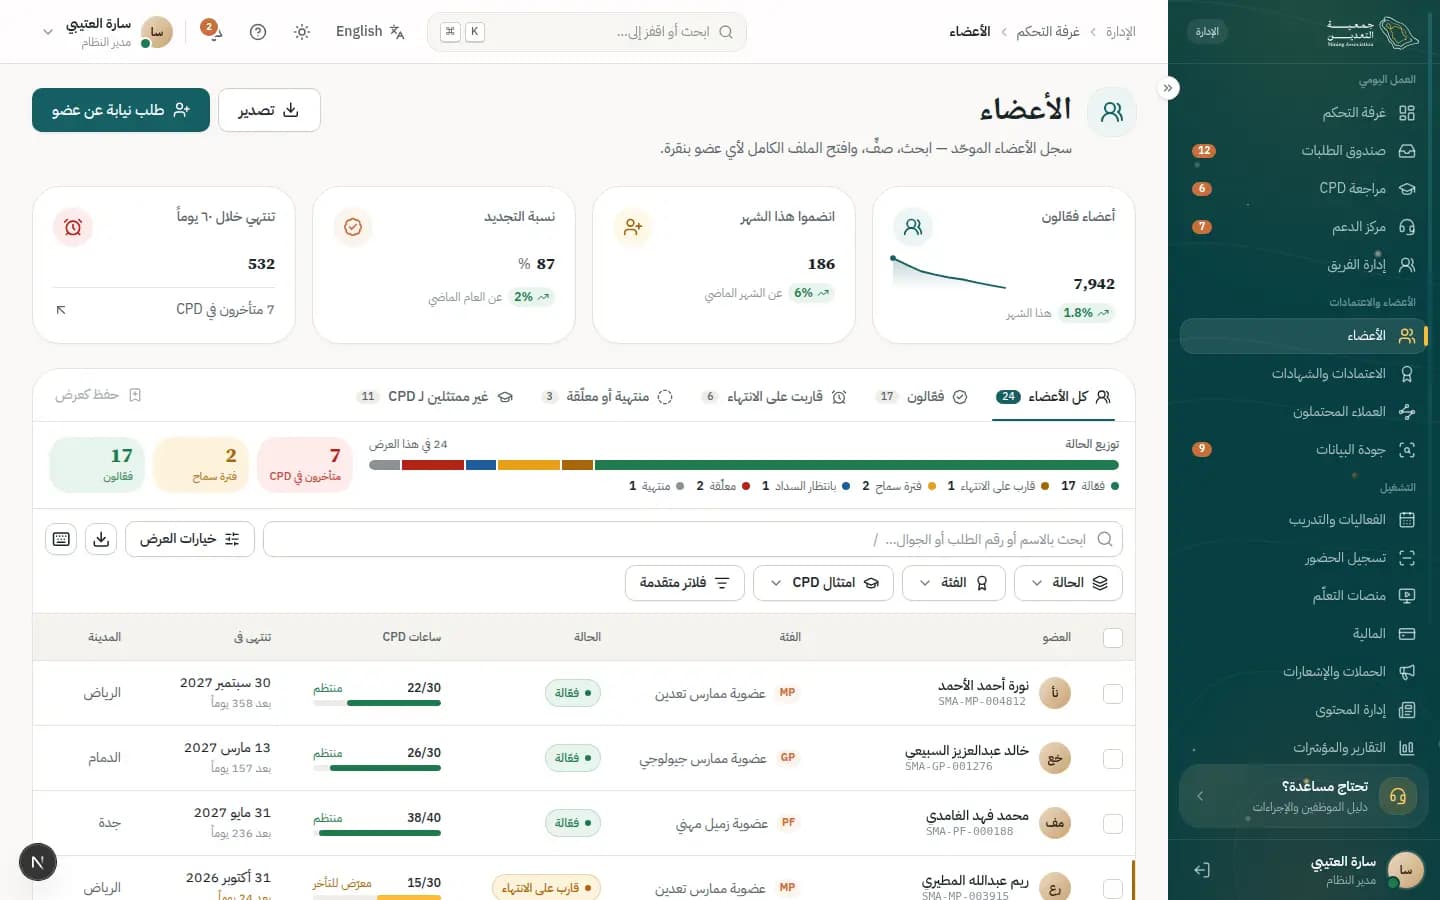
How to
Find a member and open their file
- 1Type the name or member number in the search box above the table.
- 2Click the row to open the side sheet with key details and CPD progress.
- 3Press 'Message' to write, or the 'Call' icon to dial through the switchboard.
- 4Press 'Open 360°' to go to the full file.
Follow up on expiring memberships
- 1Choose the 'Expiring' or 'Lapsed' view tab.
- 2Sort by 'Expires' to see the soonest first.
- 3Press 'Export' to extract the list for a reminder campaign if needed.
Start an assisted request
- 1Press 'Assisted request' at the top of the screen.
- 2Search for the member or enter the national ID as prompted.
- 3Complete the request; it later appears in the inbox with the 'Staff-assisted' channel.
What's on the screen
- “Active members”
- KPI cards: 'Active members', 'Joined this month', 'Renewal rate', 'Expiring in 60 days'.
- “All members”
- Ready views: 'All members', 'Active', 'Expiring', 'Lapsed', 'CPD non-compliant'.
- “CPD compliance”
- One of the filters, alongside 'Status', 'Category', 'City' and 'Employer', to narrow the register.
- “CPD hours”
- Column showing approved hours versus required, or 'Exempt' for exempt categories.
- “Behind on CPD”
- Insight strip; click a figure to apply its filter, likewise 'In grace' and 'Active'.
- “Open 360°”
- Button in the side sheet that takes you to the full member file.
Status meanings
- ActiveMembership in force.
- Expiring soonMembership approaching its end date.
- In graceExpired and within the renewal grace period.
- ExpiredEnded without renewal.
- SuspendedSuspended by an administrative decision.
Tips
- Use 'Group by' in 'Display' to group members by category, status or city.
- Exports contain personal data; export only what a specific task requires.
/admin/members/SMA-MP-004812Member 360°
The Member 360° file brings together everything about one member: membership, requests, payments, CPD ledger, documents, tickets, notifications, consents and audit, with direct admin actions.
Who uses it?
Membership officers and support agents use it to understand a member's context before replying; the CPD committee awards hours manually; supervisors suspend and reinstate.
Features covered
Related journeys
Related screens
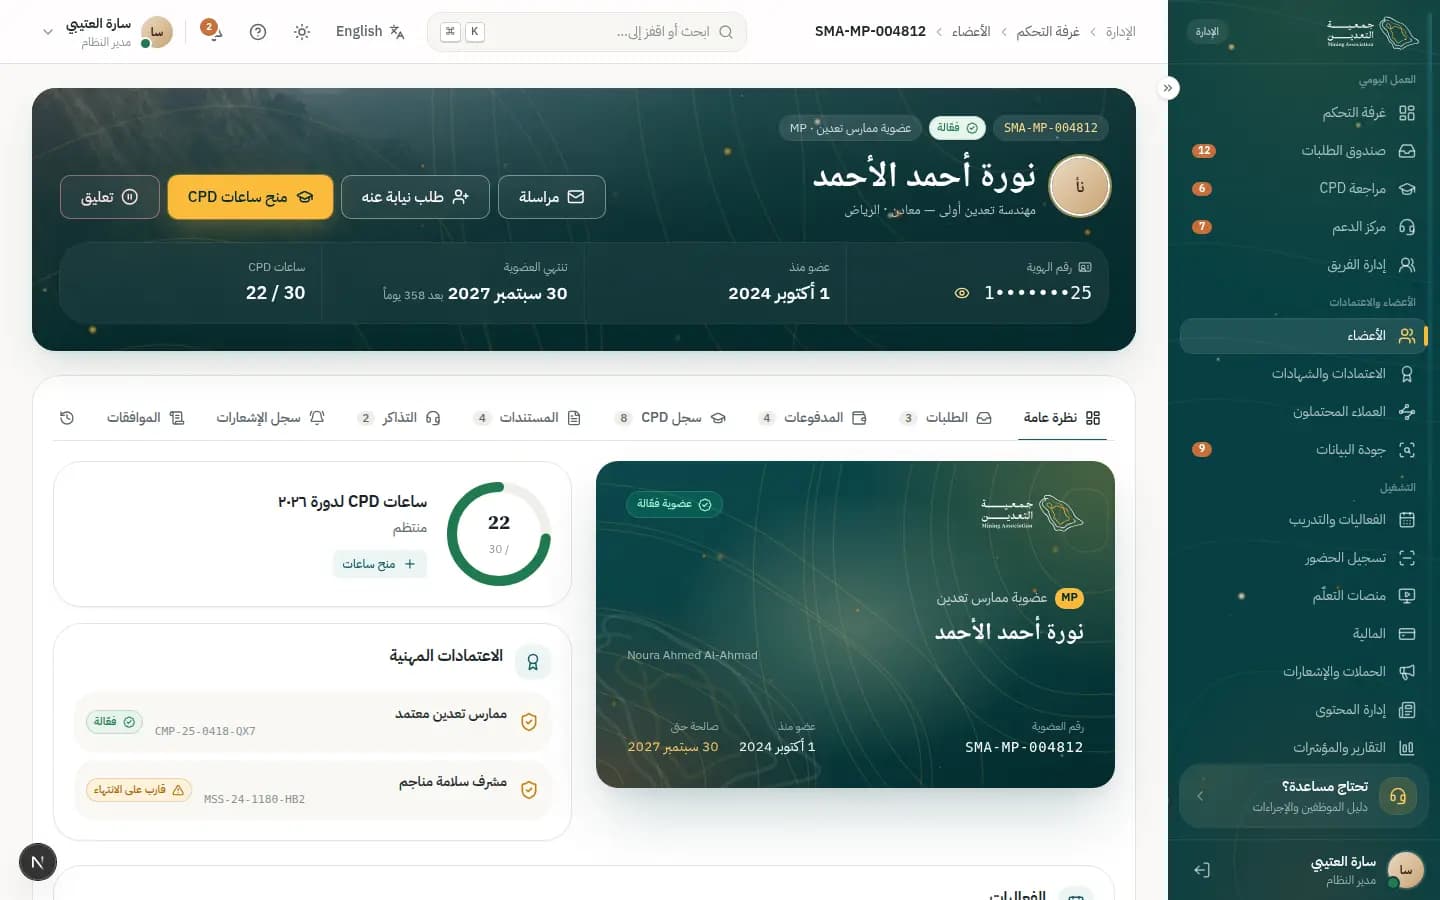
How to
Award CPD hours manually
- 1Press 'Award CPD' in the header or 'Award hours' in the 'CPD ledger' tab.
- 2Enter the 'Activity' and choose the 'Type'; each type shows its cap.
- 3Enter the 'Hours' and review the 'After award' section.
- 4Press 'Award hours'; the member is notified and the event is added to the 'Timeline'.
Reveal the national ID with a logged reason
- 1Press the 'Reveal with reason' icon next to 'National ID' in the header.
- 2Choose a 'Reason', such as 'Verifying a caller's identity'.
- 3Add an optional 'Note' and press 'Reveal now'.
- 4The number hides again after 5 minutes and the reveal is logged to audit under your name.
Suspend or reinstate the membership
- 1Press 'Suspend' in the header.
- 2Fill in 'Reason (shown to the member)'.
- 3Press 'Suspend membership'; the card and linked credentials stop immediately.
- 4To restore it later, press 'Reinstate'.
What's on the screen
- “Header”
- Name, status, masked 'National ID', 'Member since', 'Membership expires' and 'CPD hours', with 'Message', 'Assisted request', 'Award CPD' and 'Suspend'.
- “Overview”
- Current-cycle CPD hours, 'Professional credentials' and 'Events'.
- “Requests”
- The member's past and current requests, each with 'Open'.
- “Payments”
- Invoices and payments linked to the member.
- “Delivery log”
- Delivery state of each message (Delivered, Opened, Failed, Queued) with 'Resend' for failures.
- “Consents”
- The member's data consents, 'Granted' or 'Not granted'.
- “Audit trail”
- Every admin action on the file, alongside the unified 'Timeline' across modules.
Status meanings
- ActiveMembership in force and can be suspended.
- SuspendedSuspended; the 'Reinstate' button appears.
- FailedIn the 'Delivery log': a message that didn't arrive and can be resent.
Tips
- Every reveal of sensitive data is logged with your name and reason under PDPL; reveal only when truly needed.
- Suspension notifies the member and is audited; you can press 'Undo' in the toast right away if it was a mistake.
- Hours beyond the type cap are not fully credited; only the cap counts.
/admin/cpdCPD review
Shows external CPD activities members submitted awaiting your decision, with each type's annual cap, plus bulk award and random audit sampling tools.
Who uses it?
Used by the CPD committee or CPD officer to review activities, credit their hours and award event hours to attendees.
Features covered
Related journeys
Related screens
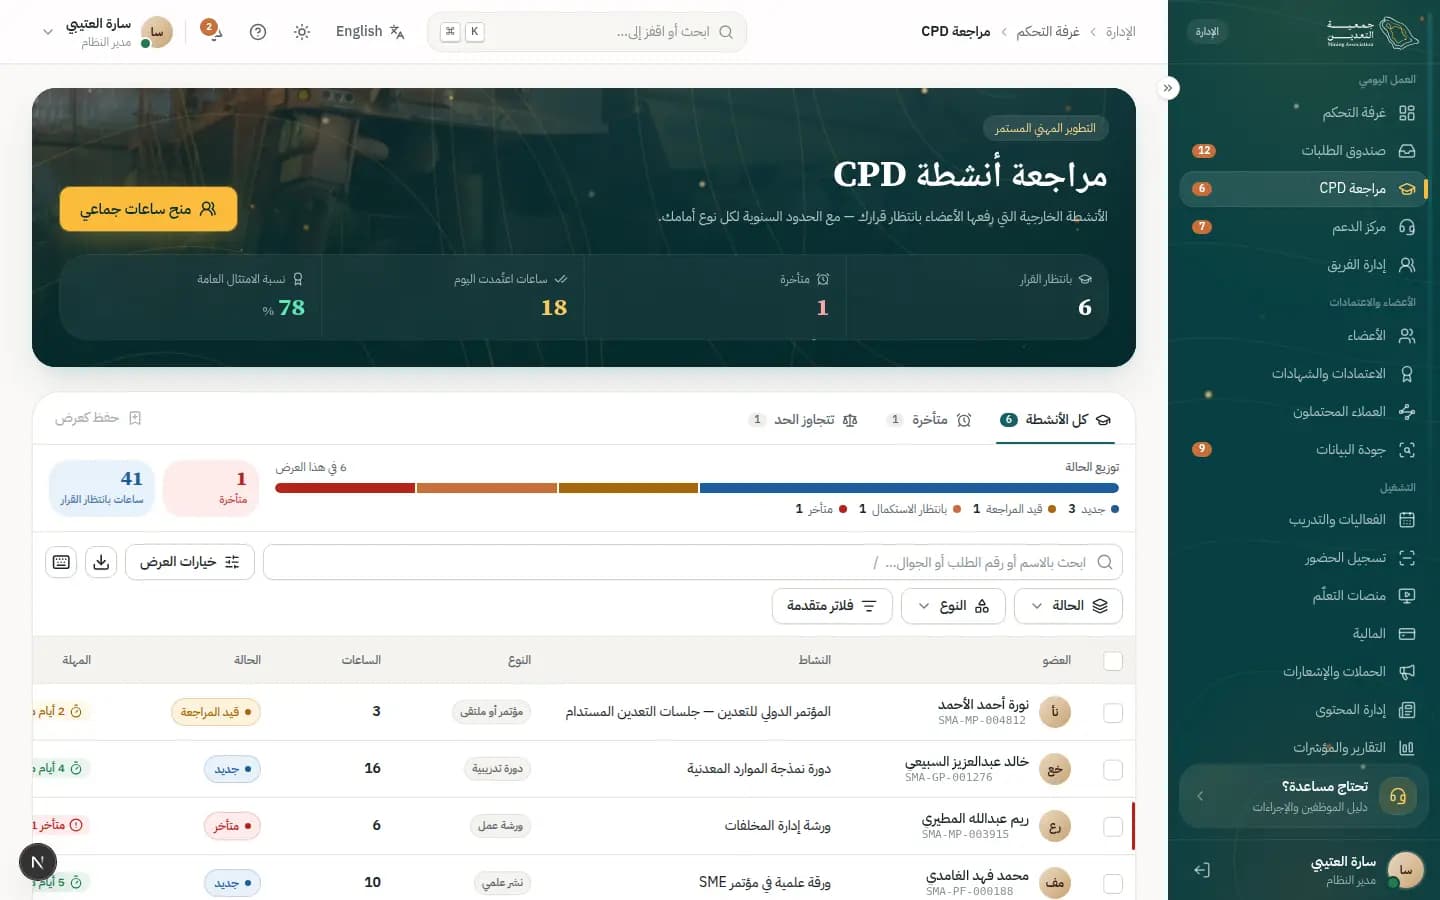
How to
Review an activity and record a decision
- 1Open the activity to see the uploaded certificate and its 'Type', 'Provider' and 'Hours claimed'.
- 2Check the 'Annual cap' bar and the 'Required evidence:' for this type.
- 3Under 'Decision' choose 'Approve all hours', 'Approve with adjusted hours', 'Request correction' or 'Reject'.
- 4Adjust 'Hours credited' if needed and write the 'Reason (shown to the member)'.
- 5Press 'Record decision'; it appears in 'Your decisions this session' with an 'Undo' option.
Award hours for an event's attendees
- 1Press 'Bulk award hours' at the top.
- 2Pick the 'Event' and set 'Hours per attendee'.
- 3Review 'Attended (checked in)', 'Partial attendance — excluded' and 'Would exceed cap'.
- 4Press 'Award to 142 members'; notifications go out and ledgers update.
Draw a random audit sample
- 1Scroll to 'Random audit sampling'.
- 2Set the 'Sample rate' and press 'Draw sample'.
- 3Review the drawn members and press 'Send evidence requests'.
What's on the screen
- “Awaiting decision”
- Indicators: 'Awaiting decision', 'Overdue', 'Hours approved today', 'Overall compliance'.
- “All activities”
- Table views 'All activities', 'Overdue' and 'Over cap', with 'Status', 'Type' and 'Category' filters.
- “Over cap”
- Badge in 'Hours' when the claim exceeds the type's annual cap.
- “Decision”
- Decision panel in the activity detail with 'Hours credited', the reason and 'Record decision'.
- “Your decisions this session”
- Summary of decisions you just recorded, with 'Undo'.
- “Compliance by category”
- 'On track', 'At risk' and 'Behind' shares per category.
Status meanings
- NewNewly submitted, not yet reviewed.
- Under reviewUnder committee review.
- Needs correctionThe member was asked to fix the evidence or details.
- OverduePast the review deadline.
Tips
- Write the reason clearly; the member sees it word for word.
- When a claim is over the cap the remaining hours are suggested; use 'Approve with adjusted hours' instead of rejecting.
/admin/credentialsCredentials
Tracks professional credential applications from submission to committee decision and issuance, and manages issued certificates that can be publicly verified.
Who uses it?
Used by the credentials committee secretary to move applications through stages, schedule interviews and record committee votes, and by admins to re-issue or revoke.
Features covered
Related journeys
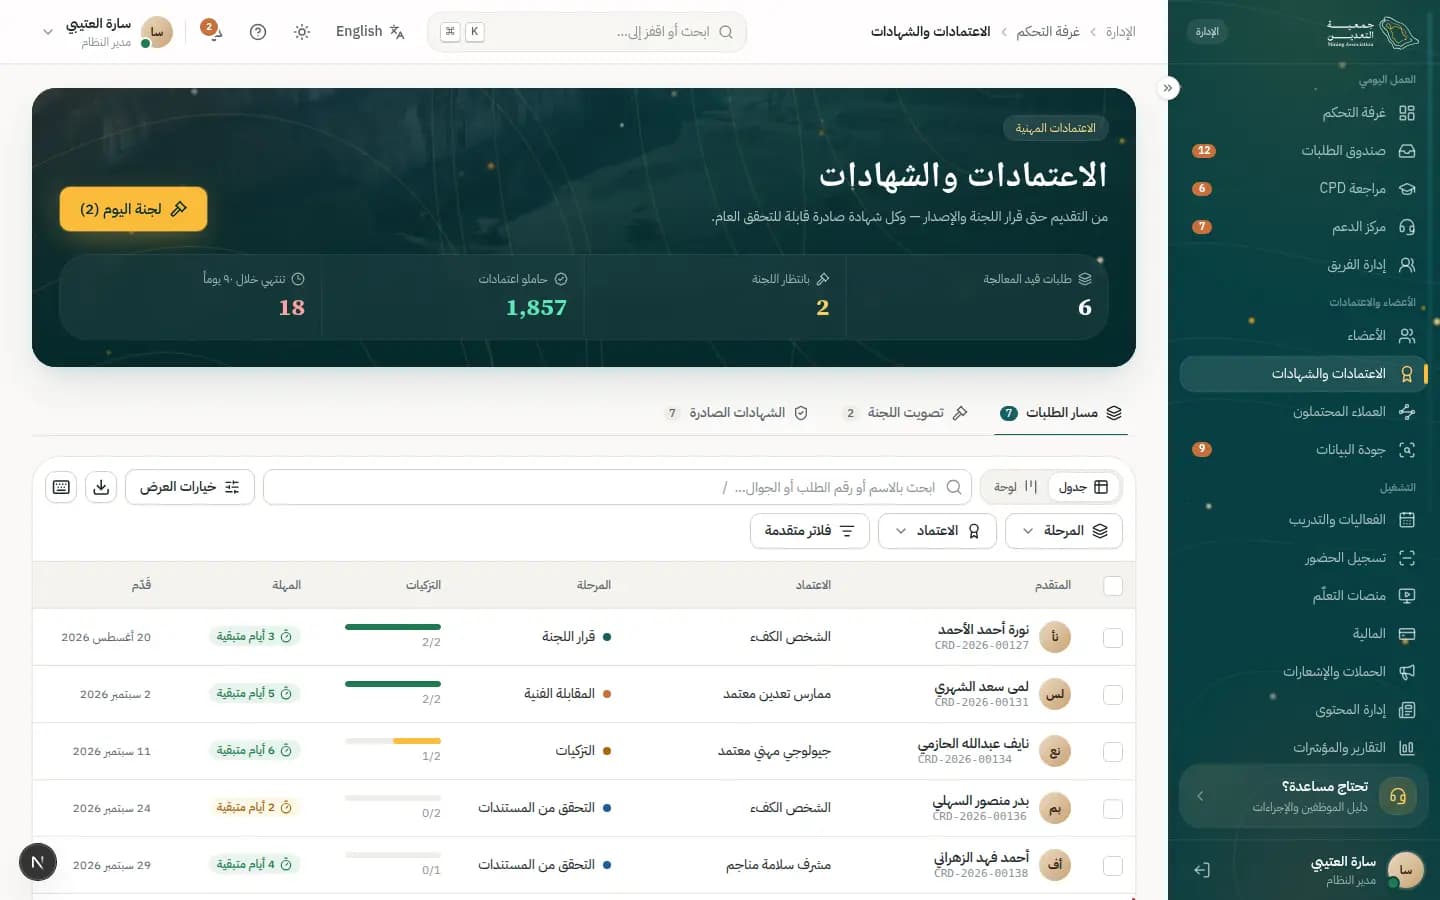
How to
Move an application through the pipeline
- 1Open the 'Pipeline' tab and pick the application from the table or board.
- 2Check 'References' and 'Interview' in the details.
- 3Press 'Advance stage' once the current stage is complete.
- 4Alternatively, drag the card on the board to the target stage column.
Schedule a technical interview
- 1Press 'Schedule interview' in the application detail.
- 2Pick the 'Proposed slot' and 'Format' ('Remote' or 'On site').
- 3Select the 'Interview panel (at least two)' and add a 'Note for the applicant'.
- 4Press 'Confirm & send invites'.
Record the committee vote and decide
- 1Press 'Today's committee' or open the 'Committee voting' tab.
- 2Record each member's vote: approve, reject or abstain.
- 3Wait until 'Quorum met' appears.
- 4Press 'Approve & issue' or 'Record rejection' according to the majority.
Revoke an issued certificate
- 1Open 'Issued certificates' and pick the certificate.
- 2Press 'Revoke' and fill in 'Reason (logged and shown to the holder)'.
- 3Press 'Revoke credential'; it shows as revoked on the public verify page immediately.
What's on the screen
- “Applications in progress”
- Indicators: 'Applications in progress', 'Awaiting committee', 'Credential holders', 'Expiring in 90 days'.
- “Pipeline”
- Table and board across 'Document check', 'References', 'Interview', 'Committee', 'Issued'.
- “Committee voting”
- A card per application with votes, quorum state and decision buttons.
- “Issued certificates”
- Certificates with 'Verify code' and 'Status', plus 'Re-issue' and 'Revoke'.
- “Credential types”
- Requirements, 'Fee', 'Validity', 'CPD / year' and 'Eligible:' categories per credential.
Status meanings
- ActiveValid certificate shown as valid on the verify page.
- Expiring soonCertificate nearing the end of its validity.
- RevokedRevoked and shown as such publicly.
Tips
- Remember 'The secretary records votes and does not vote'; decision buttons stay disabled until quorum is met.
- 'Re-issue' invalidates the previous verify code automatically, and every revocation is audited.
/admin/eventsEvents & training
Manages events and courses: create, price and map to CPD hours, track registrations and revenue, run QR check-in and review evaluations.
Who uses it?
The events and training team uses it before an event to set it up, on the day to run gate check-in, and afterwards to follow evaluations.
Features covered
Related journeys
Related screens
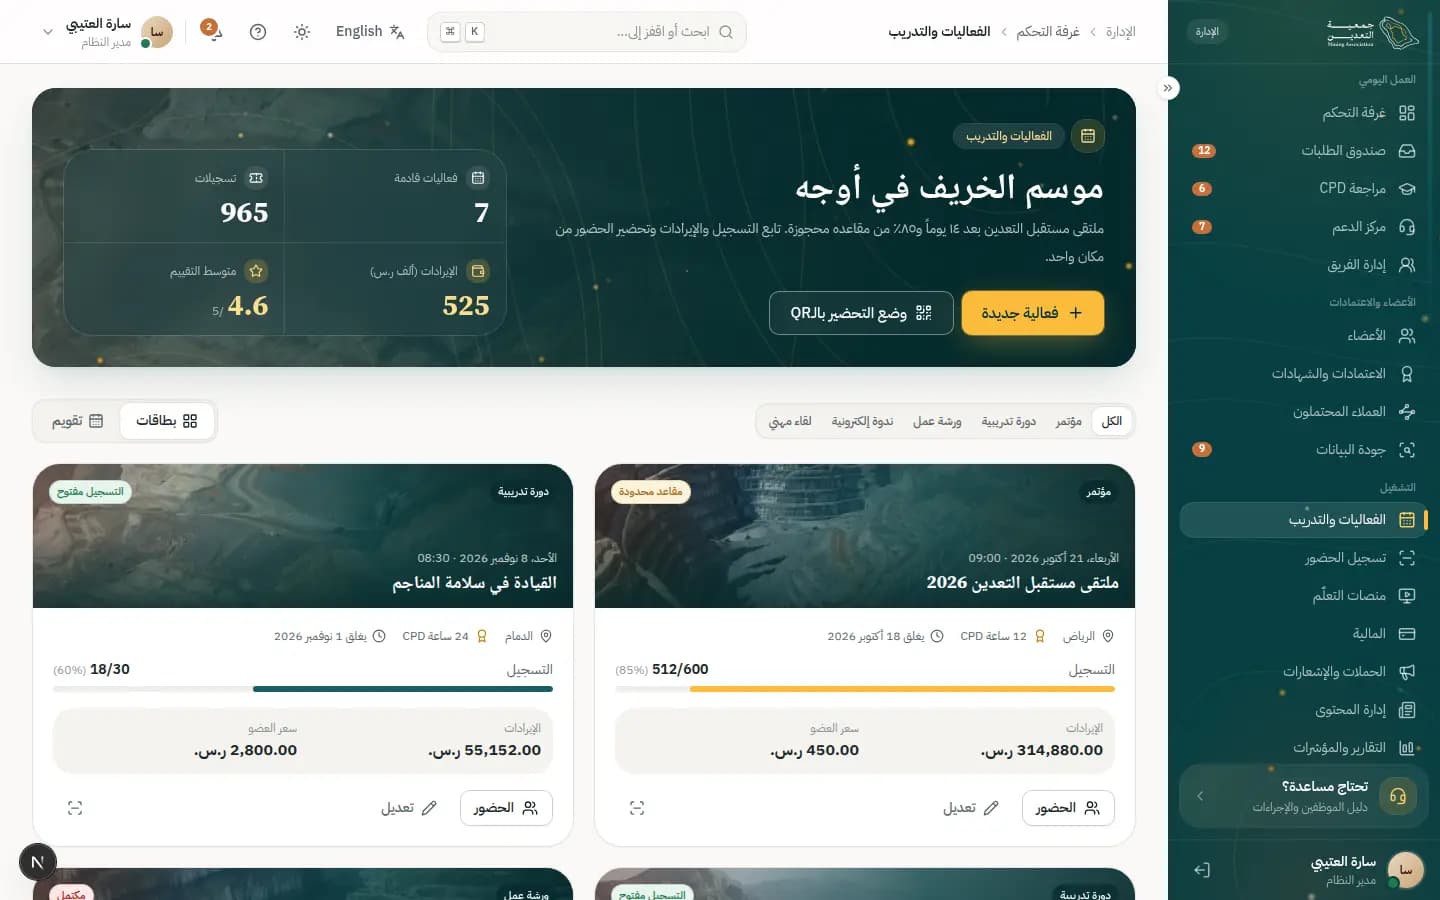
How to
Create and publish a new event
- 1Press 'New event'.
- 2Fill in 'Basics', then 'Sessions', then 'Capacity & waitlist'.
- 3Enter the 'Pricing matrix' for each audience ('Member', 'Non-member', 'Student').
- 4Set the 'CPD mapping' and add 'Registration questions' if needed.
- 5Press 'Publish event', or 'Save draft' to come back later.
Run QR check-in on event day
- 1Press 'QR check-in kiosk', then 'Fullscreen' on the tablet.
- 2Ask the attendee to hold the ticket QR to the camera.
- 3Watch the result: 'Checked in', 'Already checked in' or 'Invalid code'.
- 4Follow the 'Checked in so far' counter and 'Latest scans'.
Check in an attendee manually
- 1Press 'Attendees' on the event card.
- 2Search by name or ticket number.
- 3Press 'Check in' next to the name, or 'Undo' to reverse a mistaken check-in.
- 4Use 'Message registrants' or 'Export' as needed.
What's on the screen
- “Upcoming”
- Indicators: 'Upcoming', 'Registrations', 'Revenue (SAR k)', 'Avg rating'.
- “Cards / Calendar”
- Switch between cards and a monthly calendar, and filter by event type.
- “Event card”
- Registration fill, waitlist, revenue and 'Member price', with 'Attendees', 'Edit' and 'Check-in'.
- “QR check-in kiosk”
- Gate screen that scans tickets and shows 'Duplicates', 'Rejected' and 'Per minute'.
- “Attendees”
- 'Registered', 'Checked in' and 'Waitlist' counts with manual check-in per person.
- “Evaluations summary”
- Overall rating, 'By criterion', 'From attendee comments' and 'Remind non-respondents'.
Status meanings
- RegisteredRegistered, not yet checked in.
- WaitlistedOn the waitlist awaiting a seat.
- AttendedChecked in.
Tips
- Turn on 'Enable waitlist' and 'Auto-promote on cancellation' for busy events so cancelled seats are not lost.
- CPD hours are added automatically to attendees after check-in closes, based on 'Min. attendance'.
- Pricing matrix amounts are before 15% VAT.
/admin/financeFinance
The finance workspace brings revenue, payments, daily gateway reconciliation, refunds and tax invoices together.
Who uses it?
Finance officers use it daily to close the day, handle failed payments and approve refunds; the finance manager follows the indicators.
Features covered
Related journeys
Related screens
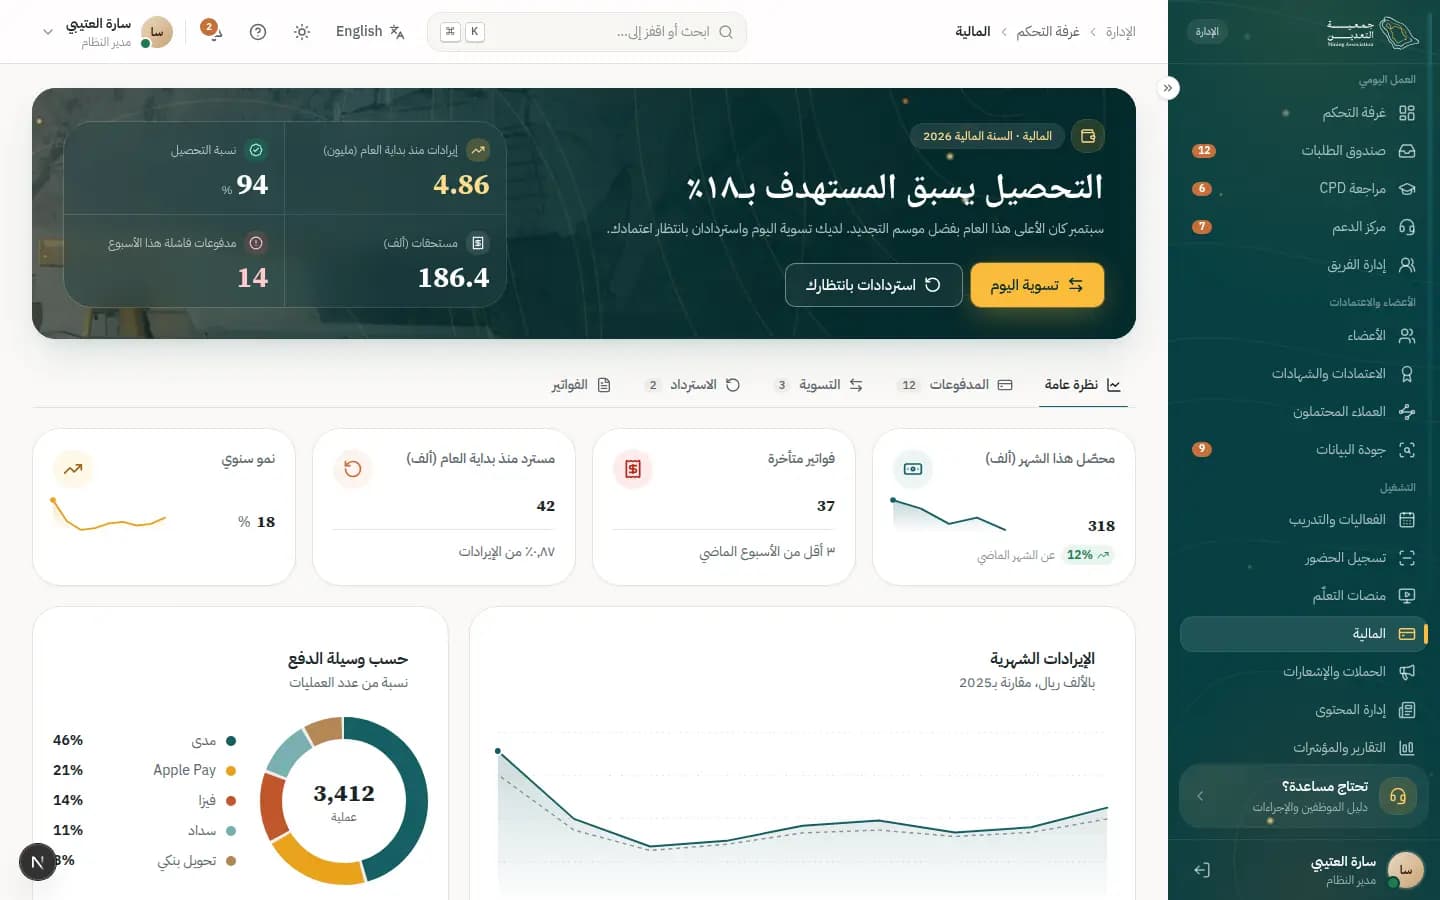
How to
Reconcile and close the day
- 1Press 'Reconcile today' or open the 'Reconciliation' tab.
- 2Compare 'Gateway settlement' with 'Platform ledger' and check the 'Result' column.
- 3Press 'Resolve' on each exception, choose an 'Action', write a 'Reconciliation note', then 'Confirm resolution'.
- 4Press 'Close day' and confirm; the journal is exported to the ERP.
Handle a failed payment
- 1Open 'Payments' and choose the 'Failed' view.
- 2Press 'Details' to see the 'Gateway failure reason' and 'Gateway log'.
- 3Press 'Send pay link' to send the member a new link.
Approve a refund
- 1Open 'Refunds' or press 'Refunds awaiting you'.
- 2Check the 'Maker', 'Checker', amount and reason.
- 3Press 'Approve refund' then 'Approve & execute', or 'Reject' with a reason.
Re-send an invoice
- 1Open 'Invoices' and pick one to open the 'Invoice preview'.
- 2Check the 'VAT no.', items and 'Total'.
- 3Press 'Resend' or 'Print'.
What's on the screen
- “Overview”
- 'Monthly revenue' vs last year, plus 'By payment method' and 'By service'.
- “Payments”
- Transactions table with 'All payments', 'Failed' and 'Pending' views and 'Status', 'Method', 'Service' filters.
- “Reconciliation”
- Gateway vs platform matching: 'Matched', 'Amount mismatch', 'Missing on platform', 'Missing at gateway'.
- “Refunds”
- Refund requests with 'Maker', 'Checker' and decision buttons.
- “Invoices”
- E-invoices with ZATCA QR, resend and print.
Status meanings
- PaidSuccessful, collected payment.
- FailedDeclined by the gateway; a new pay link can be sent.
- PendingNot yet completed at the gateway.
- Awaiting approvalRefund waiting for the checker's approval.
- RefundedAmount returned to the original method.
Tips
- Remember 'Maker–checker in effect': whoever raises a refund can't approve it, and amounts above SAR 5,000 need a second approval from the finance manager.
- Today's entries can't be edited after closing, and open exceptions roll to tomorrow.
- Every exception resolution is audited with your note, and an executed refund can't be undone.
/admin/supportSupport desk
The support desk shows the member ticket queue with each ticket's SLA, conversation, member context and tools to assign, merge and resolve.
Who uses it?
Support agents reply to and resolve tickets; the support lead assigns unassigned ones and watches SLA risk.
Features covered
Related journeys
Related screens
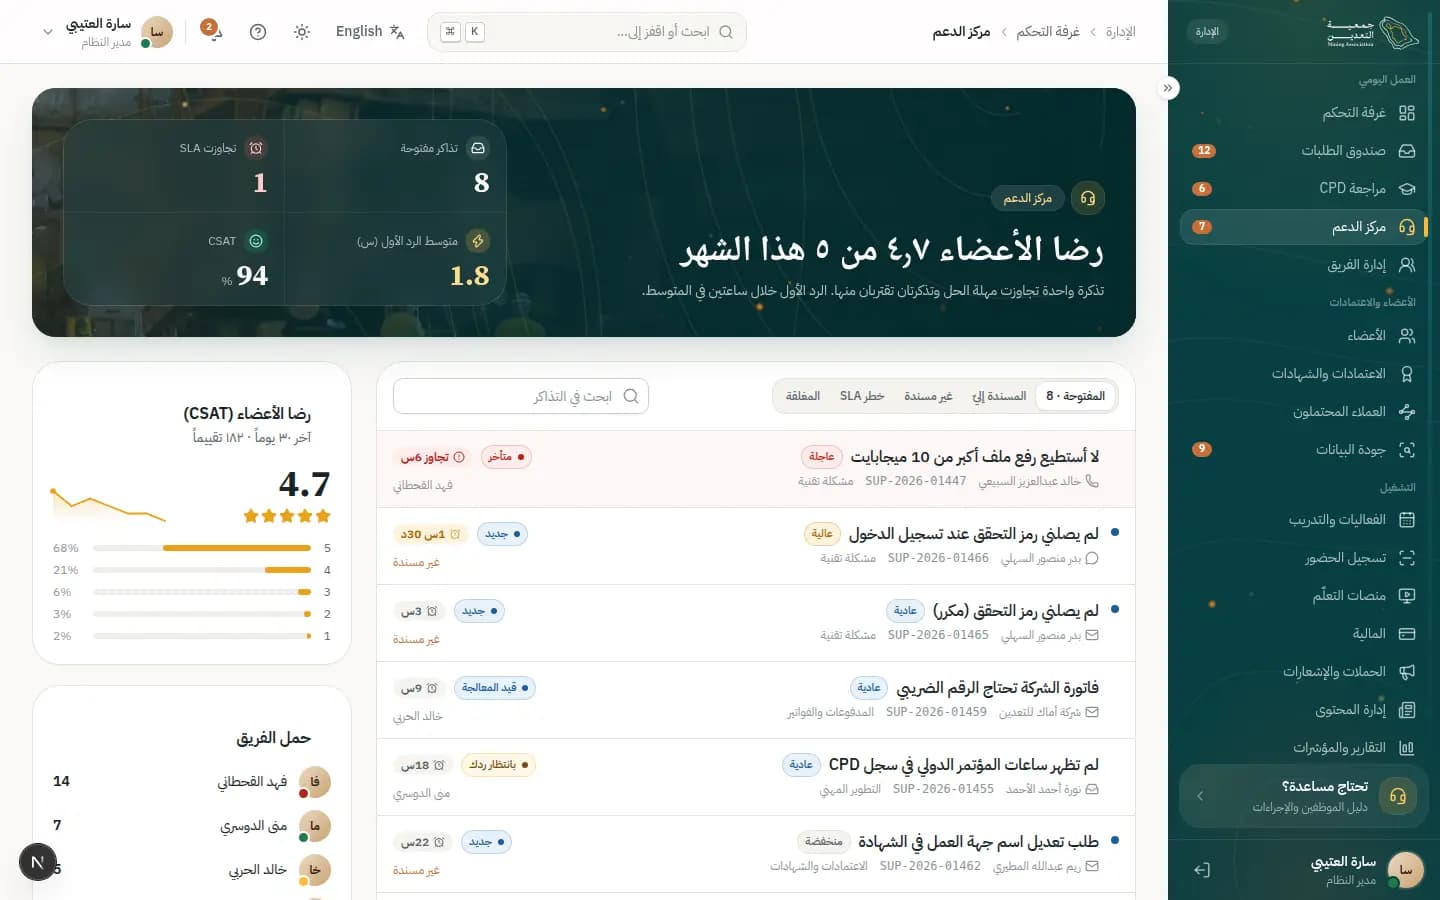
How to
Reply to and resolve a ticket
- 1Choose 'Mine' or 'SLA risk' and open the ticket.
- 2Check 'Member context' and press 'Open member 360°' if you need more.
- 3Choose 'Reply', write or pick from 'Canned replies', then press 'Send'.
- 4Press 'Mark resolved' once fixed; a CSAT survey is sent automatically.
Assign a ticket and set its priority
- 1Choose the 'Unassigned' tab.
- 2Press 'Assign' in the ticket header and pick someone from 'Assign to'.
- 3Press 'Priority' and choose 'Low', 'Normal', 'High' or 'Urgent'.
Merge a duplicate ticket
- 1Notice the 'Same member has a similar open ticket' alert inside the ticket.
- 2Press 'Merge here'.
- 3Press 'Merge' to confirm; messages move over and the other ticket closes.
What's on the screen
- “Open tickets”
- Indicators: 'Open tickets', 'Breached SLA', 'Avg first reply (h)'.
- “Open”
- Queue tabs 'Open', 'Mine', 'Unassigned', 'SLA risk', 'Closed', plus 'Search tickets'.
- “Reply / Internal note”
- Message composer; internal notes are hidden from the member and saved with 'Save note'.
- “Member context”
- Membership status, employer, expiry and an 'Open member 360°' link.
- “Ticket details”
- 'Category', 'Channel', 'Opened' and 'Linked' when tied to a request.
- “Team load”
- Open tickets per agent, alongside 'Satisfaction (CSAT)'.
Status meanings
- NewArrived and not yet answered.
- In progressBeing worked on by an agent.
- Awaiting your replyThe team replied and is waiting for the member.
- OverduePast the resolution deadline.
- ResolvedResolved and the CSAT survey sent.
- ClosedClosed for good.
Tips
- Follow the 'SLA policy': first reply within 4 business hours, resolution within 2 business days, auto-escalation to the support lead at 80%.
- A merge can't be split afterwards; make sure both tickets are about the same issue.
/admin/reportsReports & KPIs
Reports give the association at a glance: executive dashboard, funnels, request operations, membership, CPD compliance, finance and support for the period you choose.
Who uses it?
Admins and executive management follow performance here, and admins schedule recurring reports for the board.
Features covered
Related journeys
Related screens
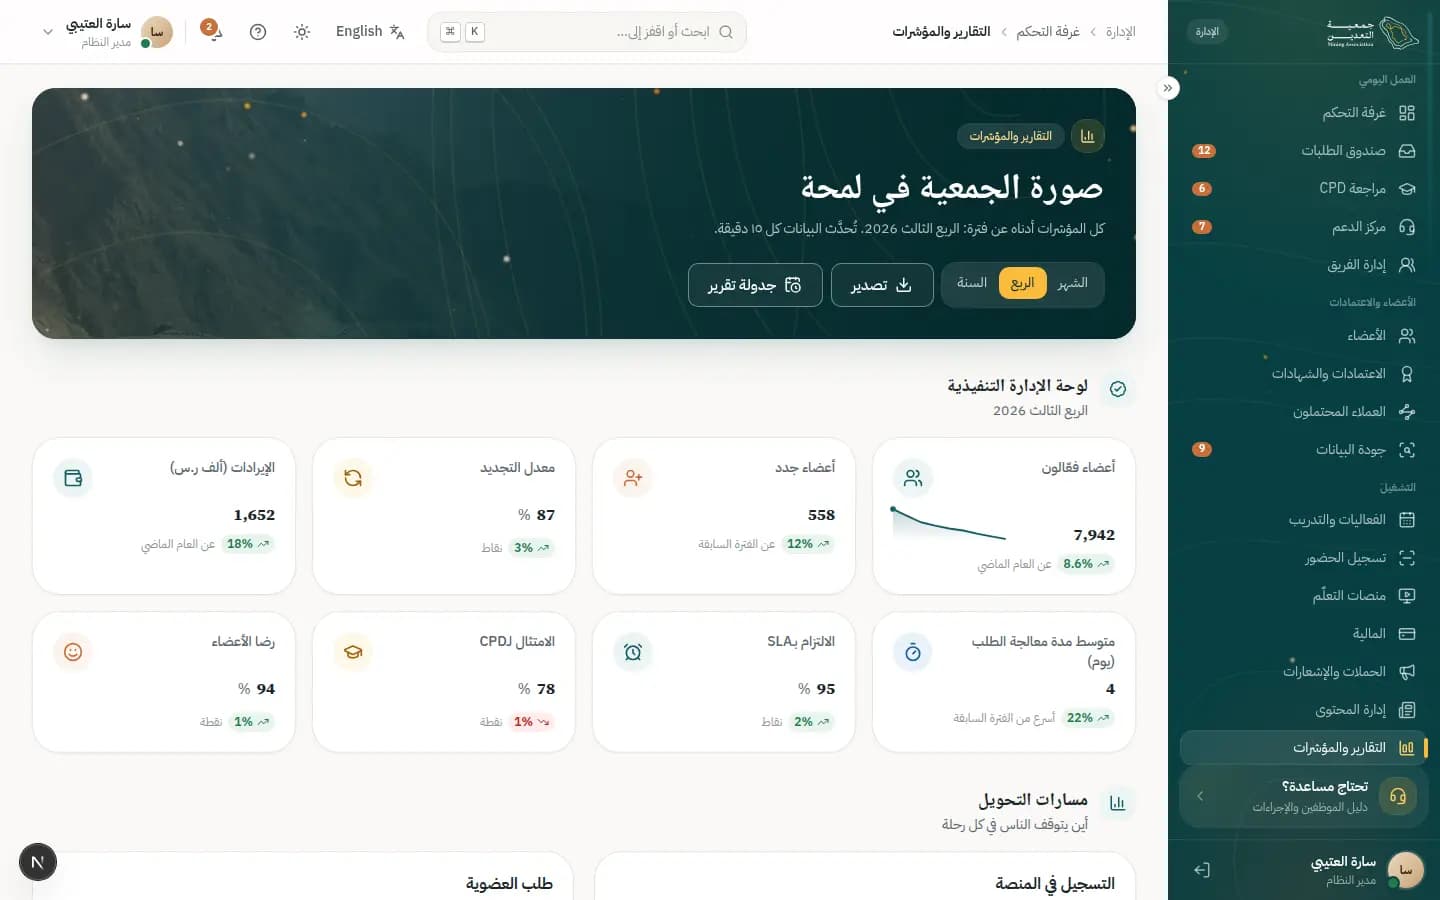
How to
Read indicators for a period
- 1Pick the period: 'Month', 'Quarter' or 'Year'.
- 2Review the 'Executive dashboard', then 'Funnels' to see where people drop off.
- 3Scroll to 'Request operations' for 'Open request ageing'.
Export the report
- 1Press 'Export'.
- 2Choose PDF for reading or Excel for analysis.
Schedule a recurring report
- 1Press 'Schedule report'.
- 2Enter the 'Report name' and set 'Frequency', 'Day' and 'Time'.
- 3Pick 'Sections' and 'Format', and enter 'Recipients' separated by commas.
- 4Press 'Save schedule'.
What's on the screen
- “Executive dashboard”
- Active and new members, renewal rate, revenue, processing time, SLA compliance, CPD compliance and member CSAT.
- “Funnels”
- Steps in each journey: 'Sign-up', 'Membership application', 'Renewal', 'Training'.
- “Request operations”
- 'Open request ageing' and the within-SLA share.
- “Membership”
- Breakdown 'By category', 'By city' and 'CPD compliance'.
- “Support”
- 'Tickets received', 'First-contact resolution', 'Avg resolution (h)' and 'CSAT'.
Tips
- Data refreshes every 15 minutes, so an action you just took may not appear immediately.
- Scheduled reports are emailed automatically; double-check recipients before saving.
/admin/teamTeam
The team screen shows each colleague's workload against their capacity, lets you move work between people, set out-of-office delegation, and follow review quality.
Who uses it?
Supervisors and team leads use it when work piles up on one person or a colleague is away. Quality metrics are visible only to the staff member and the supervisor.
Features covered
Related journeys
Related screens
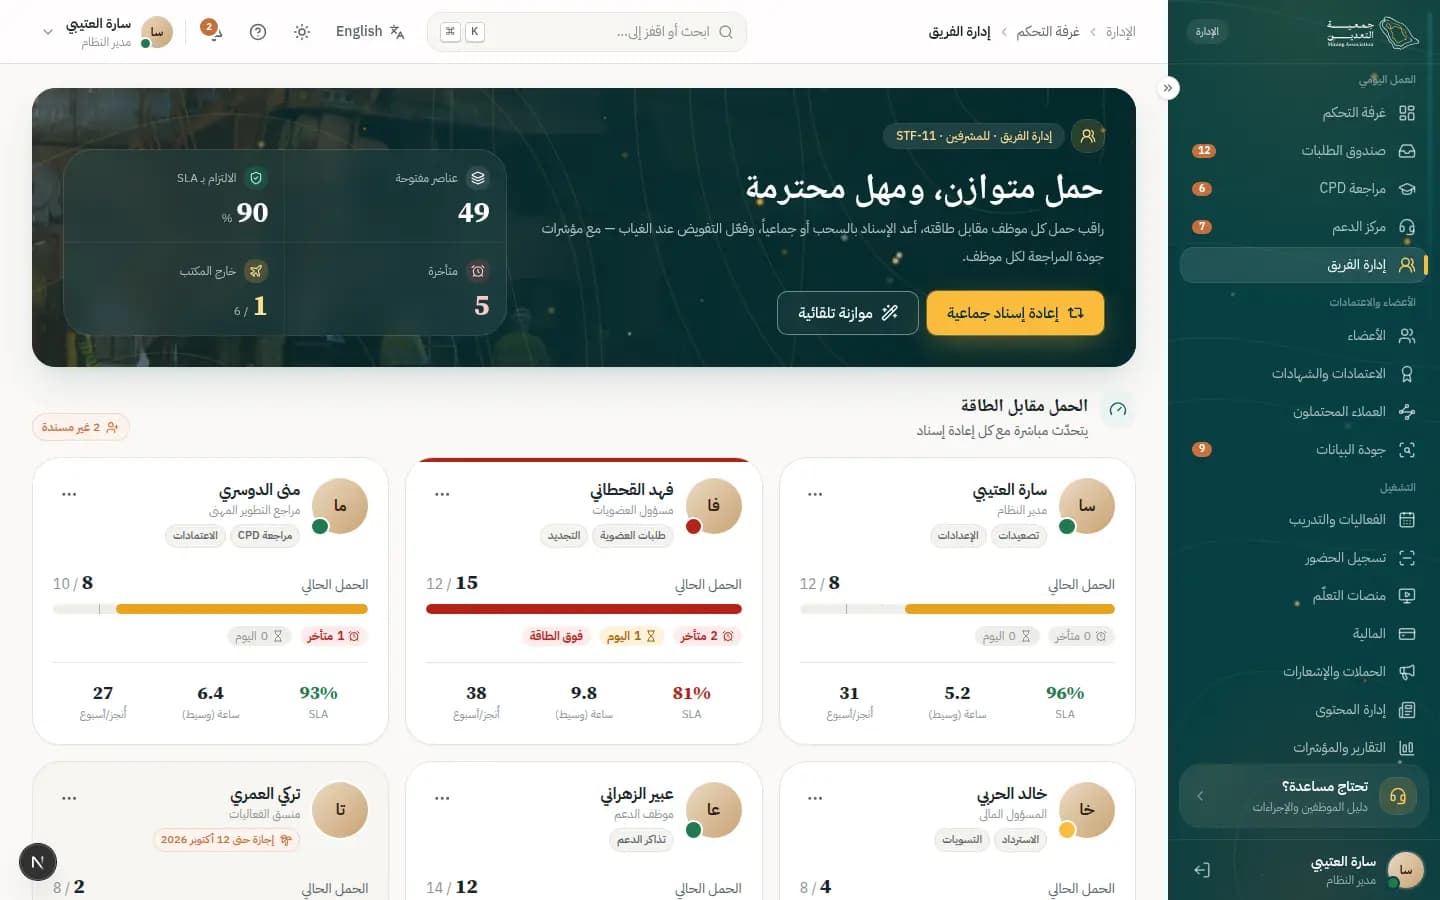
How to
Balance the workload
- 1Open 'Workload vs capacity' and look for someone marked 'Over capacity'.
- 2Press 'Auto-balance' and the system suggests a split based on free capacity and queue skills.
- 3Review the suggestion and confirm it; press 'Undo' if you change your mind.
Reassign several items at once
- 1Open 'Team work items' and tick items, or use 'Select all'.
- 2Press 'Bulk reassign' and pick the person in 'Assign to'.
- 3Read the 'load after move' preview; if it says 'Will exceed set capacity', choose someone else.
- 4Confirm the move; it is logged and the items reach the new person.
Set a colleague as out of office
- 1Press 'Options' next to the person, then 'Set out of office'.
- 2Choose the dates (From / To) and the 'Delegate'.
- 3Pick the options you need, such as moving items to the delegate or the 'Auto-note on items', then 'Activate'.
- 4When they return, press 'End out-of-office'.
What's on the screen
- “Team SLA compliance”
- Share of items closed within SLA against the 'Target 90%'.
- “Workload vs capacity”
- A bar per person showing the current load, colored as it nears or passes capacity.
- “Team work items”
- All team items as a table or board; in the board each column is a person and you drag cards to reassign.
- “Unassigned”
- Items without an owner that need 'Assign'.
- “Throughput”
- Weekly output over the last 6 weeks with 'Median handling' and 'Done this week'.
- “Reviewer quality metrics”
- 'Correction rate' and 'Reversal rate' for each reviewer.
- “Out of office”
- A notice shown when someone is away, naming the 'Delegate' who receives their items.
Tips
- Start with 'Late & open' items; they hurt the compliance figure the most.
- Use 'Open in module' to jump to the original item without searching.
- Set up delegation before a colleague goes away, not after.
/admin/leadsLeads
The leads screen gathers everyone who showed interest through the website, events or the app, with source, interests and consent, so you can invite them and convert them into an application without retyping.
Who uses it?
Member-services and marketing staff use it to follow up with interested people and turn them into applicants.
Features covered
Related journeys
Related screens
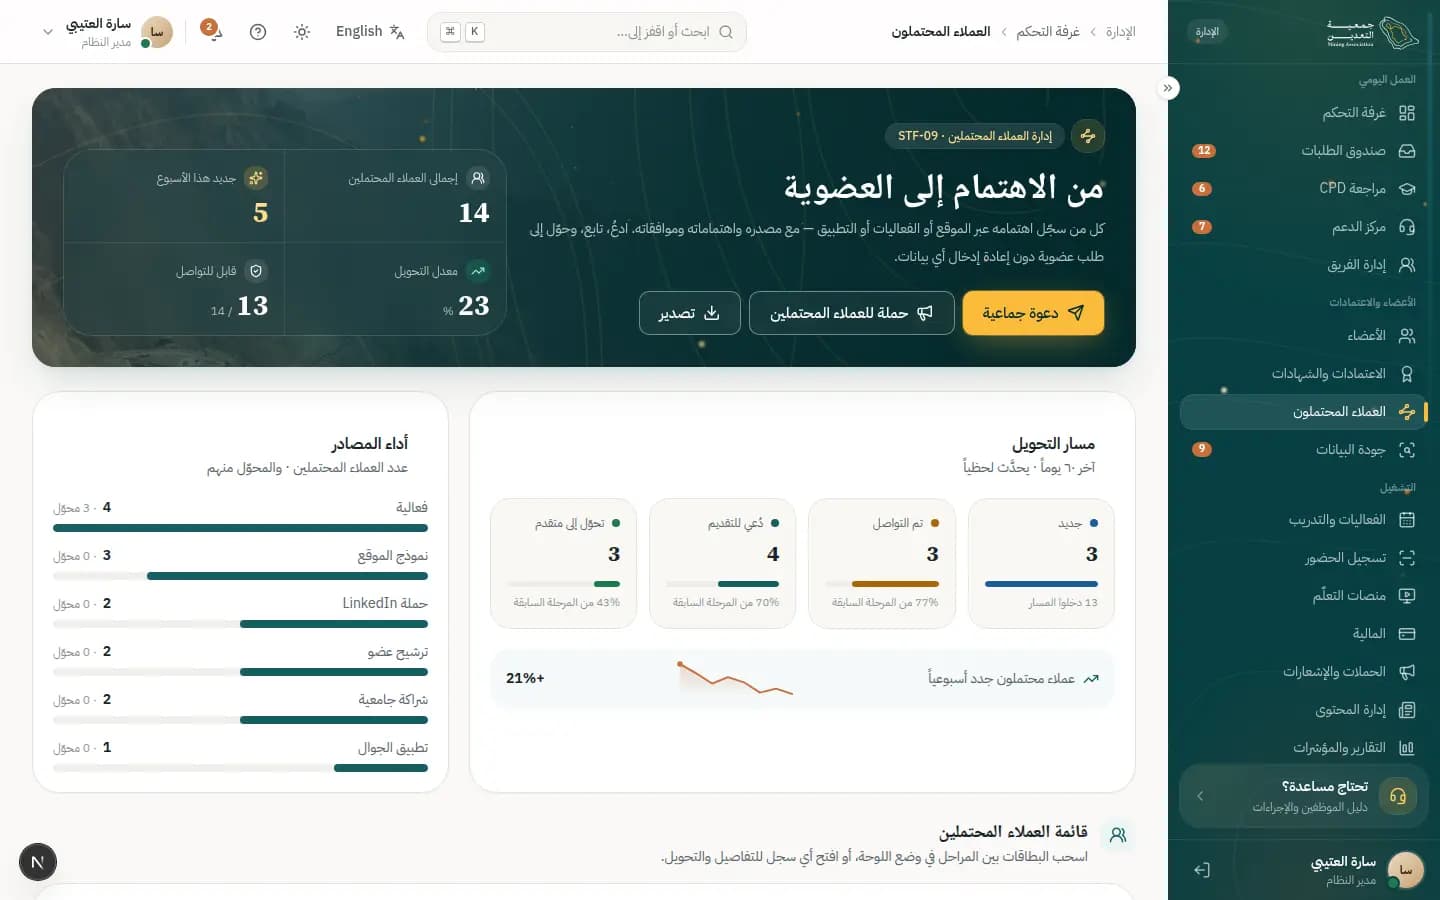
How to
Follow up a lead and add a note
- 1Filter by score such as 'Hot', or search by name.
- 2Click the row to open the lead card.
- 3Type in 'Add a follow-up note…' and press 'Save note'.
- 4Change the 'Owner' if you want to hand it to a colleague.
Send an invitation to apply
- 1Open the lead and press 'Send invitation to apply'.
- 2Pick the 'Channel' (email, SMS or WhatsApp); channels the lead has not consented to are disabled.
- 3Choose the 'Template' such as 'Continue application' and check 'Preview'.
- 4Press 'Send invitation'; a secure link valid for 7 days is delivered.
Convert a lead into an applicant
- 1Open the lead and press 'Convert to applicant'.
- 2Review 'Data carried over' and the 'Proposed membership category'.
- 3Press 'Create application'; it is saved as a draft and the conversion is audited under your name.
What's on the screen
- “Conversion funnel”
- 'From interest to membership': interested, invited and converted counts.
- “Lead list”
- The table with 'Interested in', 'Source', 'Fit score', 'Stage' and 'Owner'.
- “Fit score”
- Hot (80+), Warm (60–79) and Cold (<60).
- “Communication consent”
- Messages go only through channels each person agreed to; 'No consent' appears when there is none.
- “Bulk invitation”
- Invite several leads together, with a count of 'Recipients'.
- “Source performance”
- Compares sign-up sources and the conversion rate of each.
- “Export”
- Exports the list to Excel; sensitive fields are left out according to your permissions.
Tips
- Never bypass consent: if you see no email consent, use another channel or wait for a new opt-in.
- Start with 'Hot' and 'New & unassigned' leads; they have the best chance.
/admin/data-qualityData quality
The data-quality center runs a nightly scan for duplicate records, shared documents, bounced email and incomplete files. Merging is always manual, with a preview, and fully audited.
Who uses it?
Data stewards and reviewers use it to clean records so there is one record per person.
Features covered
Related journeys
Related screens
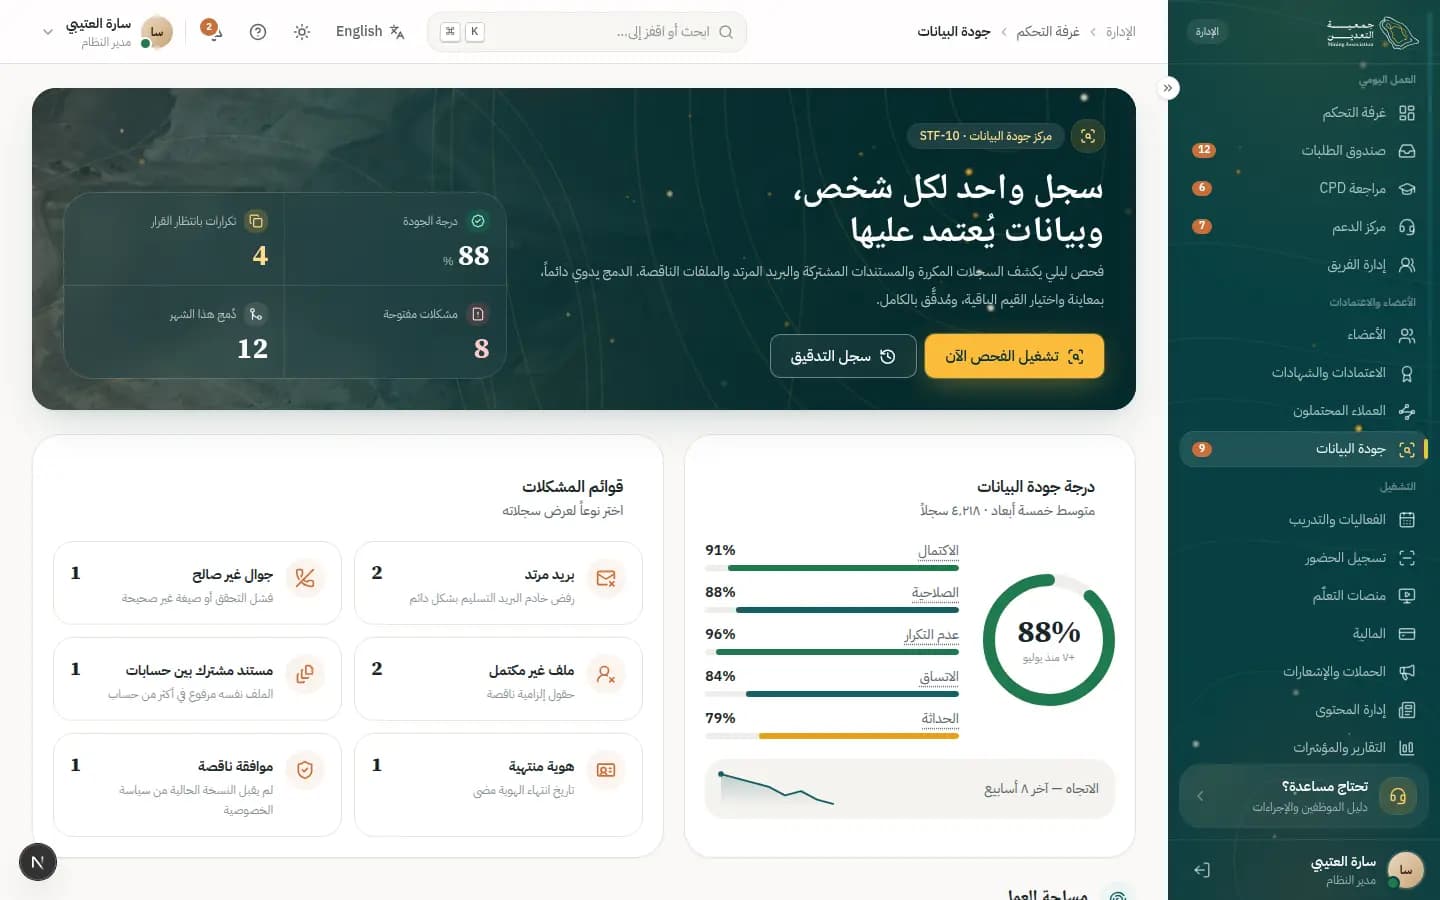
How to
Merge two duplicate records
- 1Open 'Possible duplicates' and choose a 'Pending' pair.
- 2Read 'Why we flagged this' and the 'Match' score, then press 'Compare & merge'.
- 3In 'Choose surviving values' pick the value to keep for each field and the 'Survivor' record.
- 4Press 'Preview merged record', write the 'Merge reason (for audit)', then 'Confirm merge'.
Dismiss a false match
- 1Open the suspected pair and check ID and date of birth.
- 2Press 'Not a duplicate'; the pair will not be suggested again.
Fix a quality issue
- 1Pick a type in 'Issue lists', such as 'Shared documents', to see its records.
- 2Read the 'Suggested fix' and press 'Request update' to contact the member.
- 3If you fixed it yourself, press 'Mark fixed'.
Run the scan manually
- 1Press 'Run scan now'.
- 2Wait a few minutes; results appear here automatically.
What's on the screen
- “Data-quality score”
- An average across five dimensions with the 8-week trend.
- “Duplicates to review”
- Suspected pairs waiting for your decision.
- “Open issues”
- Issues by severity: High, Medium, Low.
- “Merged this month”
- Number of merges completed.
- “Merge history”
- Every merge with before and after values, fully traceable.
- “Issue type”
- Contact data, Documents, Payments & receipts and CPD hours (de-duplicated).
Tips
- There is never an automatic merge; every merge is a human decision logged under your name.
- Linked data such as payments and CPD moves to the surviving record, and a merge can only be undone by a system administrator.
/admin/checkinEvent check-in
The check-in screen lets you scan event tickets or verify membership cards at the gate, and it keeps working even offline.
Who uses it?
Event coordinators and gate staff use it on the day of the event, from a phone or tablet.
Features covered
Related journeys
Related screens
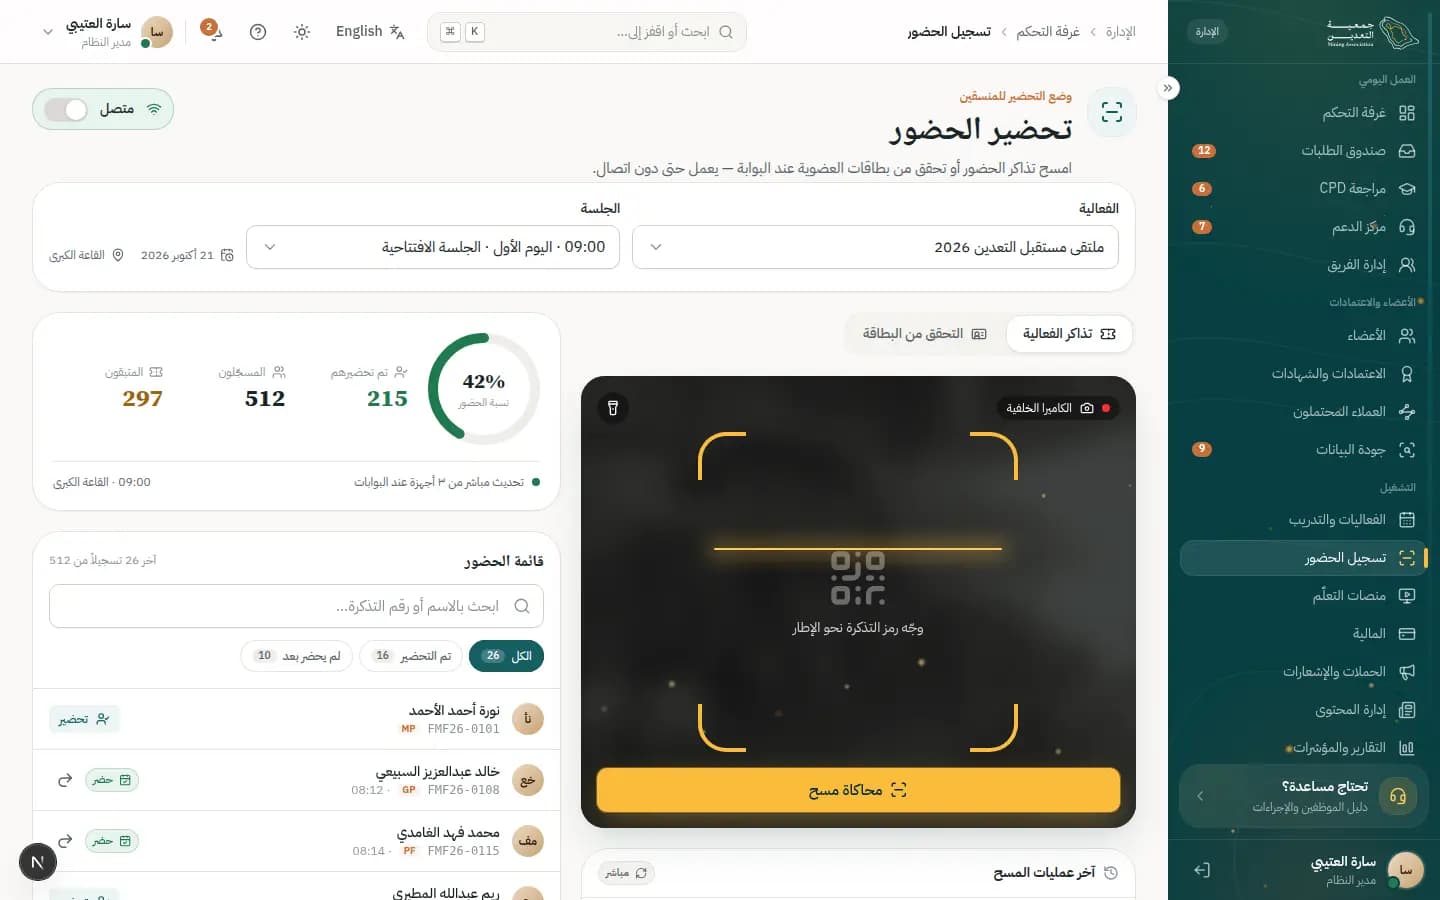
How to
Check people in by scanning tickets
- 1Choose the 'Event' and 'Session' at the top.
- 2Point the ticket code at the frame; use 'Torch' in dark places.
- 3A valid ticket shows 'Checked in'; problems show 'Invalid ticket' or 'Duplicate scan'.
- 4If you made a mistake, press 'Undo check-in'.
Verify a membership card
- 1Open 'Card verification' and point at the digital membership card code.
- 2Or press 'Enter membership number', type it and press 'Verify'.
- 3Read the result: 'Valid membership' gets member pricing, 'Membership expired' or 'Membership suspended' does not.
Register a walk-in guest
- 1Press 'Register walk-in'.
- 2Enter the guest's details and issue a ticket; they are checked in immediately.
Work offline
- 1When the network drops you see 'Offline' and the device checks locally stored tickets.
- 2Scans pile up as 'Pending sync'.
- 3When you are back online, press 'Sync now'.
What's on the screen
- “Turnout”
- 'Registered', 'Checked in' and 'Remaining' with the live percentage.
- “Recent scans”
- The latest scans with the result of each.
- “Attendee list”
- Search by name or ticket number, with a manual 'Check in' for those 'Not yet' in.
- “Offline mode”
- Keeps scans on the device and sends them when you reconnect.
- “Coordinator check-in mode”
- A simplified phone view for coordinators.
- “Simulate scan”
- Test buttons to try scenarios without a real ticket.
Tips
- Sync before leaving the event so attendance records are up to date on the server.
- For a visitor with an expired membership, press 'Remind them to renew' instead of turning them away.
/admin/learningLearning platforms
The learning-platforms screen manages the licensed course catalog (Coursera and Udemy Business), license seats, learner progress and the automatic conversion of completions into CPD hours.
Who uses it?
Training and CPD officers use it to manage licenses and make sure hours are credited.
Features covered
Related journeys
Related screens
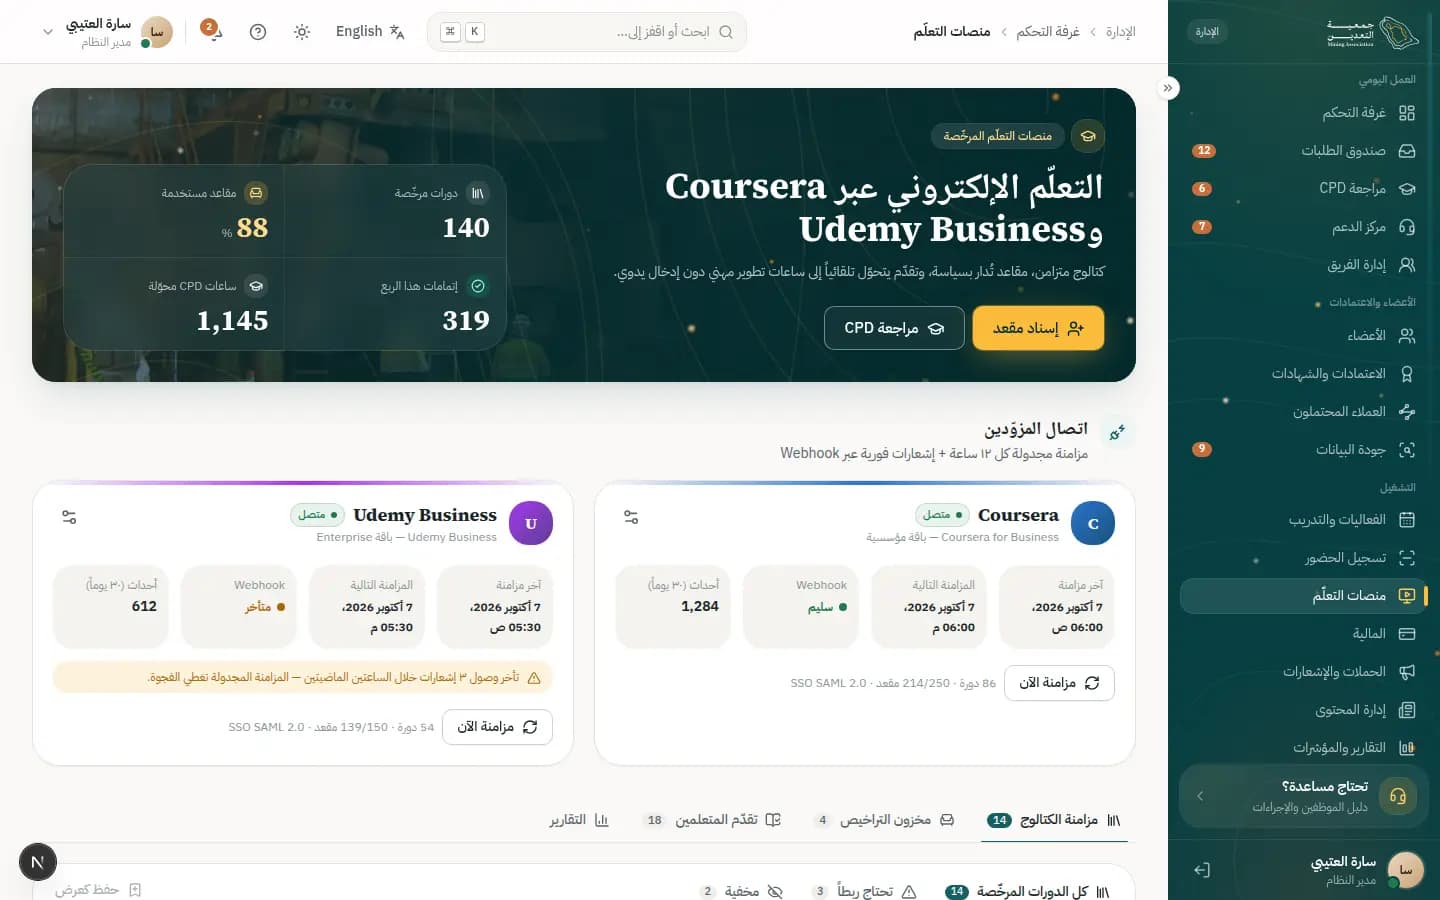
How to
Map a course to CPD hours
- 1Open the 'Catalog sync' tab and choose a course marked 'Needs mapping'.
- 2Press 'Map', choose the 'CPD activity type' and check 'CPD on completion'.
- 3Set the 'Eligible categories' and catalog visibility, then 'Save mapping'.
Assign a learning seat to a member
- 1Open 'License pool' and press 'Assign a seat'.
- 2Find the member by name or number and pick a catalog course.
- 3Press 'Assign'; the member receives a single sign-on link.
Reclaim inactive seats
- 1Press 'Reclaim inactive seats' to see who has had no activity for the set period.
- 2Choose 'Notify all' to warn them first, or 'Reclaim now' when needed.
- 3By policy the member is notified first and the seat is reclaimed after 7 days.
What's on the screen
- “Licensed learning platforms”
- Each provider's status ('Connected') with 'Sync now' and 'Connection settings'.
- “Catalog sync”
- Courses with 'Visibility', 'Course length' and 'Sync'.
- “License pool”
- 'Purchased', 'Seats in use' and 'Seats available' per provider.
- “Learner progress”
- 'Progress' and 'Last activity' per member, with a 'Nudge' for those who fell behind.
- “Reports”
- 'Completion rate per course' and CPD hours credited from providers.
- “Auto-create CPD entries”
- At 100% one CPD entry is created, so it is never counted twice.
Tips
- If a sync shows 'Failed', check 'Connection settings' and press 'Sync now' again.
- Use 'Send a test event' to confirm Webhook notifications arrive.
/admin/notificationsCampaigns & notifications
The campaigns and notifications screen brings together bulk campaigns, in-app announcements, the delivery log and automated reminder rules, always respecting member consent.
Who uses it?
The communications, events and membership teams use it to send messages and track delivery.
Features covered
Related journeys
Related screens
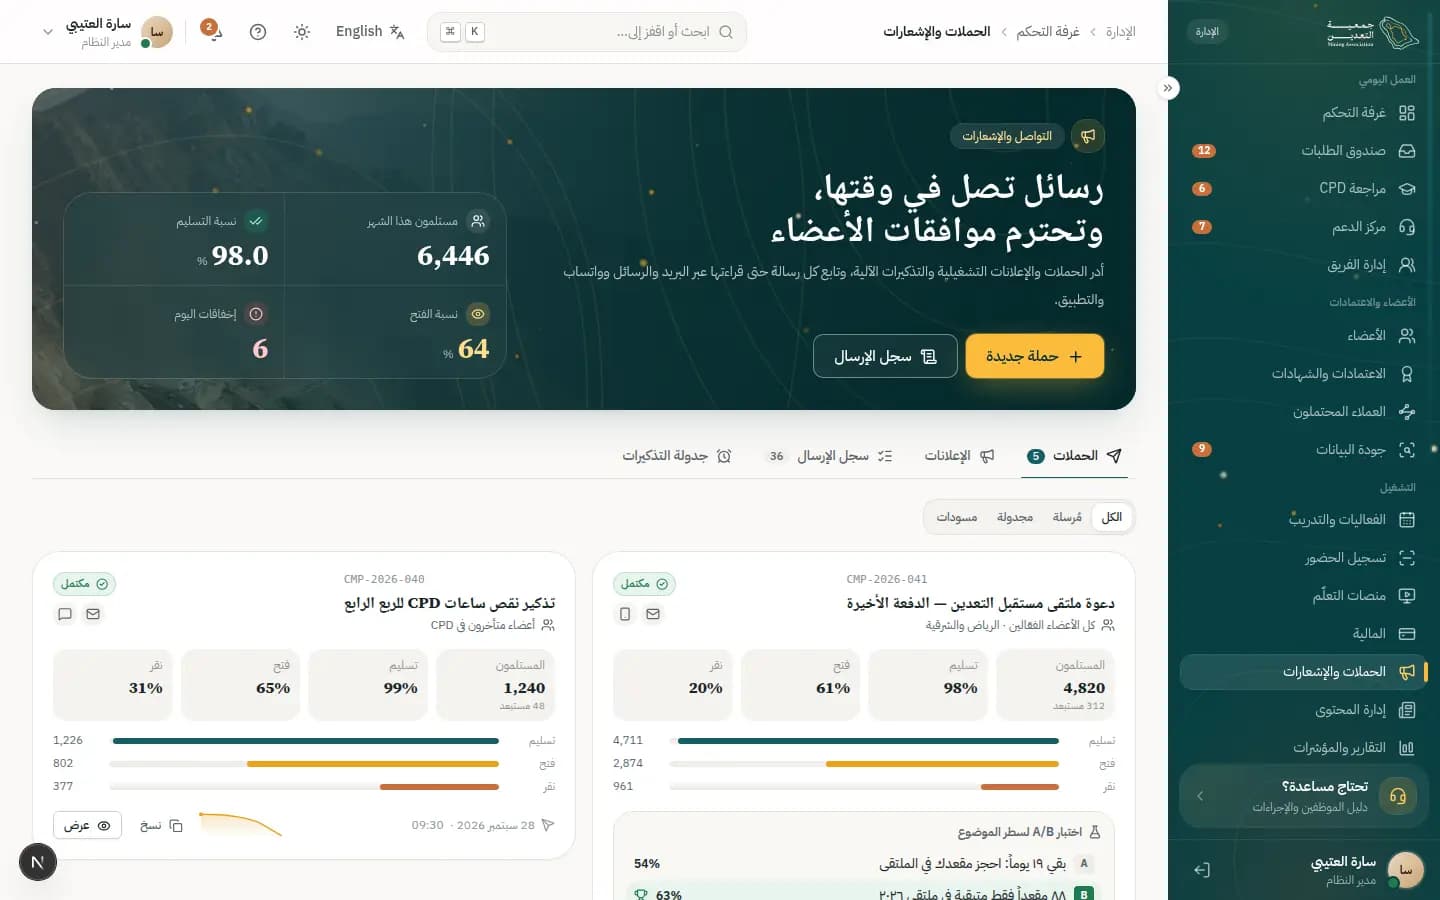
How to
Create and send a campaign
- 1In the 'Campaigns' tab press 'New campaign' and enter the 'Campaign name'.
- 2In 'Audience segment' choose the audience, such as 'Category' or 'Status', and watch 'Matching' and 'Excluded (consent)'.
- 3Pick the 'Channels', then write the 'Subject line' and 'Message' in Arabic and English until 'Ready in both languages' shows.
- 4Press 'Send test' to get a copy at your own email.
- 5Choose 'Send now' or 'Schedule', set the 'Time (Riyadh)', then 'Send now'.
Publish an in-app announcement
- 1Open the 'Announcements' tab and press 'New announcement'.
- 2Choose the tone ('Info', 'Warning' or 'News') and write the 'Title' and 'Message'.
- 3Set 'Starts' and 'Ends', then 'Publish'.
Find out why a message failed
- 1Open 'Delivery log' and filter by 'Failed'.
- 2Open the row to read the 'Failure reason' and 'Message events'.
- 3Press 'Resend' after fixing the cause.
What's on the screen
- “Campaigns”
- The list by 'Sent', 'Scheduled' and 'Drafts', with 'Delivery rate' and 'Open rate'.
- “Announcements”
- Operational banners shown at the top of the portal and app by audience and period.
- “Delivery log”
- Every message with 'Channel', 'Provider' and provider message ID.
- “Reminder scheduler”
- 'Automated reminder rules' such as renewal reminders, with 'Send offsets' and 'Auto-cancel'.
- “Fatigue protection”
- Limits how many messages one member receives.
- “A/B test the subject line”
- Try 'Subject A' and 'Subject B' to see which gets opened more.
Status meanings
- DraftA campaign that has not been sent.
- PendingScheduled and waiting for its send time.
- FailedDelivery failed; check the delivery log.
Tips
- Complete the text in both languages before publishing so each member gets their preferred language.
- A sent campaign is read-only; use 'Duplicate' to start a new draft from it.
/admin/cmsContent management
The content-management screen handles website pages, news, FAQs and legal documents in two languages, with drafts, review, scheduling and a version history.
Who uses it?
Content and marketing editors use it, and a supervisor reviews before publishing.
Features covered
Related journeys
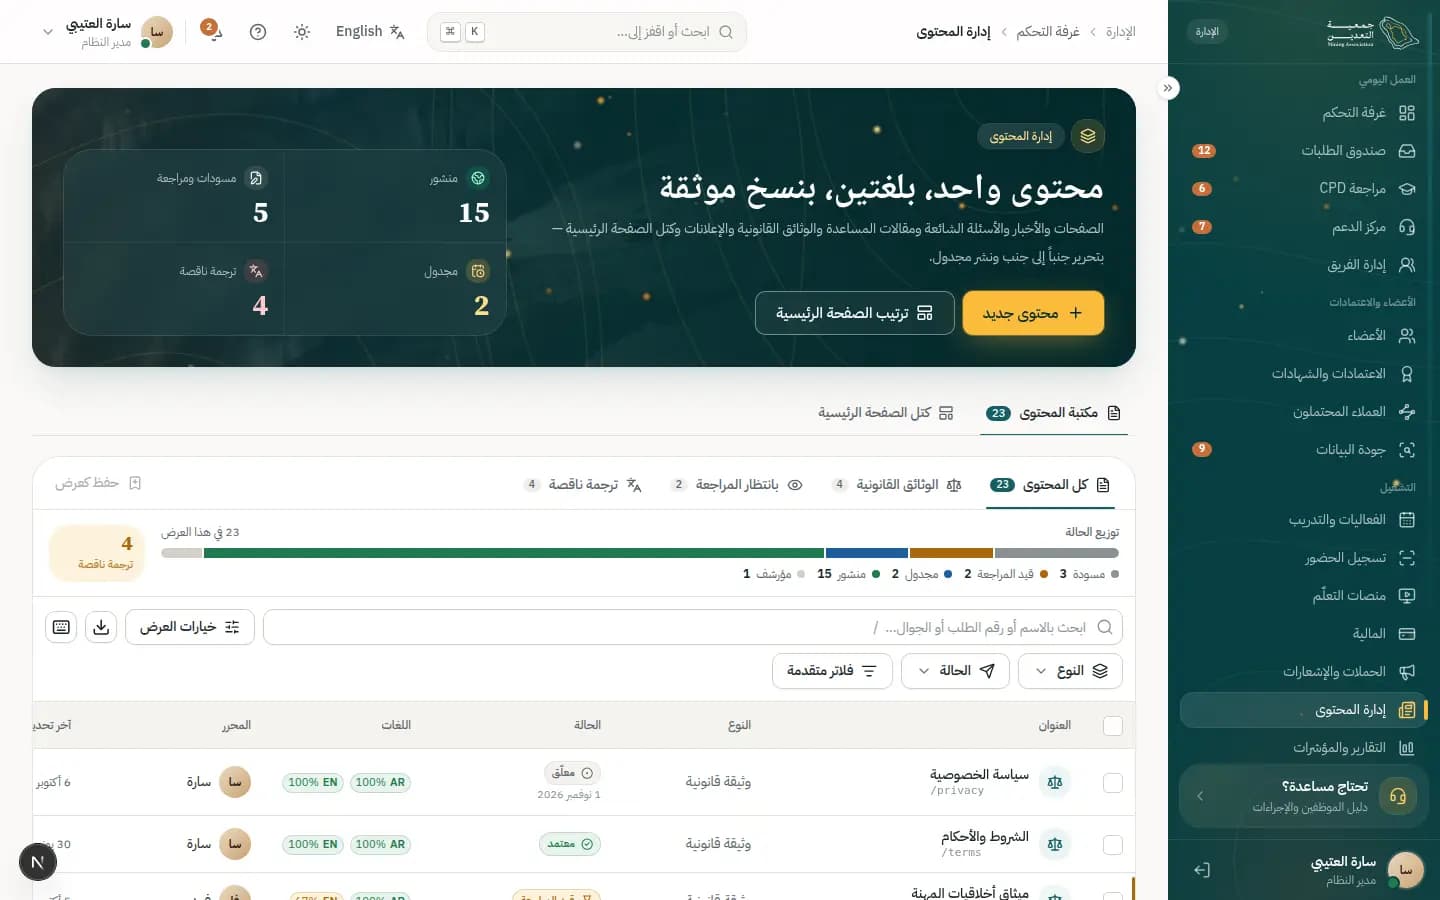
How to
Create and publish new content
- 1Press 'New content' and choose the 'Type'.
- 2Enter the 'Title', 'Slug' and the summary for search engines.
- 3Write the content in Arabic and then English; 'Translation' shows your progress.
- 4Press 'Save draft' or 'Preview', then 'Publish now' or 'Schedule' to set the 'Publish date'.
Fix a missing translation
- 1Open 'Drafts & review' or filter by 'Translation gaps'.
- 2Open the item with 'Open editor' and review any machine 'Draft translation'.
- 3Edit the text and save; the status becomes 'Complete in both'.
Arrange the home-page blocks
- 1Press 'Arrange home page'.
- 2Use 'Move up' and 'Move down' to order the 'Home page blocks'.
- 3Press 'Publish layout'.
Restore an earlier version
- 1Open the item, then 'Version history'.
- 2Press 'Compare' to see the differences, then 'Restore'.
What's on the screen
- “Content library”
- All items with 'Type', 'Status', 'Languages' and 'Last edited'.
- “Legal documents”
- Terms and privacy; you can request member consent for a new version and consent is logged with the version number.
- “Editor”
- Tools for bold, italic, list, link, image and quote.
- “Mini preview”
- Shows how the content will look and opens the full preview in a new tab.
- “Version history”
- The 'Current version' and earlier ones with 'Compare' and 'Restore'.
Status meanings
- DraftAn unpublished draft.
- Under reviewUnder review before publishing.
- ActivePublished and visible to the public.
Tips
- Review machine translations before publishing; they are only drafts.
- Always preview before 'Publish now' to check both Arabic and English.
/admin/reports/builderReport builder
The report builder lets you create a custom report in three steps (dataset, configure, live preview), then save it, schedule it or set a threshold alert.
Who uses it?
Supervisors and analysts who need figures the ready-made reports do not provide.
Features covered
Related journeys
Related screens
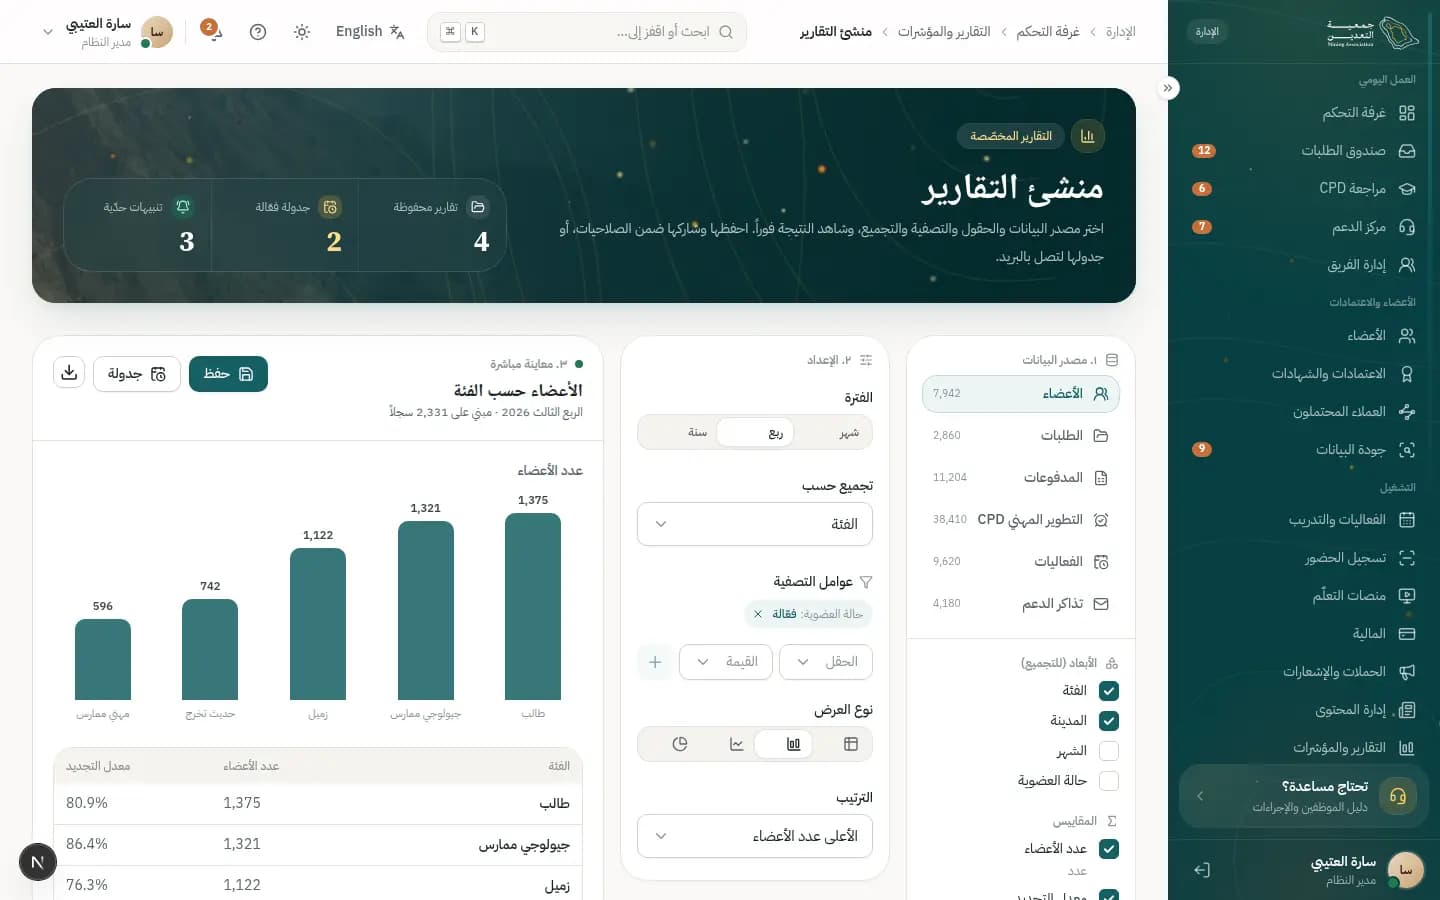
How to
Build a custom report
- 1In '1. Dataset' pick a dataset.
- 2In '2. Configure' choose 'Measures', 'Dimensions (group by)' and 'Period'.
- 3Press 'Add filter' to narrow results and set the 'Sort'.
- 4Choose the 'Visualisation': table, bar, line or donut, and watch '3. Live preview'.
Save and share the report
- 1Press 'Save report' and enter the 'Report name' and 'Description'.
- 2Under 'Who can see it?' choose 'Private', 'My team' or 'Specific roles'.
- 3Press 'Save'. Sharing never exceeds the recipient's permissions.
Schedule a report or create an alert
- 1Press 'Schedule' and choose 'Scheduled report' or 'Threshold alert'.
- 2For a scheduled report set 'Frequency', 'Day', 'Time (Riyadh)', 'Recipients' and 'Format'.
- 3For an alert pick the 'Metric', 'Condition' (Above or Below), 'Threshold' and 'Notify via'.
- 4Press 'Schedule' or 'Create alert'.
What's on the screen
- “1. Dataset”
- The data the report is based on.
- “2. Configure”
- Measures, grouping, period and filters.
- “3. Live preview”
- An instant result as you adjust.
- “Saved reports”
- Your reports and your team's, with 'Open'.
- “Schedules & alerts”
- 'Active schedules' and 'Threshold alerts', which can be paused.
- “Export”
- Download as Excel or PDF.
Tips
- Start with one measure and a short period, then widen the report gradually.
- A threshold alert tells you as soon as a metric crosses the limit, so you do not need to open the report.
/admin/privacyPrivacy & compliance
The privacy and compliance workspace handles data-subject requests, the consent ledger, retention policies and anomaly alerts under the Personal Data Protection Law (PDPL).
Who uses it?
The data-protection officer and compliance team use it; every action is logged under your name in the audit trail.
Features covered
Related journeys
Related screens
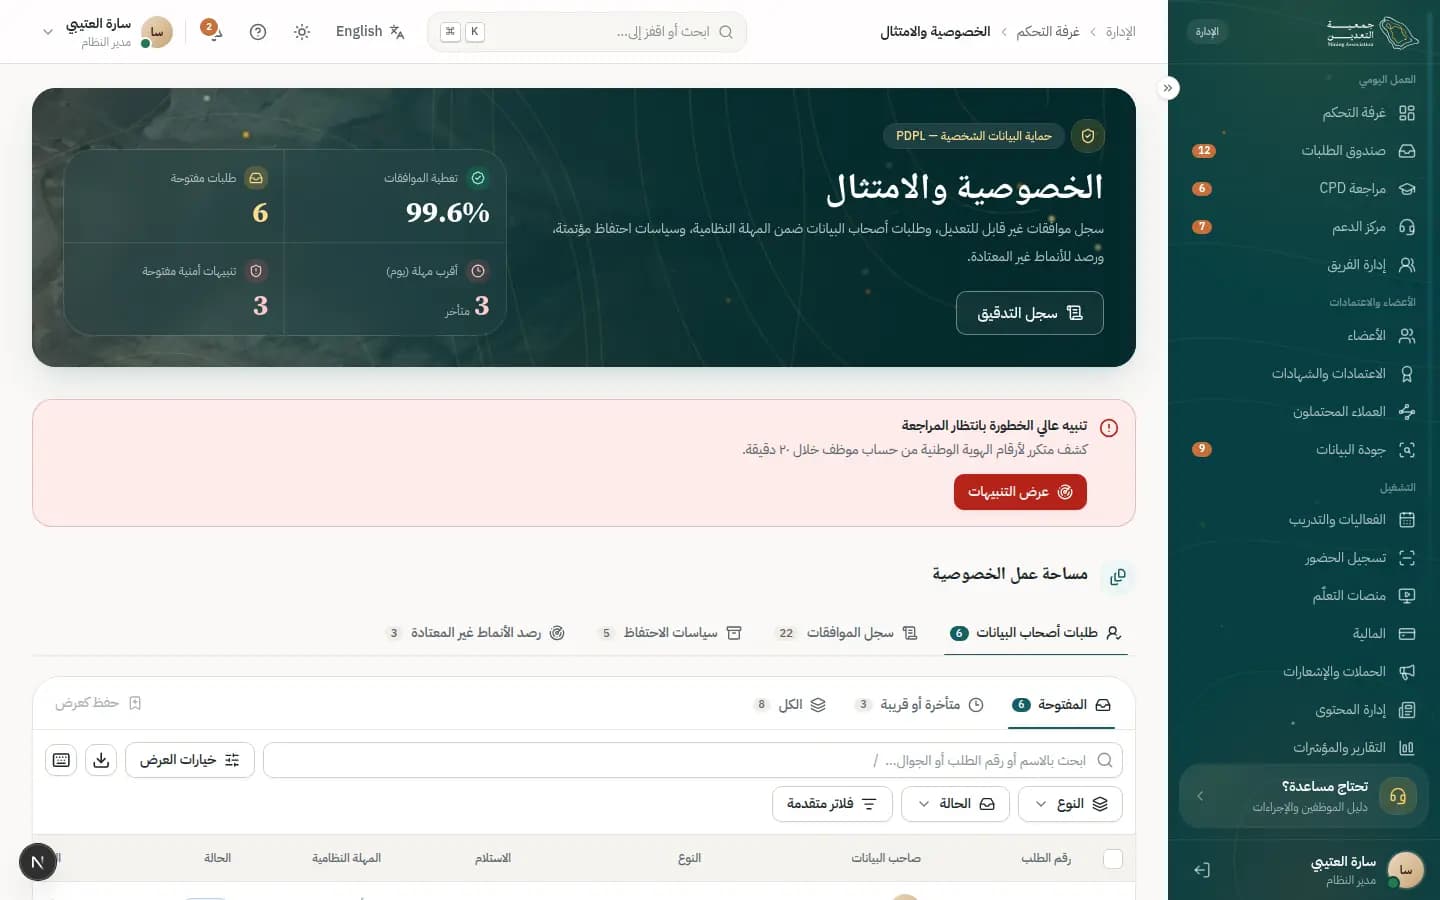
How to
Handle a data-access request
- 1Open the 'Data subject requests' tab and choose a 'New' request.
- 2Verify identity: press 'Request Nafath verification' if not yet 'Verified (Nafath)'.
- 3Press 'Handle' then 'Generate & send export'; the 'Export package' appears and a 7-day secure link is sent.
Carry out a deletion or closure
- 1Open the request and read the 'Impact of deletion / closure' to see what 'Will be deleted' and what is 'Retained by law'.
- 2Press 'Execute deletion & closure' and confirm 'Delete this member's data permanently?'.
- 3If it is not possible choose 'Reject with reason' and write the reason that is sent to the member.
Adjust a retention policy
- 1Open 'Retention policies' and press 'Edit policy'.
- 2Change the 'Retention period' and the 'Action at expiry': 'Anonymize' or 'Delete'.
- 3Try a 'Dry run' then 'Save policy'; the statutory minimum cannot be shortened.
Respond to an anomaly alert
- 1Open 'Anomaly alerts' and choose an 'Open' alert.
- 2Read 'Observed' against 'Baseline', then choose 'Open investigation' or a containment action such as 'End user sessions' or 'Block IP address'.
- 3When done press 'Acknowledge'.
What's on the screen
- “Open requests”
- With the 'Nearest SLA (days)' and 'Late or due soon'.
- “Data subject requests”
- Access, correction, deletion and objection requests with the 'Statutory SLA'.
- “Consent ledger”
- 'Current consents', 'Consent coverage' and 'Withdrawals'.
- “Retention policies”
- The period per data type, the 'Next run' and 'Respect legal holds'.
- “Anomaly alerts”
- Alerts by severity: Open, Investigating, Acknowledged.
- “Audit log”
- Every action is recorded; open it with 'Open audit log'.
Status meanings
- NewA new request not yet handled.
- In progressBeing handled.
- OverduePast its statutory deadline.
- CompletedDone and audited.
- RejectedRejected and the member told why.
Tips
- Never delete before identity is verified; payments and the audit trail are kept for their legal period.
- Use 'Anonymize' when you only want to keep the figures for statistics.
/admin/systemSystem monitoring
The system-monitoring screen shows service health, background jobs, errors, uptime and performance, and backups, so you spot problems early.
Who uses it?
System administrators and the IT team use it; a supervisor may check it after a report of slowness or an outage.
Features covered
Related journeys
Related screens
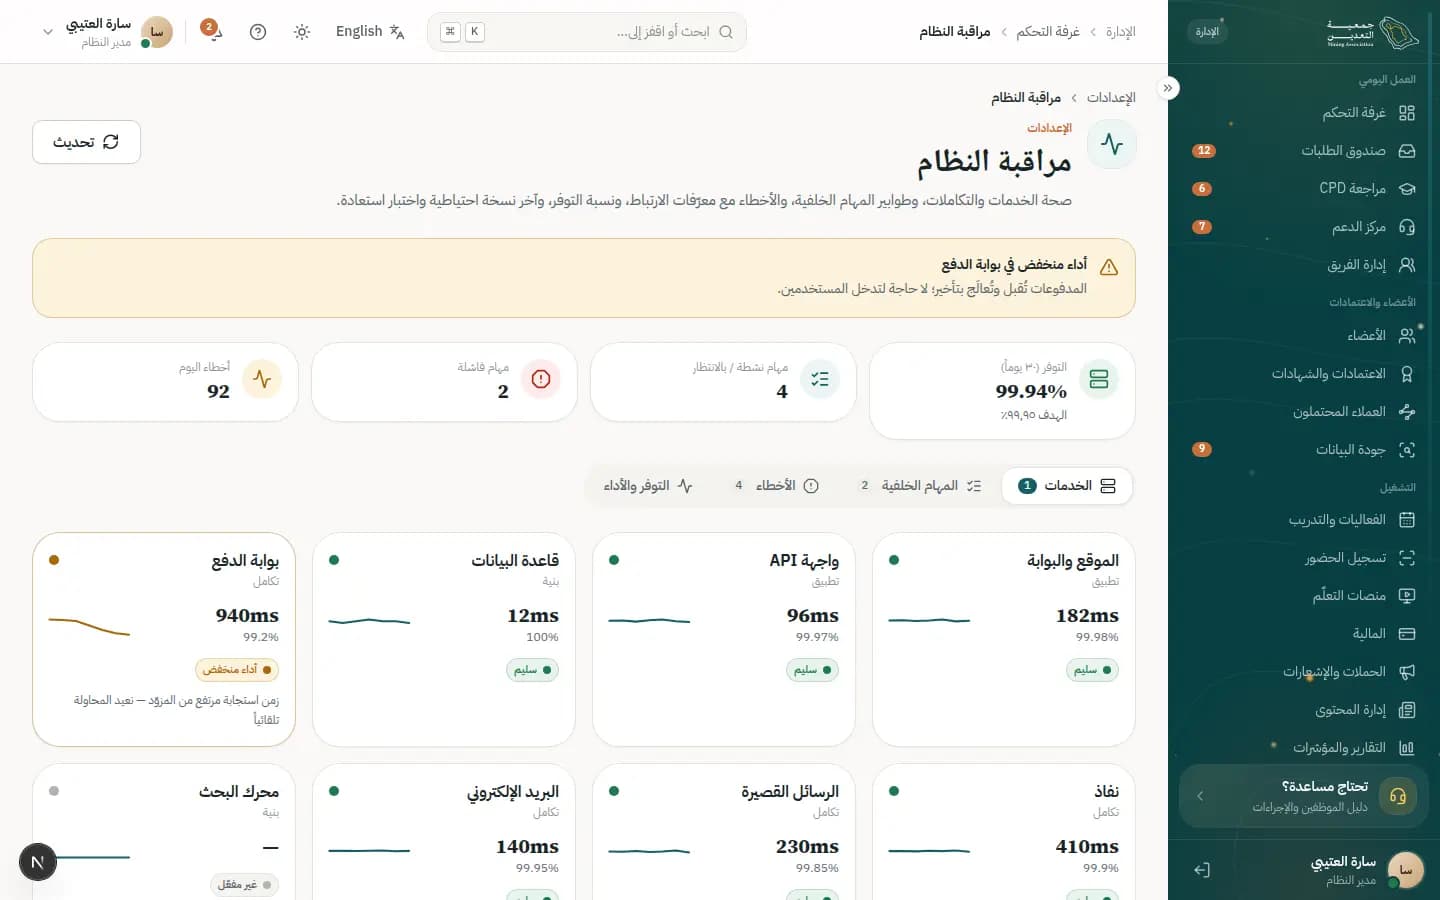
How to
Check service health
- 1Open the 'Services' tab and read each service's state: healthy, degraded or outage.
- 2Press 'Refresh' to get the latest status.
- 3Compare 'Uptime (30d)' with the 'Commitment 99.5%', and 'Response time p95' against the ≤ 3 s commitment.
Retry failed jobs
- 1Open 'Background jobs' and filter by 'Failed'.
- 2Press 'Retry' next to the job, or 'Retry all failed'.
- 3You can 'Pause' a job and then 'Resume'.
Trace an error and report it
- 1Open the 'Errors' tab and choose the error.
- 2Press 'Copy correlation ID' and send it to the technical team.
Take a backup
- 1Read 'Last backup' and 'Last restore test' in 'Backup & restore'.
- 2Press 'Back up now' when needed, for example before a big change.
What's on the screen
- “Services”
- Payment gateway, email, SMS, database, Nafath and more.
- “Background jobs”
- 'Running', 'Queued' and 'Failed' with 'Progress' and 'Attempts'.
- “Errors”
- 'Errors today', 'Occurrences' and 'Trace'.
- “Uptime & traffic”
- The 'Uptime strip' with a bar per day, 'Requests per hour' and 'Error rate %'.
- “Backups”
- Daily and incremental backups with 'Retention'.
Tips
- Remember that data is stored inside the Kingdom and encrypted.
- If a job keeps failing after 'Retry', do not keep retrying; report it with the correlation ID.
/admin/settingsSettings
The platform control centre holds everything that shapes the platform without code — categories, forms, workflows, access and more — with every change versioned and audited.
Who uses it?
Platform admins use it to edit membership categories and reach the designers, roles and audit log.
Features covered
Related journeys
Related screens
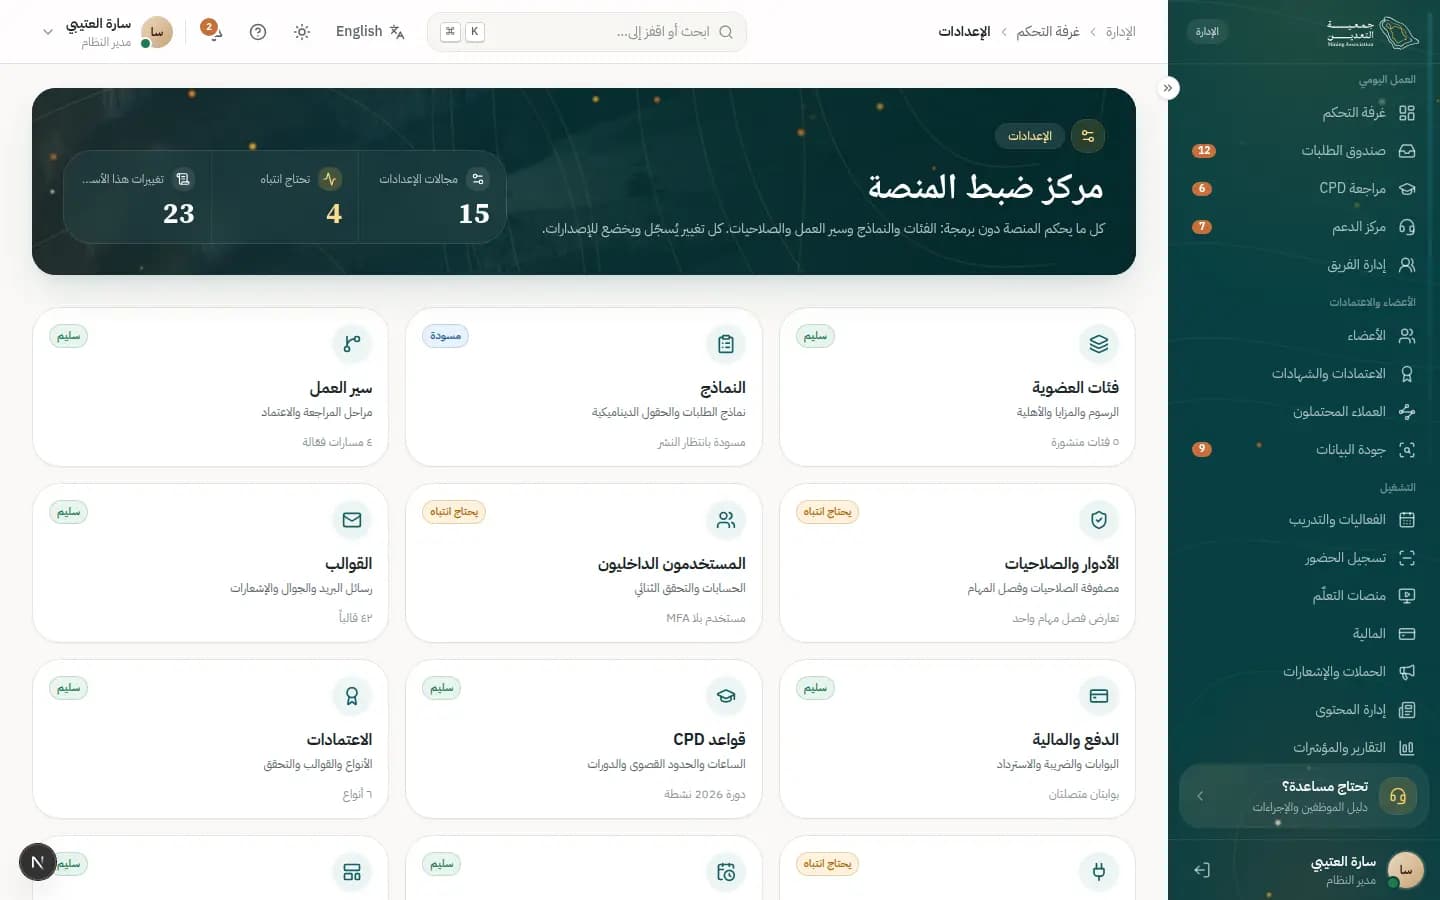
How to
Edit a membership category
- 1Scroll to 'Membership categories' and press 'Edit' on a category.
- 2Update 'Annual fee (pre-VAT)' and 'Required CPD hours / year'.
- 3Edit 'Benefits', 'Eligibility rules' and 'Required documents' with 'Add' or remove.
- 4Choose the 'Publish state' and 'Effective date', and press 'Preview card' to check.
- 5Press 'Save'; a new version of the category is created.
Open a settings area
- 1Scan the area cards and their badge: 'Healthy', 'Needs attention' or 'Draft'.
- 2Press 'Forms', 'Workflows', 'Roles & permissions' or 'Audit log' to open its screen.
What's on the screen
- “Settings areas”
- Indicators: 'Settings areas', 'Need attention', 'Changes this week'.
- “Area cards”
- One card per area such as 'Membership categories', 'Forms', 'Workflows', 'Templates', 'Integrations', 'SLA & calendars'; some open only in the full build.
- “Membership categories”
- Category list with 'Fee', CPD hours, 'Members' and publish state, plus 'New category'.
- “Publish state”
- 'Draft', 'Scheduled' or 'Published', with 'Effective date' and 'Show on public site'.
Tips
- Category changes apply to new applications only; existing members keep their terms until renewal.
- Every save creates a new version and is audited, so you can trace who changed what and when.
/admin/settings/formsForm builder
The form builder designs the application form (here 'Mining Professional') without code: drag fields into steps, set validation, visibility rules and prefill, then publish a new version.
Who uses it?
Used by platform admins or membership officers authorised to change application forms.
Features covered
Related journeys
Related screens
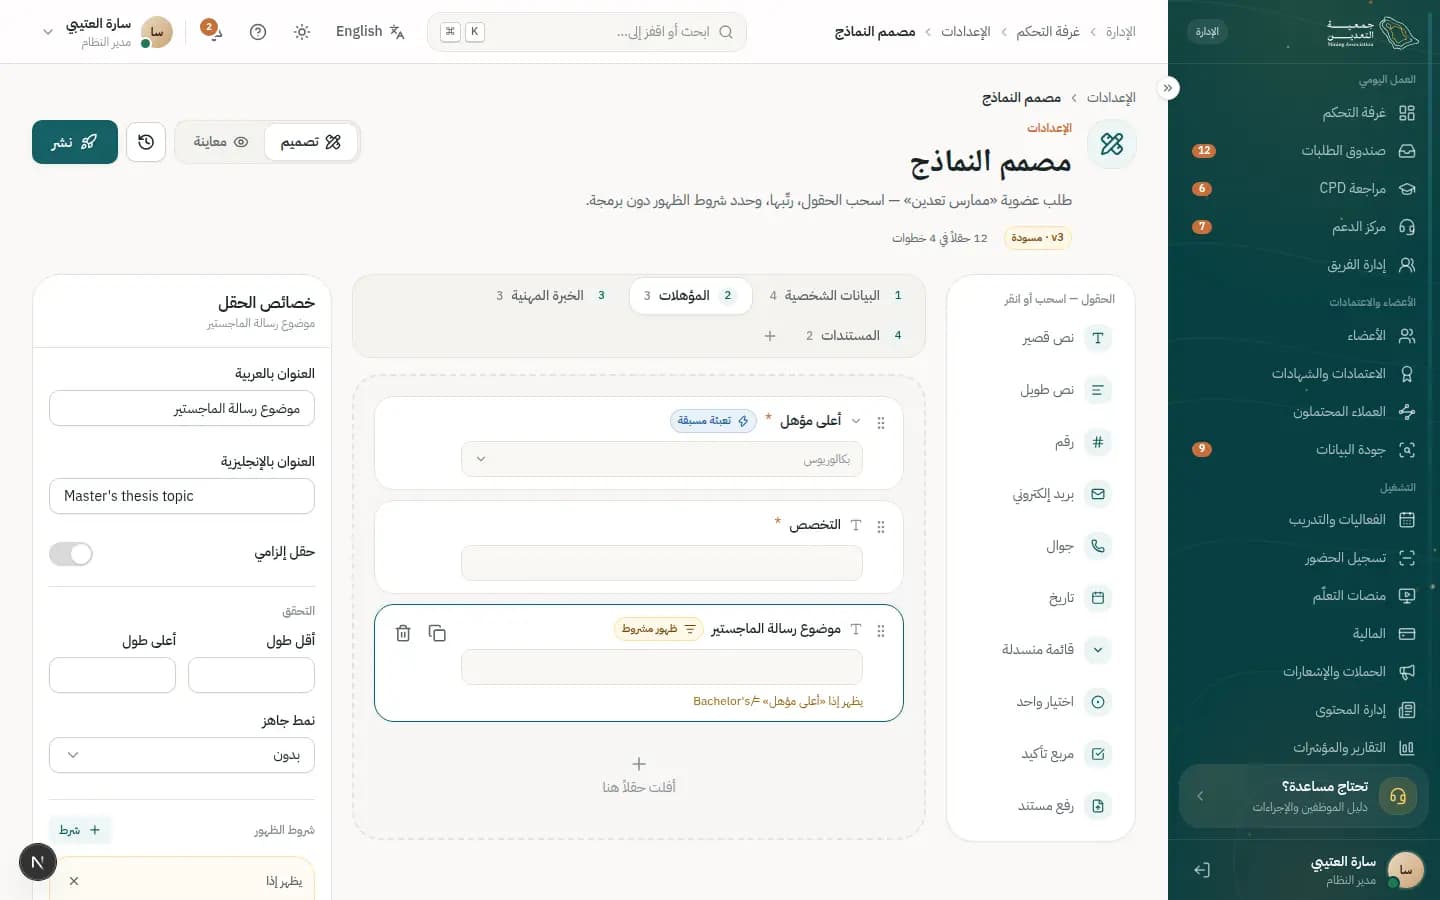
How to
Add a field and set its properties
- 1Drag a field type from 'Fields — drag or click' into a step, or click it to add.
- 2Select the field to show 'Field properties'.
- 3Enter 'Label (Arabic)' and 'Label (English)' and turn on 'Required' if needed.
- 4Set 'Validation' such as a 'Preset pattern' and add 'Help text'.
Make a field conditional
- 1Select the field and press 'Rule' under 'Visibility rules'.
- 2Pick the source field, the operator ('equals', 'not equal', 'greater than') and the value.
- 3The field shows a 'Conditional' badge; check it in 'Preview'.
Preview and publish the form
- 1Switch to 'Preview' and try it on 'Desktop' or mobile and in both languages.
- 2Check 'Version history' to compare with the previously published version.
- 3Press 'Publish', then 'Publish now'.
What's on the screen
- “Build / Preview”
- Build mode to edit fields; Preview to walk through the form as the applicant sees it.
- “Fields — drag or click”
- Field types: short/long text, number, email, mobile, date, dropdown, single choice, checkbox, file upload.
- “Form steps”
- Step canvas such as 'Personal details', 'Qualifications', 'Experience', 'Documents', with 'Add step'.
- “Field properties”
- Labels, required, 'Validation', 'Visibility rules', 'Prefill mapping' and 'Help text'.
- “Prefill mapping”
- Link a field to a source such as 'Nafath → Full name', 'Profile → Mobile' or 'Vault → Degree', with 'Allow applicant to edit'.
- “Version history”
- Current draft, published and archived versions.
Tips
- Publishing applies to new applications immediately; in-flight ones, like Noura's, finish on the version they started with.
- Publishing the form is written to the audit log under your name.
/admin/settings/workflowsWorkflow designer
The workflow designer defines the stages, roles, SLAs and notifications of a new membership application, with a simulation before publishing.
Who uses it?
Used by platform admins when changing the review path, SLAs or how roles are split across stages.
Features covered
Related journeys
Related screens
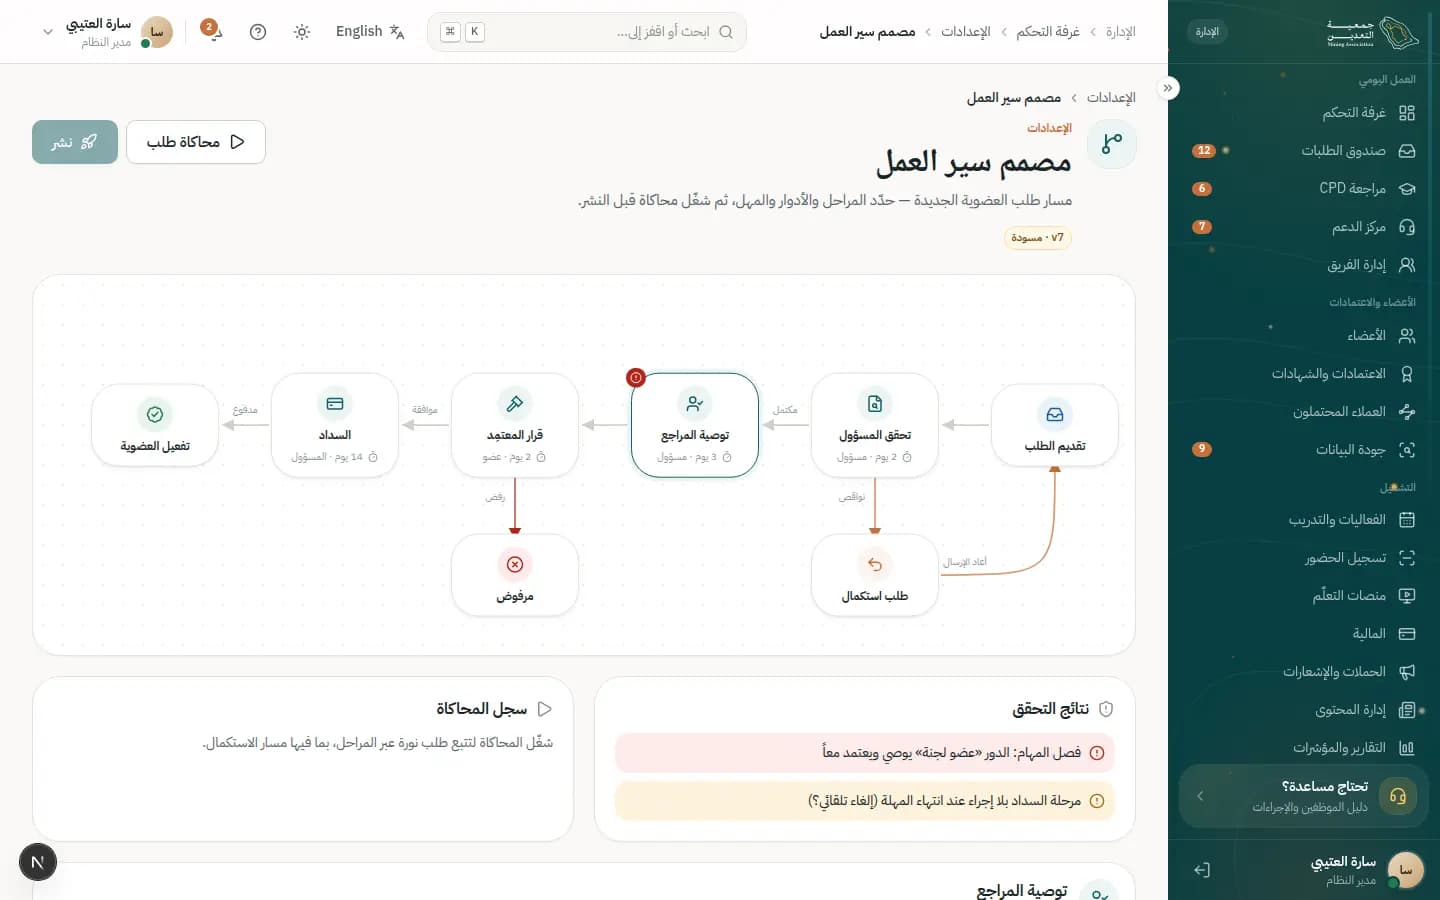
How to
Edit a stage in the flow
- 1Click a stage on the canvas, such as 'Officer verification'.
- 2Set the 'Responsible roles' for the stage.
- 3Adjust the 'SLA (working days)'.
- 4Set 'Notifications': 'Notify member', 'Notify team' and 'Escalate at 80% of SLA'.
- 5Choose 'Required to proceed' fields such as 'Written reason'.
Run a request simulation
- 1Press 'Simulate a request'.
- 2Follow Noura's request through the stages in the 'Simulation log', including the 'Correction' branch.
- 3Use play and 'Next step', then 'End simulation'.
Validate and publish the flow
- 1Review the 'Validation' panel and fix every red issue.
- 2Make sure 'No issues — ready to publish' appears.
- 3Press 'Publish'; it stays disabled while critical issues remain.
What's on the screen
- “Workflow canvas”
- Stages 'Submitted', 'Officer verification', 'Reviewer recommendation', 'Approver decision', 'Payment', 'Activation', plus branches 'Correction' and 'Rejected'.
- “Responsible roles”
- Roles allowed to act on the selected stage, with the SoD check.
- “SLA (working days)”
- Stage duration used to compute overdue indicators in the inbox.
- “Validation”
- Issues such as a stage with no role, an SoD conflict, or a payment stage with no timeout action.
- “Simulation log”
- Timeline of Noura's request from submission to issuing membership SMA-MP-004812.
Tips
- Keep separation of duties: the same role can't recommend and approve; remove the committee role from recommendation or add a 'not the same person' rule.
- Always simulate before publishing to confirm the correction branch returns to 'Submitted'.
/admin/settings/rolesRoles & permissions
Sets the least privilege each role needs within a clear scope (Own / Team / All), flags separation-of-duties conflicts and manages internal users.
Who uses it?
Used by platform or security admins when creating or editing a role or inviting a new staff member.
Features covered
Related journeys
Related screens
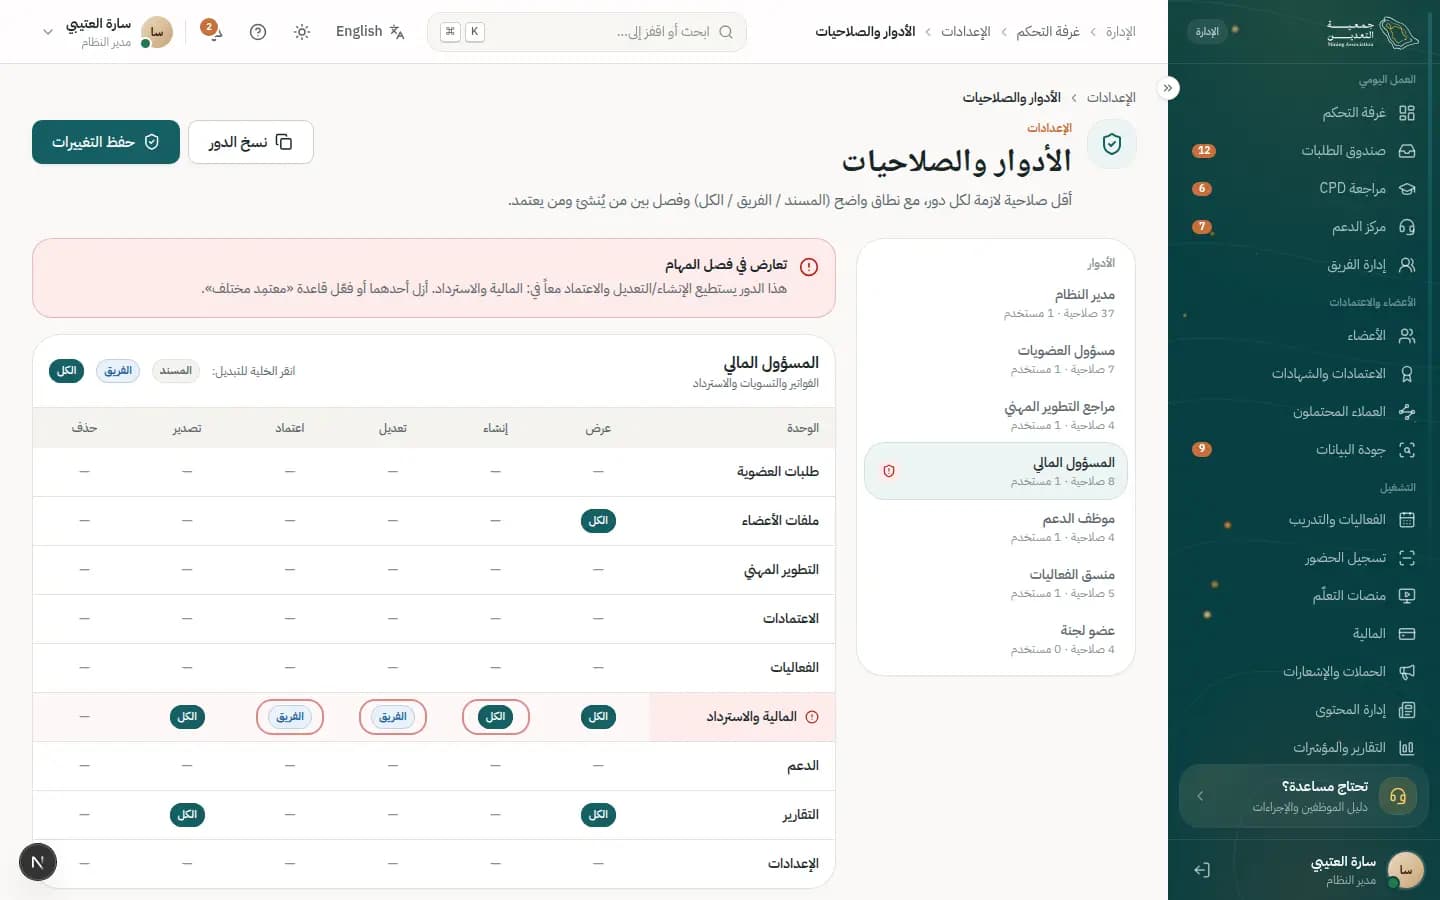
How to
Edit a role's permissions
- 1Pick the role from the 'Roles' list.
- 2Click a matrix cell (module × action) to cycle 'Own', 'Team', 'All' and none.
- 3Watch for the 'Separation-of-duties conflict' alert and fix it.
- 4Press 'Save changes'.
Invite an internal user
- 1Press 'Invite user'.
- 2Enter 'Full name' and 'Work email' and pick 'Role' and 'Team'.
- 3Set 'Access duration' (permanent or 90-day temporary) and keep 'Require MFA on first sign-in' on.
- 4Press 'Send invite'.
Lock an account or remind about MFA
- 1Scroll to the 'Internal users' table.
- 2Press 'Remind' next to anyone without MFA.
- 3Press 'Lock' to suspend the account and end its sessions, or 'Unlock' to restore it.
What's on the screen
- “Roles”
- Role list with permission and user counts, and an 'SoD conflict' marker when present.
- “Permission matrix”
- Modules (Applications, Member records, CPD, Finance & refunds…) against actions (View, Create, Edit, Approve, Export, Delete).
- “Duplicate role”
- Copies the current role as a new draft to edit without touching the original.
- “Internal users”
- User, role, 'MFA' state, 'Last sign-in' and account state.
Tips
- A role must not combine create/edit with approve in the same module — that is the heart of separation of duties.
- MFA is mandatory for every role with approval rights.
- Saving permissions, invites and role grants are all written to the audit log under your name.
/admin/settings/auditAudit log
The audit log records every action with who, what, when and where, chaining each event to the previous one's hash so it can't be altered or deleted.
Who uses it?
Security admins and internal auditors use it to investigate events or prove integrity; admins use it to follow settings changes.
Features covered
Related journeys
Related screens
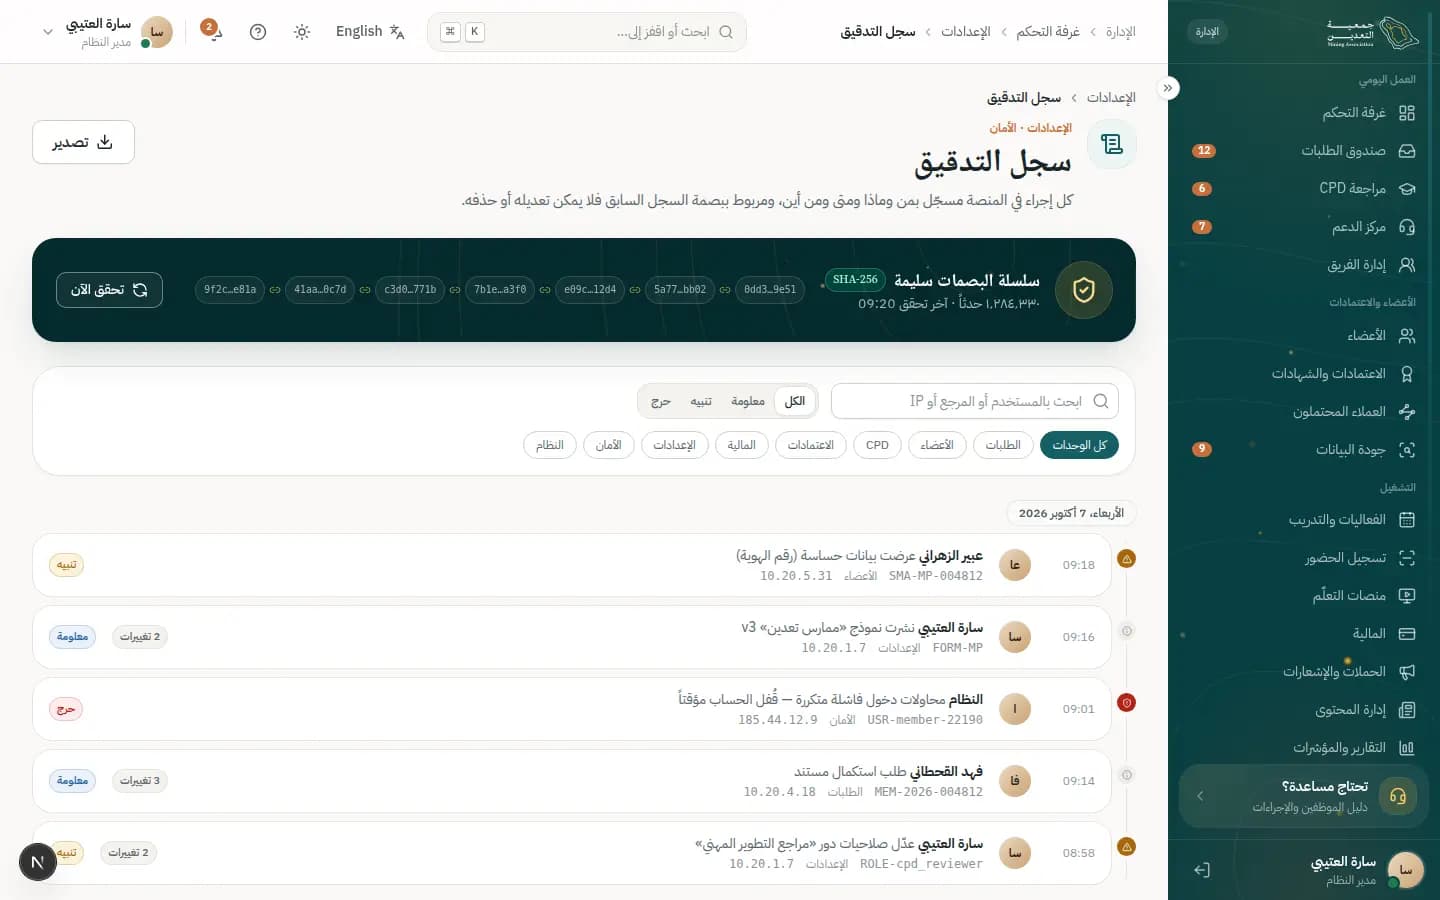
How to
Find an event and inspect it
- 1Type a user name or reference in the search box.
- 2Filter by severity ('Info', 'Warning', 'Critical') or by module.
- 3Open the event to see 'Actor', 'Time', 'IP address' and 'Device'.
- 4Review the 'Before / after' table and the 'Integrity' section.
Verify the chain's integrity
- 1Press 'Verify now' in the top banner.
- 2Wait for 'Hash chain intact' with the last verification time.
Export the log with step-up verification
- 1Press 'Export'.
- 2Pick the 'Scope' (current results, last 30 days or a custom range) and 'Format'.
- 3Enter the 'Verification code' sent to your mobile until 'Verified' shows.
- 4Press 'Export'; you'll receive a link to a digitally signed file.
What's on the screen
- “Hash chain intact”
- Integrity state, event count and 'Verify now'.
- “Search by user or reference”
- Search with the 'All / Info / Warning / Critical' severity filter and 'All modules'.
- “Before / after”
- Values before and after a change; read events show no data change.
- “Integrity”
- The event hash and its chain link, confirmed by 'Hash matches the chain'.
- “Export”
- Step-up-protected export producing a signed, watermarked file in your name.
Status meanings
- VerifiedStep-up code accepted; the export can proceed.
Tips
- The export itself is logged, and the file is digitally signed and watermarked with your name.
- Sensitive-data views — like revealing a national ID in Member 360° — appear here with their reason.
/admin/settings/categoriesMembership categories
This screen defines membership categories: fees, eligibility rules, documents, benefits and CPD requirements, with scheduled versions that do not disturb requests already in progress.
Who uses it?
Membership officers and the system administrator use it, and another officer approves its changes.
Features covered
Related journeys
Related screens
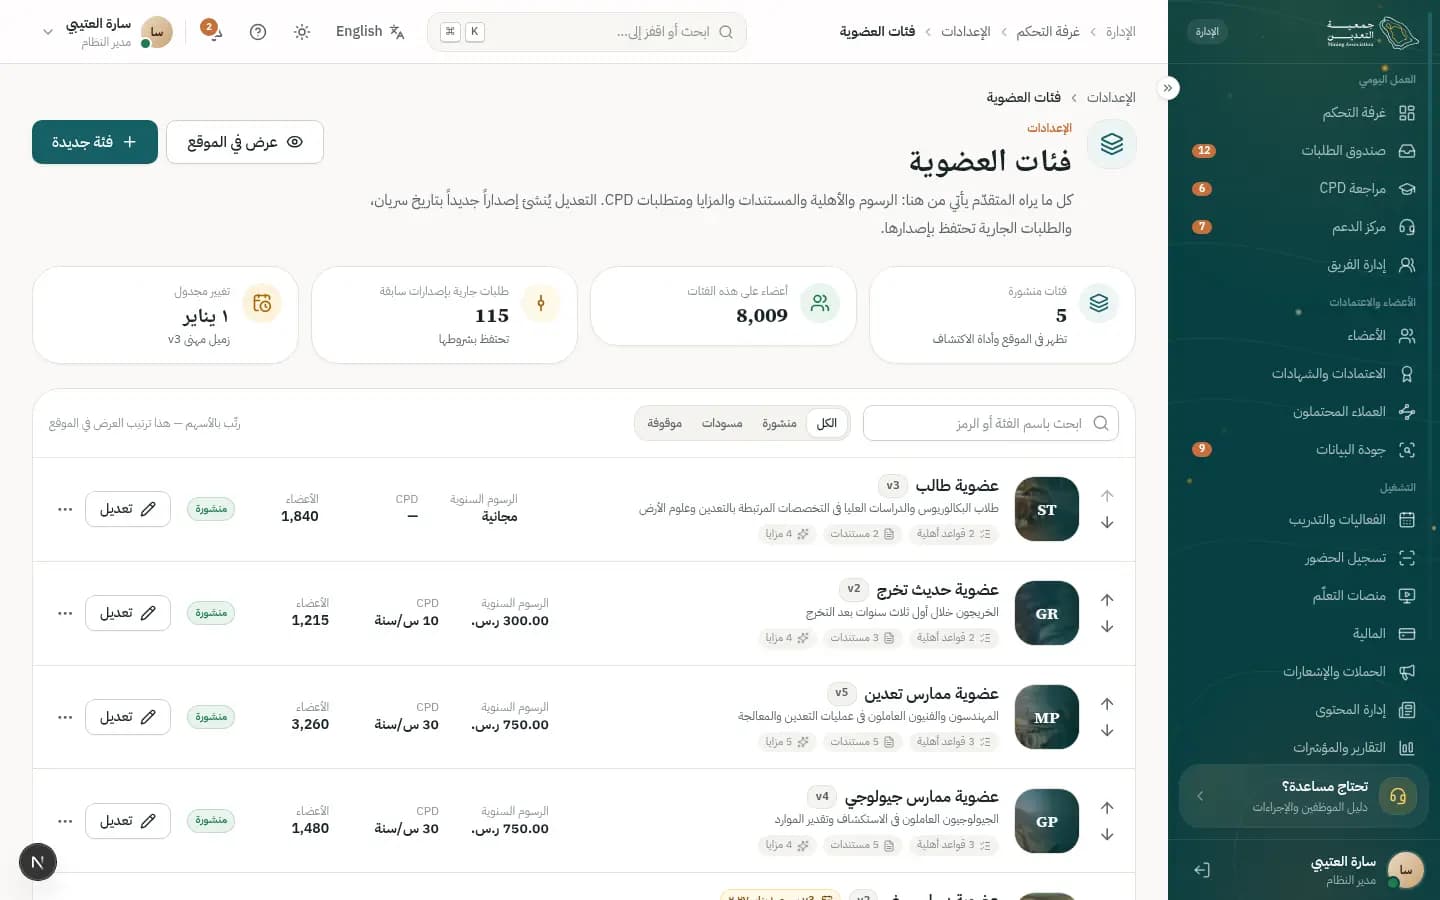
How to
Create a new category
- 1Press 'New category'.
- 2In 'General' enter 'Name (Arabic)', 'Name (English)' and 'Post-nominal'.
- 3Set 'Fees', 'Eligibility', 'Documents' and 'Benefits & CPD'.
- 4Press 'Save draft' and then 'Submit version'.
Change a category's fees
- 1Open the category and go to 'Fees'.
- 2Edit the annual, joining or late fee and check what the applicant sees in the payment summary.
- 3Pick the effective date: on approval, start of year or a custom date.
- 4Press 'Submit version'; requests in progress keep their terms.
Retire or republish a category
- 1Open the 'More' menu next to the category.
- 2Choose 'Retire for new applications'; current members are not affected.
- 3To bring it back choose 'Republish'.
What's on the screen
- “Membership categories”
- A searchable list with 'Published', 'Drafts' and 'Retired'.
- “Eligibility”
- Rules such as years of experience and degree, with an 'Add rule' button.
- “Documents”
- Required documents, for example a stamped experience letter marked 'Mandatory'.
- “Benefits & CPD”
- Benefits and required annual hours; activity types are managed in CPD settings.
- “Versions”
- 'Version history' and 'Compare versions' with the effect of each change.
- “Visibility”
- 'View on site' and the order shown on the categories page and the discovery tool.
Status meanings
- DraftA draft not yet approved.
- ActivePublished and open for applications.
- SuspendedRetired for new applications.
Tips
- Set the 'Tax treatment' carefully (standard 15% or exempt) because it shows on the invoice.
- Use 'Duplicate as new' instead of starting from scratch.
/admin/settings/usersUsers & teams
This screen manages association staff: their accounts, roles and teams, automatic assignment rules and the access policy such as MFA and single sign-on.
Who uses it?
System administrators, HR and IT use it to add staff and control who sees what.
Features covered
Related journeys
Related screens
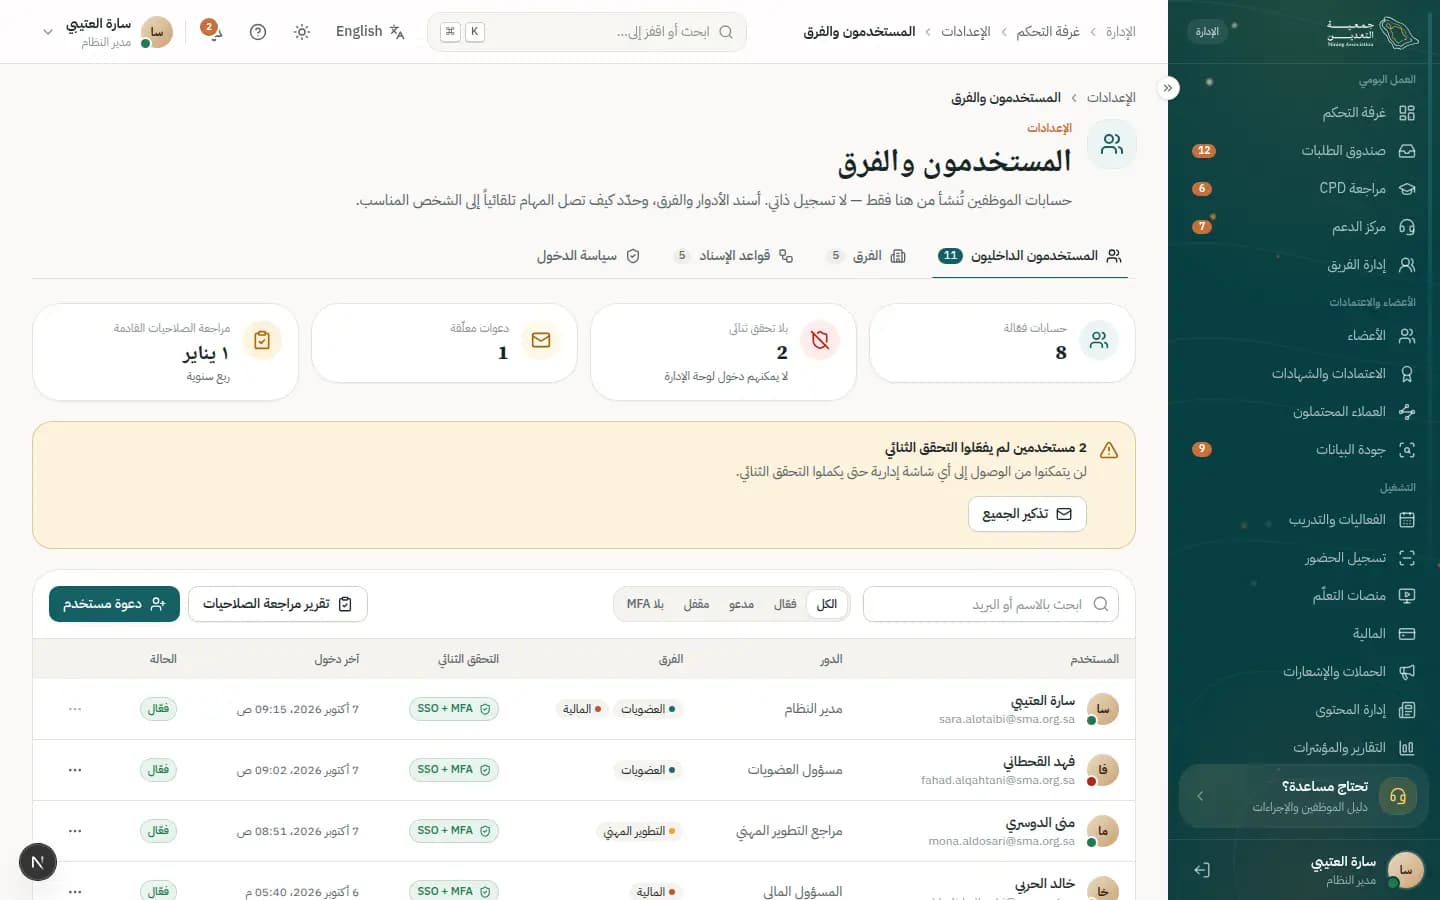
How to
Invite an internal user
- 1In 'Internal users' press 'Invite user'.
- 2Enter 'Full name' and 'Work email' (@sma.org.sa only) and choose the 'Role' and team.
- 3For a contractor enable 'Temporary access' and set the 'Access duration'.
- 4Press 'Send invite'; you can 'Resend invite' later.
Deactivate or unlock an account
- 1Press 'Actions' on the user's row.
- 2Choose 'Deactivate' and confirm 'Deactivate this account?'; their items are reassigned.
- 3For a 'Locked' account choose 'Unlock', or reset MFA if the device was lost.
Create an assignment rule
- 1Open 'Assignment rules' and press 'Rule'.
- 2Set the WHEN condition (request type, category, language or amount) and ASSIGN to a team or person.
- 3Write the reason for reviewers, try 'Test the rules', then 'Save rule'.
What's on the screen
- “Internal users”
- The table with 'Role', 'MFA' and 'Last sign-in', and state filters: Active, Invited, Locked.
- “Teams”
- Each team with 'Lead', 'Members', 'Load vs capacity' and its assignment strategy.
- “Assignment rules”
- Ordered by priority: the first matching rule applies.
- “Access policy”
- Mandatory MFA, 'Session timeout', 'Single sign-on (SSO)' and the IP allow-list.
- “Without MFA”
- Accounts blocked from the console until MFA is set up; 'Remind all' is available.
- “Access review report”
- An Excel file for the next quarterly access review.
Status meanings
- ActiveAn active account.
- PendingAn invitation not yet accepted.
- SuspendedA locked account after failed attempts.
Tips
- Review access every quarter; every role change is recorded in the audit log.
- Before saving the IP allow-list make sure your own address is included so you do not lock yourself out.
/admin/settings/templatesTemplates & messages
The templates and messages screen holds every system message (email, SMS, WhatsApp, in-app) and the canned replies, with versions and a preview before approval.
Who uses it?
The communications team and system administrator use it to edit the wording of the messages members receive.
Features covered
Related journeys
Related screens
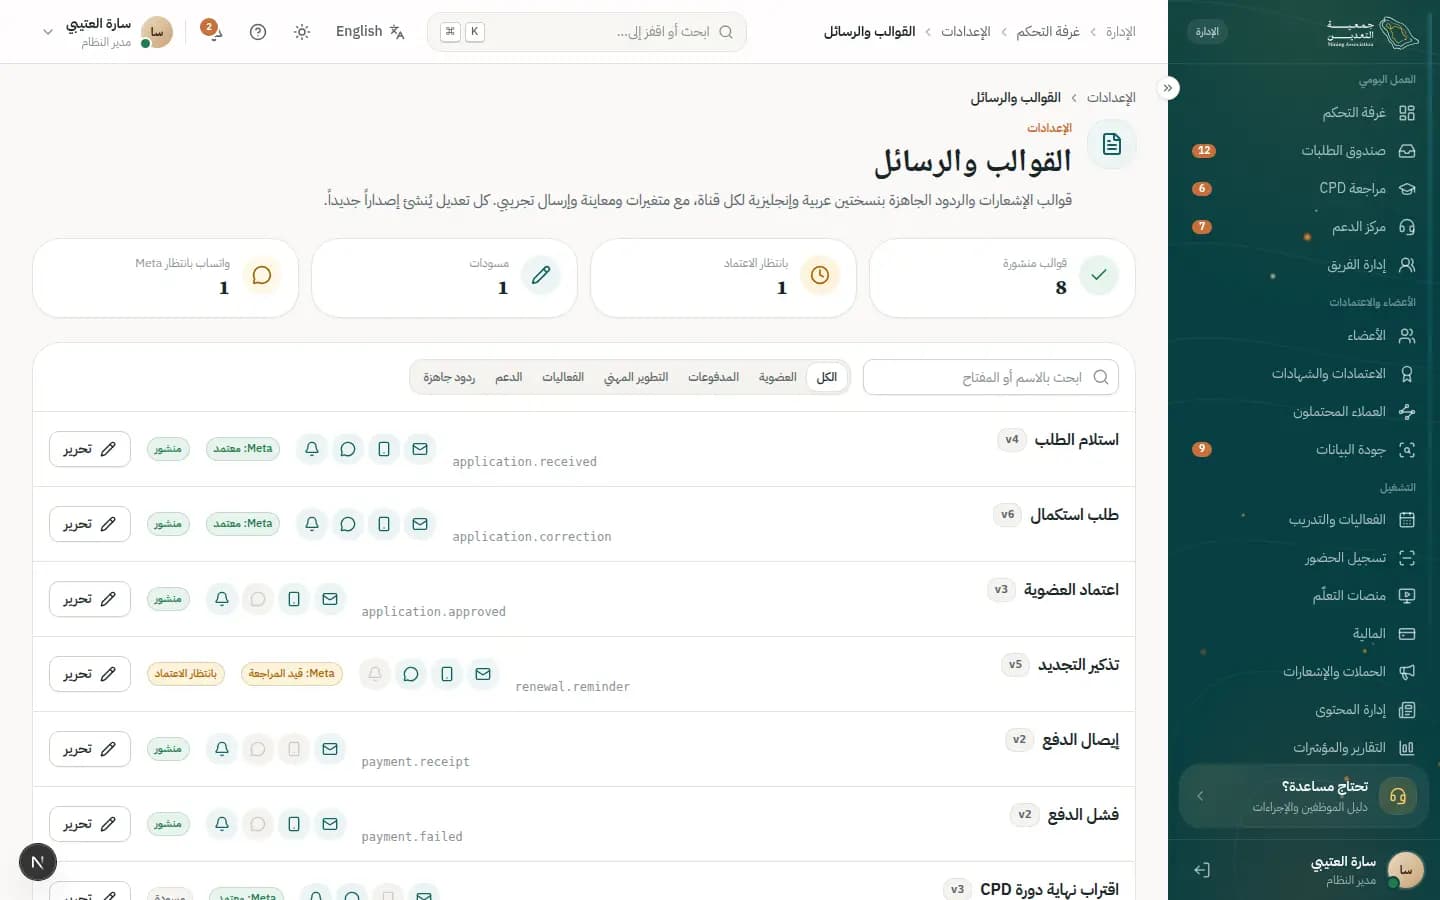
How to
Edit a template's wording
- 1Search by name or key, or filter by channel and group.
- 2Press 'Edit' on the template.
- 3Edit the 'Subject', 'Message body' and 'CTA label' in Arabic and English.
- 4Press 'Save as new version'; it goes for approval.
Use variables and test the template
- 1Open the 'Variables' tab and place the variable you need, like {{request.reference}}, in the text.
- 2Check the preview with sample values.
- 3Press 'Send test' to receive it on your own email and phone.
What's on the screen
- “Templates & messages”
- A list by group: Membership, Payments, Events, Support and CPD.
- “Channel”
- Email, SMS, WhatsApp and In-app.
- “Content”
- The message text in two languages with a live preview.
- “Variables”
- Fields filled automatically, such as the request reference and deep link.
- “Canned replies”
- Support replies such as 'Document incomplete'.
- “WhatsApp awaiting Meta”
- WhatsApp templates must be approved by Meta before use.
Status meanings
- DraftA draft being edited.
- Awaiting approvalWaiting for approval.
- ActivePublished and in use.
Tips
- These are automated messages that carry no sensitive data; never put an ID number or detailed financial figure in a template.
- A new version has no effect until it is approved.
/admin/settings/financeFinance settings
Finance settings control services and prices, VAT and document numbering, vouchers and discounts, and one-off pay-by-link payments.
Who uses it?
The finance manager and accountants use it; price changes go for approval.
Features covered
Related journeys
Related screens
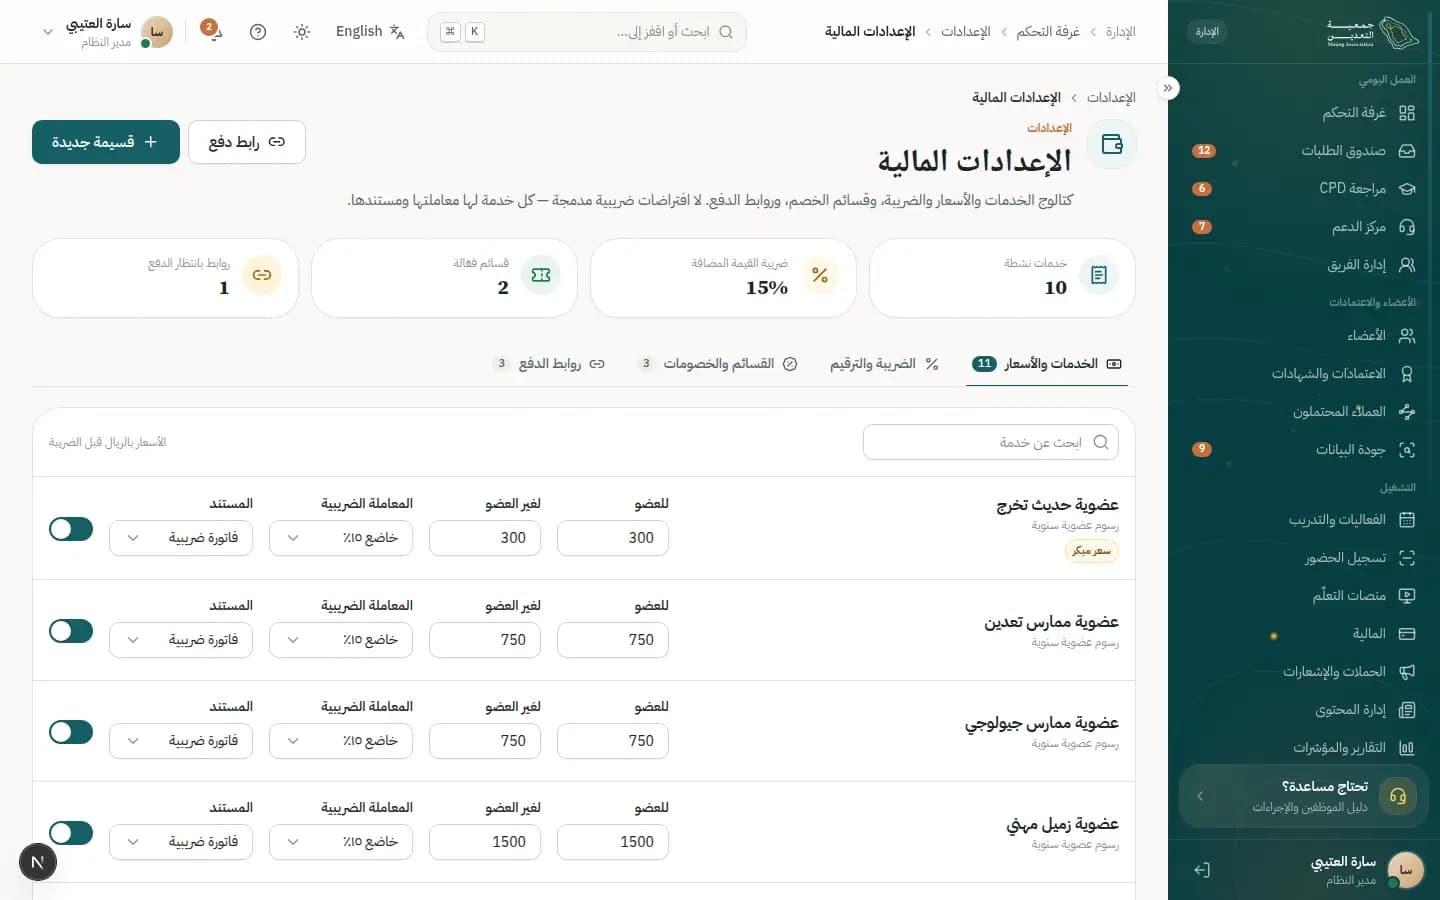
How to
Change a service price
- 1In 'Services & pricing' use 'Search for a service'.
- 2Edit the price ('For member' and 'For non-member'); prices are in SAR before VAT.
- 3Set the tax treatment (Standard 15%, Zero-rated or Exempt) and the document type.
- 4Press 'Approve' to send the change.
Create a discount voucher
- 1Open 'Vouchers' and press 'New voucher'.
- 2Choose the type (Percent or Fixed amount) and enter the 'Value' and 'Usage limit'.
- 3Set the 'Eligible categories' and the expiry date.
- 4For a full waiver (honorary member) write the 'Waiver reason'; it is required and audited.
- 5Press 'Create'.
Send a payment link
- 1Open 'Pay-by-link' and press 'Create payment link'.
- 2Choose the recipient and service, enter the 'Amount (before tax)' and the delivery channel.
- 3Press 'Create & send'; the link is valid for 7 days and works once.
What's on the screen
- “Services & pricing”
- The services table: annual fee, renewal, reactivation, event seat, late penalty.
- “VAT & numbering”
- The VAT rate and 'Document numbering series' for invoices, receipt vouchers and credit notes.
- “Vouchers”
- Live vouchers and how often each was used.
- “Pay-by-link”
- Links 'Awaiting payment' with 'Resend' or 'Close'.
Tips
- A VAT change applies to new invoices only, and numbering is sequential with no gaps.
- Settings marked as required for compliance cannot be switched off.
/admin/settings/cpd-credentialsCPD & credential settings
This screen sets the CPD rules and the professional credential types: the yearly cycle, activity caps, required hours, approved providers and assessment stages.
Who uses it?
The CPD officer and credentials officer use it; someone else approves the changes.
Features covered
Related journeys
Related screens
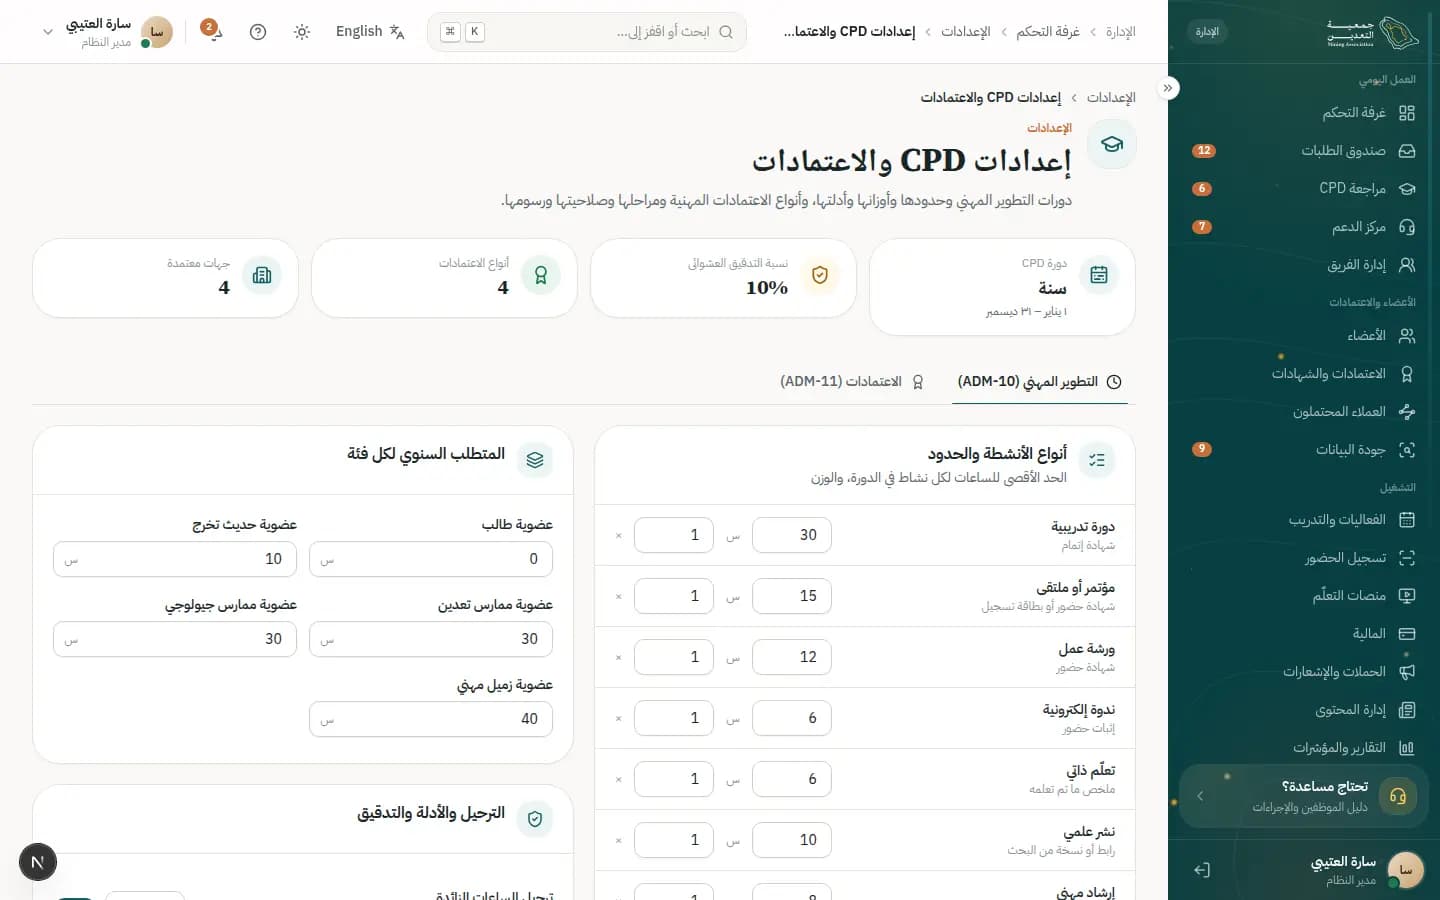
How to
Set the CPD rules
- 1Open the 'CPD (ADM-10)' tab.
- 2In 'Activity types & caps' edit the 'Cap' and 'Weight' per type.
- 3In 'Annual requirement per category' set the hours.
- 4Set 'Carry-over', 'Audit sampling rate %' and 'Require evidence for external activities'.
- 5Press 'Submit for approval'.
Edit a professional credential
- 1Open the 'Credentials (ADM-11)' tab and press 'Edit' on the credential.
- 2Change 'Fee', 'Validity (yrs)' and 'CPD / yr'.
- 3Add or edit the 'Assessment stages' and 'Eligibility requirements'.
- 4Press 'Done' and submit for approval.
Add an approved provider
- 1In 'Approved providers' press 'Add'.
- 2Enter its name and type (university, professional body, learning platform).
- 3It is saved as a draft until approved.
What's on the screen
- “CPD cycle”
- A full year from 1 January to 31 December.
- “Audit sampling”
- The share of activities picked at random for review.
- “Activity types & caps”
- The maximum and weight for each activity type.
- “Credential types”
- Each credential with 'Fee', 'Validity' and 'Holders'.
- “Assessment stages”
- Such as 'Document review', 'Technical interview' and 'Committee approval'.
- “Approved providers”
- Providers whose activities are accepted automatically or more easily.
Tips
- Changing caps affects what counts for members, so review the effect before submitting.
/admin/settings/integrationsIntegrations
The integrations screen shows the health of external services connected to the platform (payment gateway, Nafath, email, SMS, WhatsApp, learning platforms) and lets you test them and follow their event logs.
Who uses it?
System administrators and IT use it when payments, messages or identity checks start failing.
Features covered
Related journeys
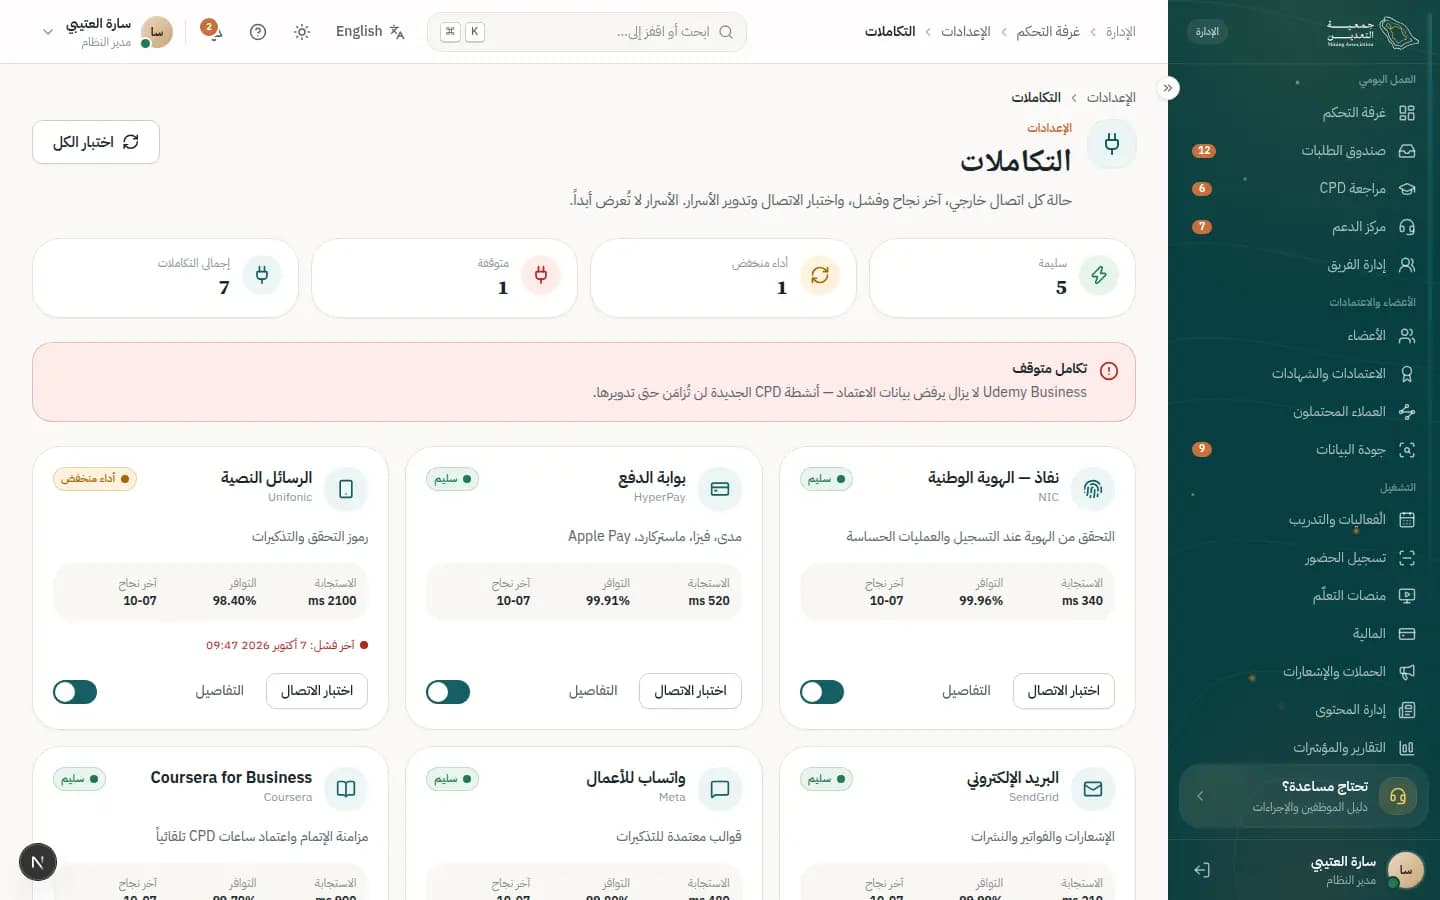
How to
Check integration health
- 1Read the top cards: total, healthy and down.
- 2Press 'Test all' or 'Test connection' for a single integration.
- 3If you see 'Needs attention', open 'Details'.
Follow an integration's events
- 1Open 'Details' for an integration such as the payment gateway.
- 2Read the 'Event log', 'Last OK' and 'Last failure'.
- 3Press 'Retry' to retry a failed message.
Review credentials
- 1Open 'Credentials' for the integration.
- 2Note how long ago each secret was rotated; secrets are never shown after saving.
- 3Rotate a secret when needed, then save and test the connection.
What's on the screen
- “Payment gateway”
- Mada, Visa, Mastercard and Apple Pay.
- “Nafath — national identity”
- Identity checks for applications and privacy requests.
- “Email and SMS”
- Sending notifications, codes and invoices.
- “WhatsApp Business”
- Approved templates for reminders.
- “Uptime”
- Uptime and 'Latency' per integration.
- “Event log”
- The latest successful and failed operations.
Tips
- Never share integration secrets in a message; use 'Credentials' inside the screen only.
- If delivery is delayed the provider may be at fault; check 'Latency' before changing settings.
/admin/settings/slaSLA & reference data
This screen sets working hours and holidays, SLA rules for each stage, request and ticket, and the bilingual reference lists such as cities, universities and specialities.
Who uses it?
The operations manager and system administrator use it; another officer approves changes.
Features covered
Related journeys
Related screens
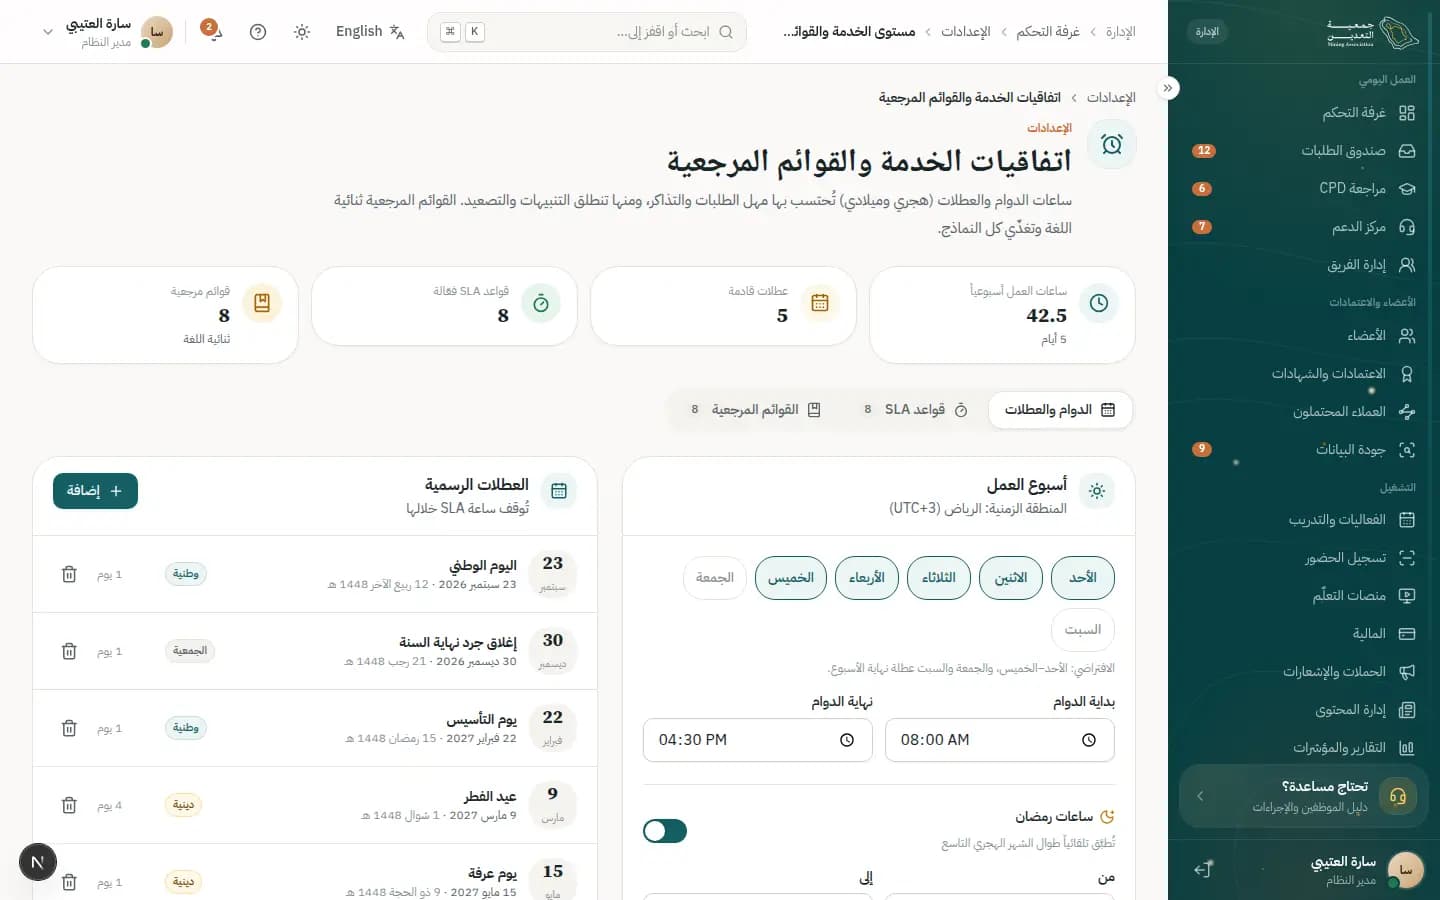
How to
Set working hours and holidays
- 1Open 'Hours & holidays' and choose the 'Working week' days with 'Start' and 'End'.
- 2Set 'Ramadan hours' if needed.
- 3Press 'Add holiday', enter the name and set the 'Date (Gregorian)' and 'Number of days'.
Edit an SLA rule
- 1Open the 'SLA rules' tab and filter by scope (stage, request or ticket).
- 2Change the 'Target (h)', 'Warn at' and 'Escalate to'.
- 3Submit for approval; the SLA clock pauses during holidays.
Add an item to a reference list
- 1Open 'Reference lists' and choose a list such as 'Cities & regions'.
- 2Press 'New item' and enter 'Name (Arabic)' and 'Name (English)'.
- 3Use 'Merge' to combine duplicate or old-spelling items.
What's on the screen
- “Working hours / week”
- Total weekly hours from your schedule.
- “Upcoming holidays”
- Upcoming public holidays such as National Day and Eid al-Fitr.
- “SLA rules”
- Each stage has a target in hours, a warning threshold and automatic escalation.
- “Reference lists”
- Cities, universities, specialities, nationalities, employers and reason codes.
- “Active / Inactive”
- Deactivating an item hides it from choices without deleting its history.
Tips
- Add Eid holidays well ahead so those days are not counted as delays.
/admin/settings/policiesPolicies & features
This screen controls platform policies (fees, category conditions, CPD rules) through versions that are approved and scheduled, and feature toggles that roll out gradually.
Who uses it?
Association managers and policy owners use it; the 'Maker ≠ checker' rule stops you from approving your own change.
Features covered
Related journeys
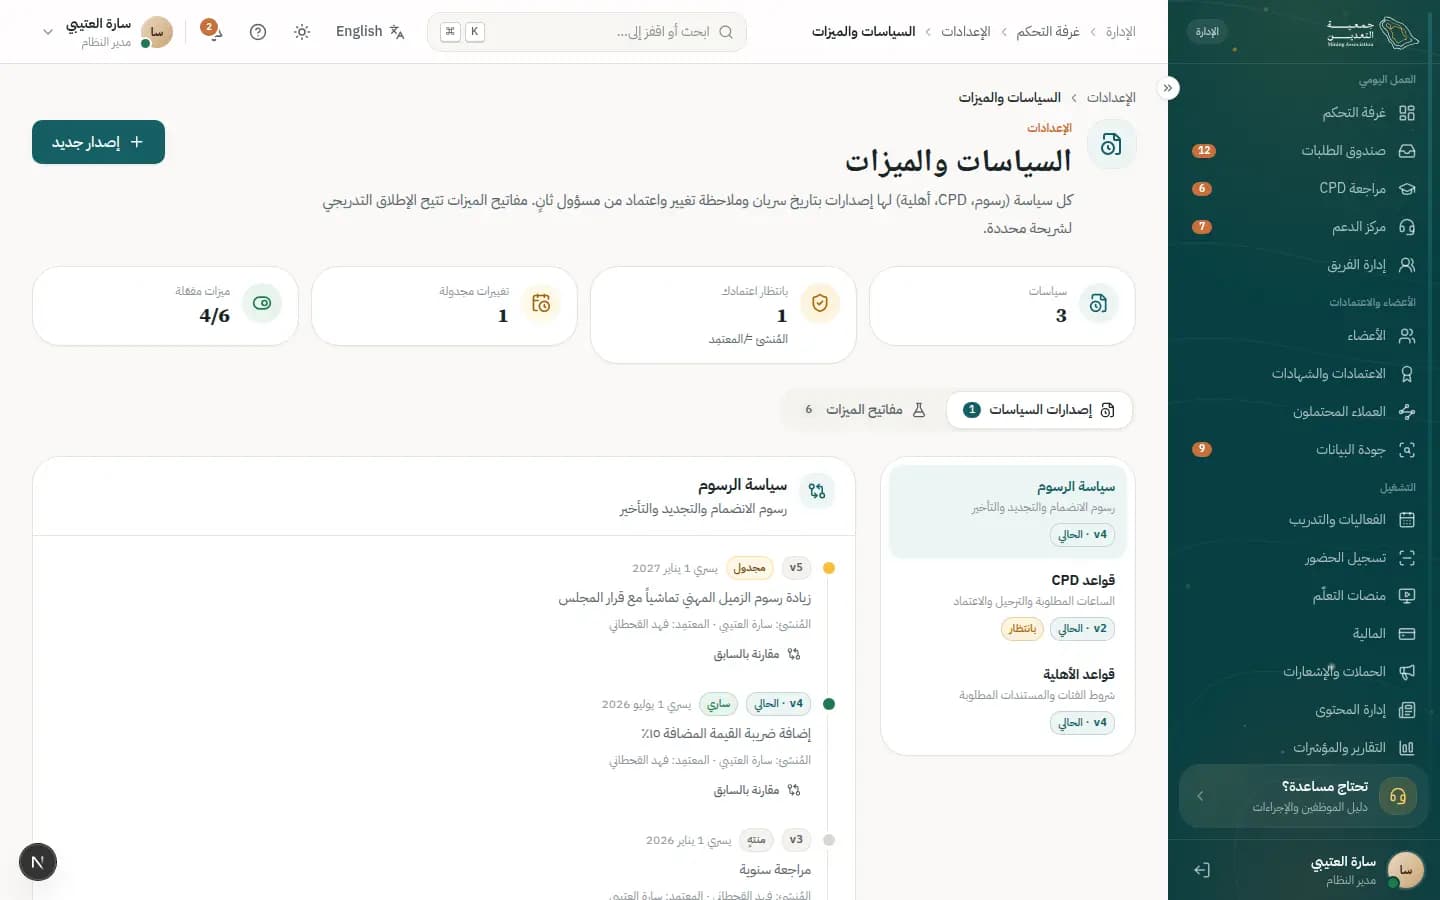
How to
Create a policy version and submit it
- 1In 'Policy versions' press 'New version' and choose the policy.
- 2Describe 'What changes?', then set the 'Effective from' date and 'Change note'.
- 3Use 'Compare with previous' to review the difference.
- 4Press 'Submit for approval'.
Approve or return a version
- 1Choose a version 'Awaiting your approval'.
- 2Review the comparison, then press 'Approve', or 'Return' to send it back to the maker.
- 3After approval the version is scheduled and appears under 'Scheduled changes'.
Roll out a feature gradually
- 1Open 'Feature toggles' and pick a feature such as Nafath sign-in.
- 2Choose the 'Audience' (Everyone, Staff only, Pilot group…) and the 'Rollout' percentage.
- 3Switch it on; you can switch it off instantly if something goes wrong.
What's on the screen
- “Policy versions”
- Every policy with its effective, scheduled and expired versions.
- “Feature toggles”
- Features such as the wallet card, auto-renewal and event waitlist.
- “Maker ≠ checker”
- A version only takes effect after a different officer approves it.
- “Production / Staging”
- The environment a toggle applies to.
- “Features on”
- How many features are currently on.
Tips
- Requests in progress keep their current version, so a policy change will not disrupt open requests.
/admin/settings/dataData import & export
The import and export screen moves member, event, payment and CPD data in and out through files, using an import wizard with a dry run and export jobs prepared in the background.
Who uses it?
Data officers and the system administrator use it, especially during migration from the old system.
Features covered
Related journeys
Related screens
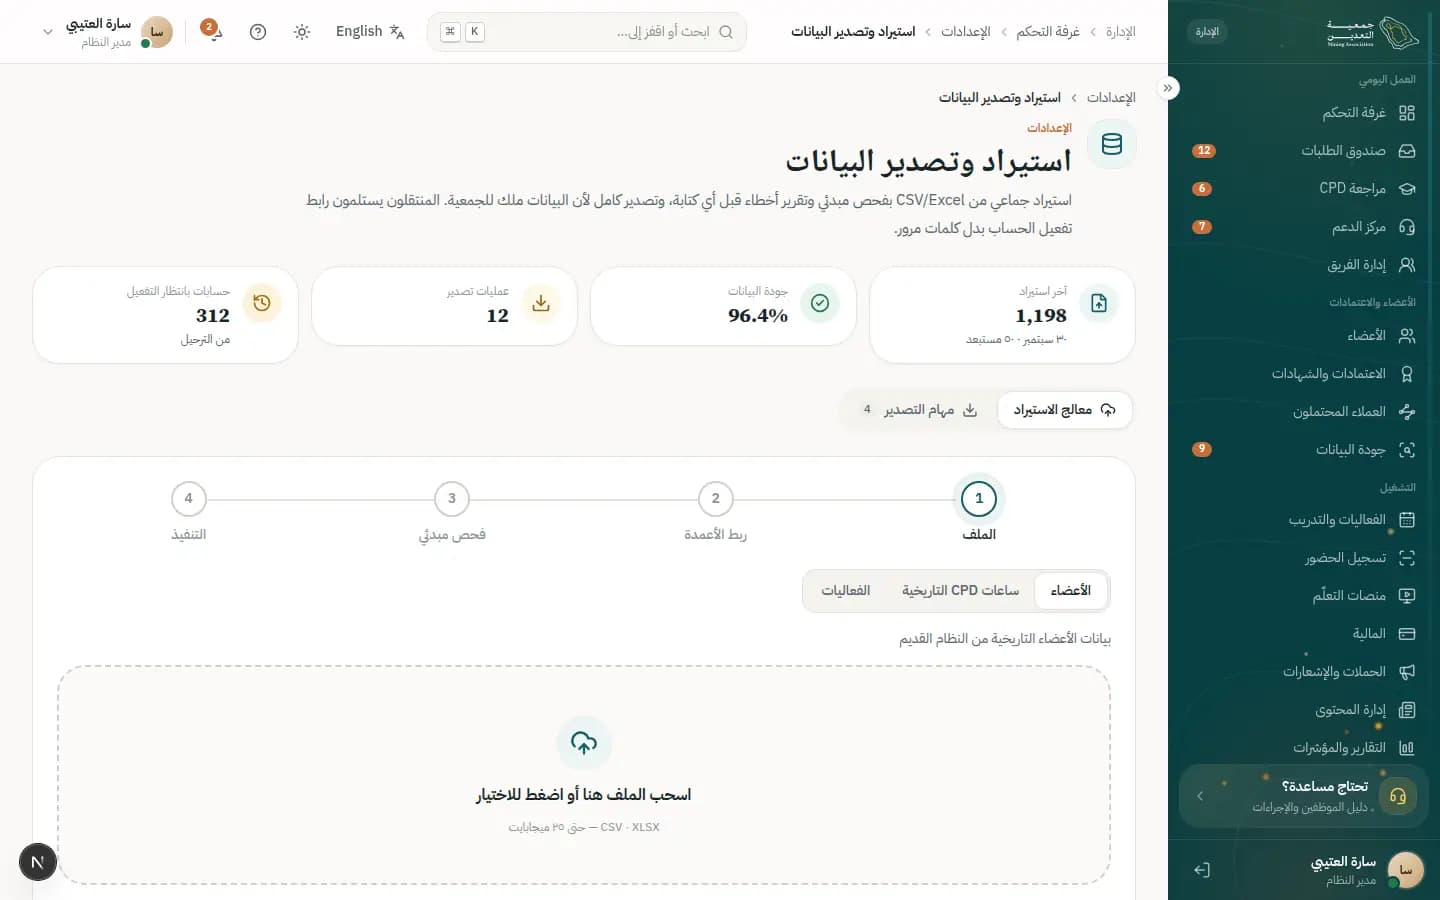
How to
Import a file
- 1Open the 'Import wizard' and choose the 'Dataset' (for example Members & categories).
- 2Press 'Download import template', then drag your file into the drop area (up to 25 MB).
- 3In 'Map columns' match your columns to the fields, or choose 'skip'.
- 4Review the 'Dry run': errors are excluded and warnings are fixed automatically, then press 'Start import'.
- 5Download the 'Error report' to fix excluded rows.
Export data
- 1Open 'Export jobs' and press 'New export'.
- 2Choose the 'Dataset' and 'Format', and set a period if needed.
- 3Press 'Start export'; when ready press 'Download'.
What's on the screen
- “Last import”
- Rows in the last import and how many were excluded.
- “Data quality”
- The quality percentage of imported data.
- “Unclaimed accounts”
- Accounts migrated that their owners have not yet claimed.
- “Import wizard”
- File, column mapping, dry run and import steps.
- “Export jobs”
- All exports with 'Progress' and 'Preparing'.
Tips
- The dry run writes no records, so use it freely before 'Start import'.
- Remember export files are deleted automatically after 7 days.
Glossary
Terms used in the platform
- Applicantمستفيد / متقدم
- Someone who has applied for membership or a credential and isn't accepted yet.
- Memberعضو
- Holder of an active membership or one in grace.
- Membership categoryفئة العضوية
- Membership level (student, graduate, practitioner…) with its terms, fee and CPD requirement.
- Application / Requestطلب
- Any submitted transaction that goes through review, with a reference like MEM-2026-004812.
- Correction request (RFI)استكمال
- A reviewer's request to fix or add specific items only, without refilling the application.
- Recommendationتوصية
- The reviewer's opinion sent to committee before the decision.
- Approval / Decisionاعتماد (قرار)
- The final decision by the authorised body, separate from the recommendation (segregation of duties).
- Professional credentialالاعتماد المهني
- A professional designation granted after assessment and committee, e.g. Competent Person.
- Certificateشهادة
- A digital document publicly verifiable by QR and code.
- CPD hoursساعات التطوير المهني
- Accredited learning hours a member must earn each cycle.
- CPD cycleفترة الاحتساب
- The period in which hours count (usually the membership year), with a cap per activity type.
- External activityنشاط خارجي
- Learning outside the association, submitted with evidence for committee review.
- Grace periodفترة السماح
- Time after expiry during which the membership can still be renewed without losing benefits.
- Suspensionتعليق
- Temporary stop of a membership and linked credentials by a recorded decision.
- Receipt voucherسند قبض
- Proof that a payment was received.
- Invoiceفاتورة
- A ZATCA-compliant tax e-invoice.
- Reconciliationمطابقة
- Matching the gateway statement against platform records before closing the day.
- Refundاسترداد
- Returning money to the original method after approval by someone other than the creator.
- Support ticketتذكرة دعم
- A help request with a number and response/resolution SLA.
- SLAمستوى الخدمة
- The committed time to complete a stage or answer a ticket.
- Audit logسجل التدقيق
- Tamper-proof record of every action: who, what, when, from where.
- Nafathنفاذ
- The national single sign-on and identity service.
- Unified profileالملف الموحد
- One member profile that pre-fills every application.
- Document vaultمكتبة المستندات
- The document vault (“My documents”) to attach files with one click.
- Task centerمركز المهام
- The list of what needs you now on the home page, ordered by priority.
FAQ